
If you are unable to view your Chart of Accounts in your CRM after connecting with Xero, follow the steps below to enable it.
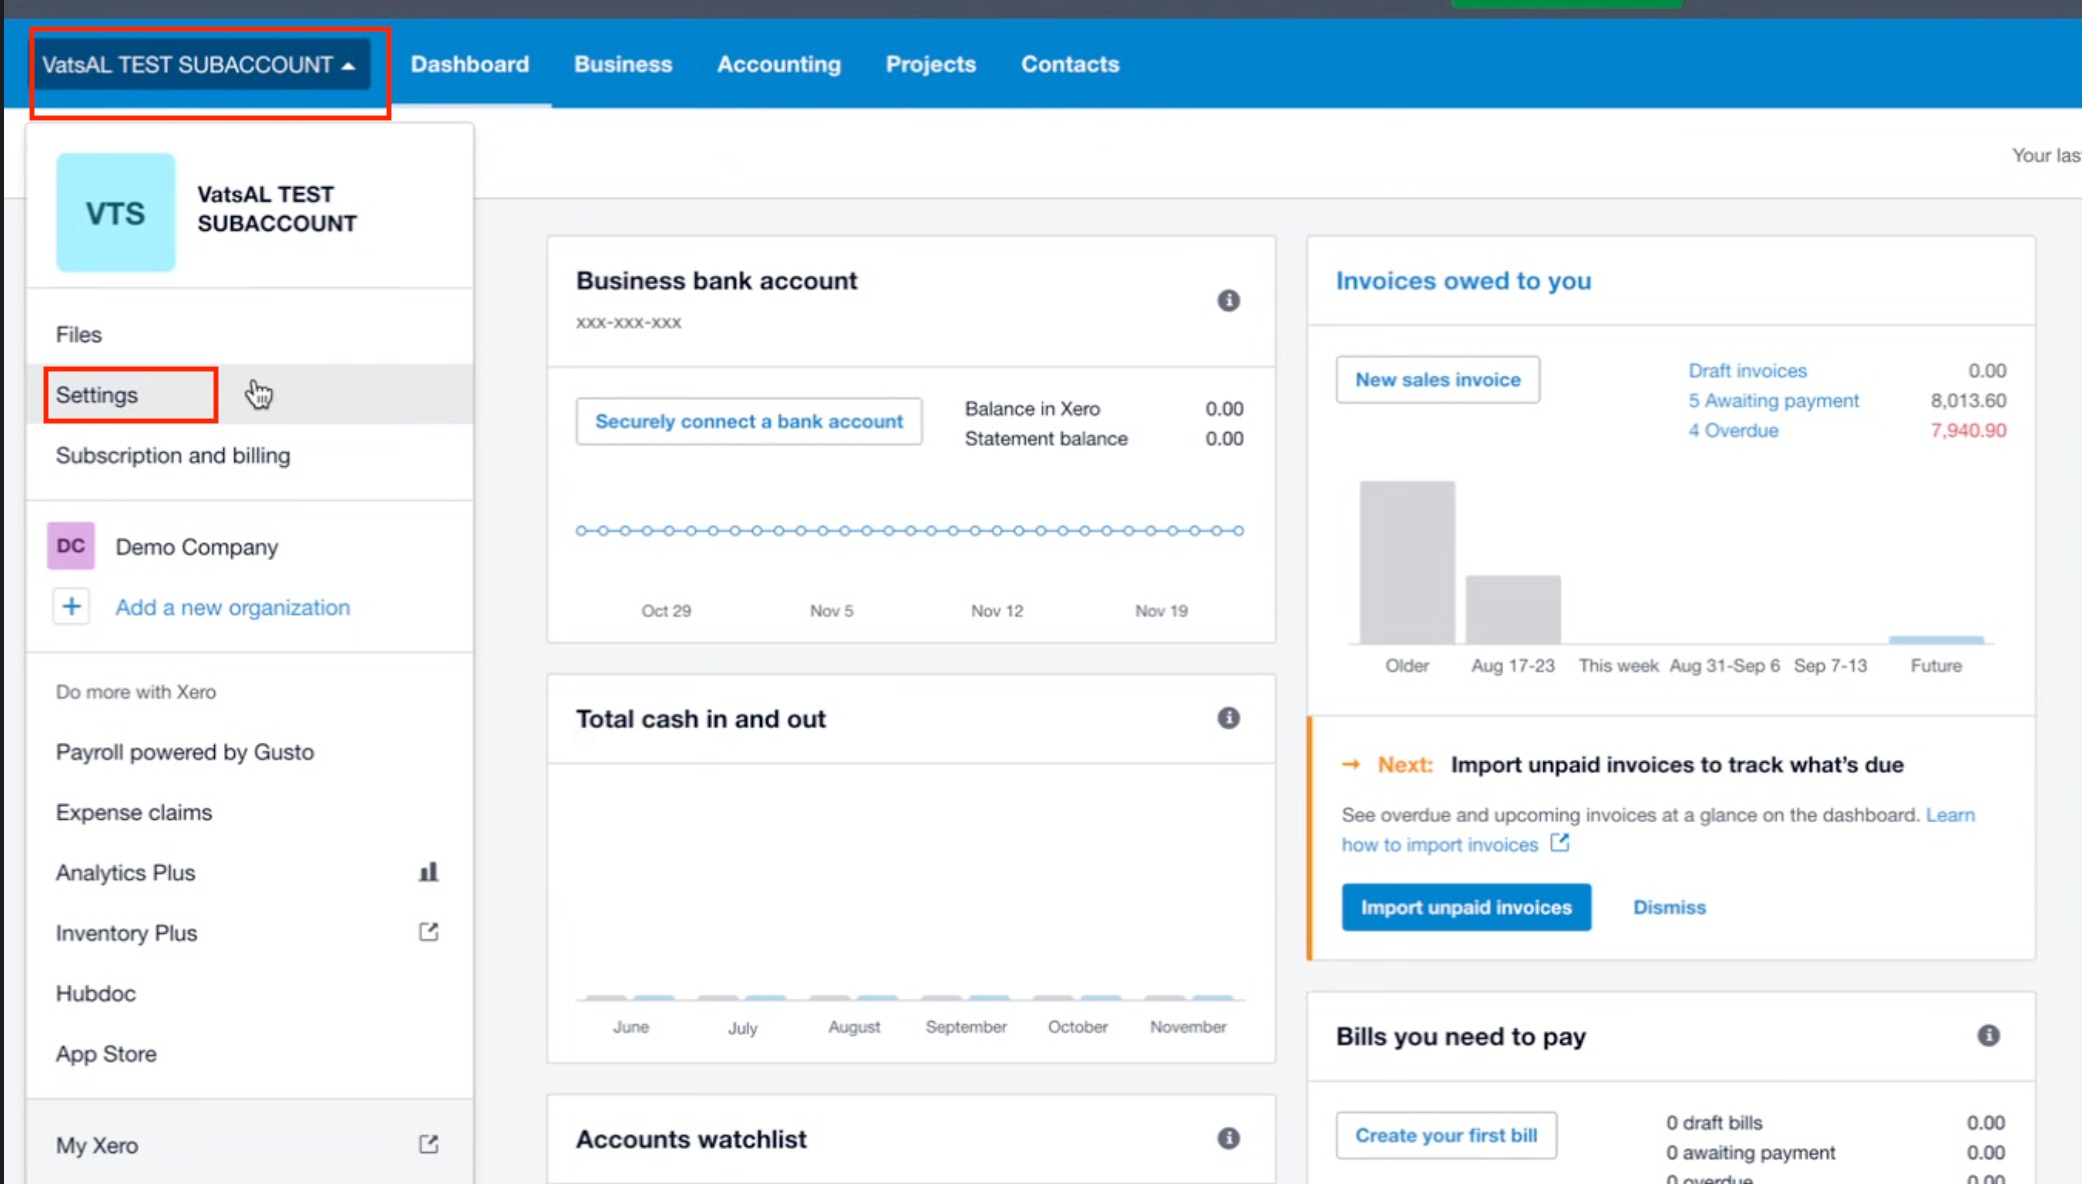
Step 1: Go to Settings in Xero
-
From your Xero dashboard, select your organization.
-
Click Settings from the dropdown menu.
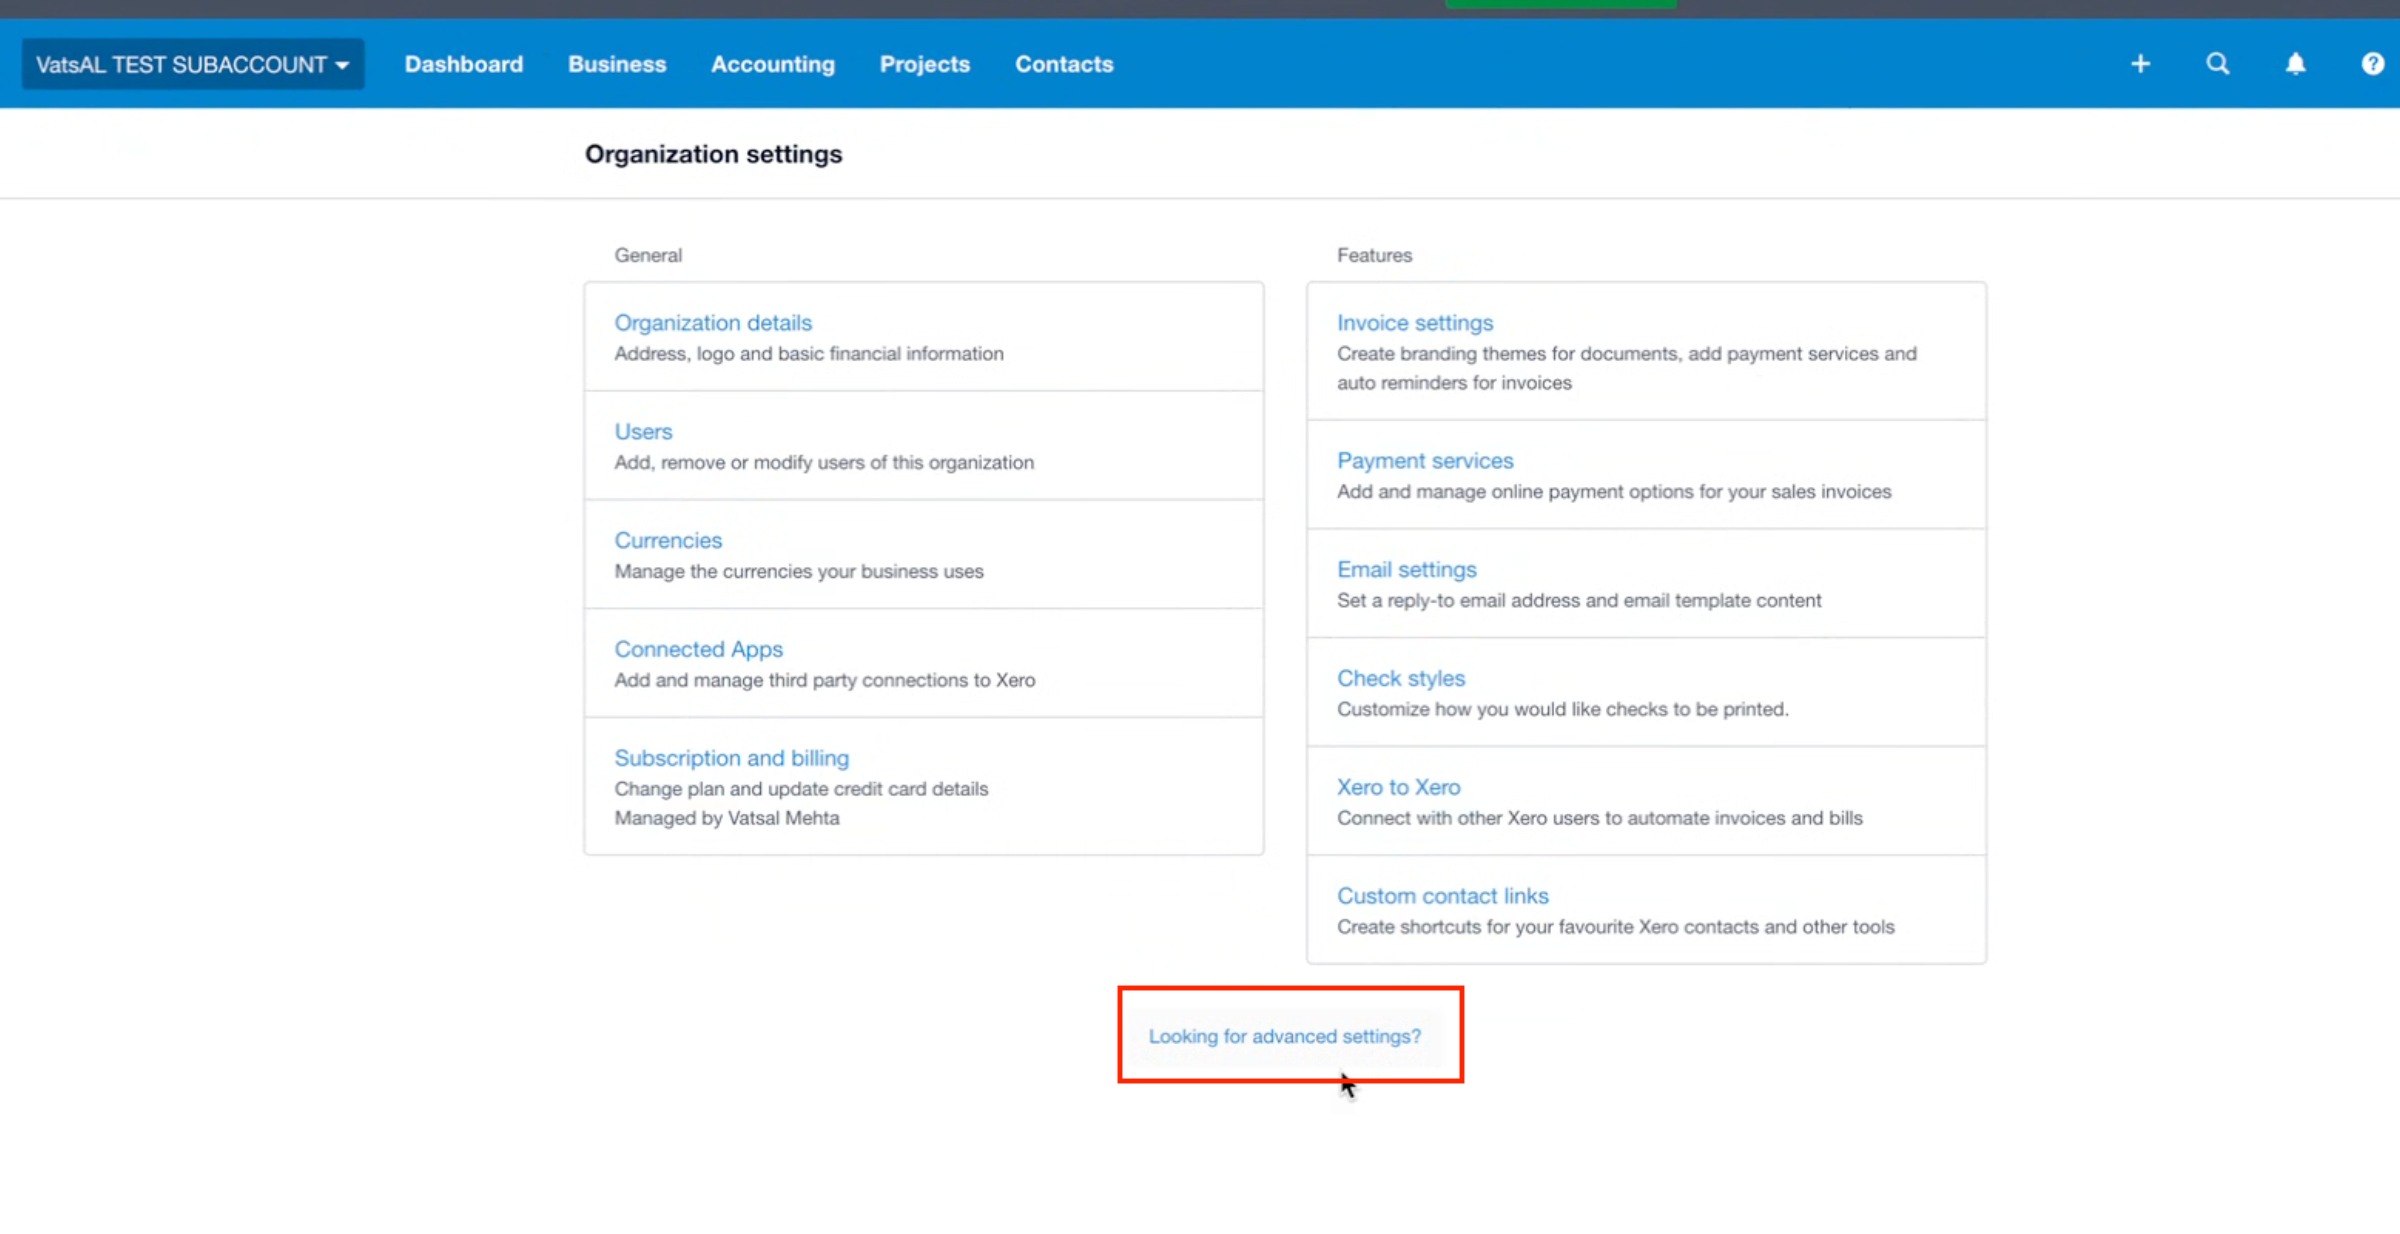
Step 2: Open Advanced Settings
-
In Organization settings, scroll down and click Looking for advanced settings?
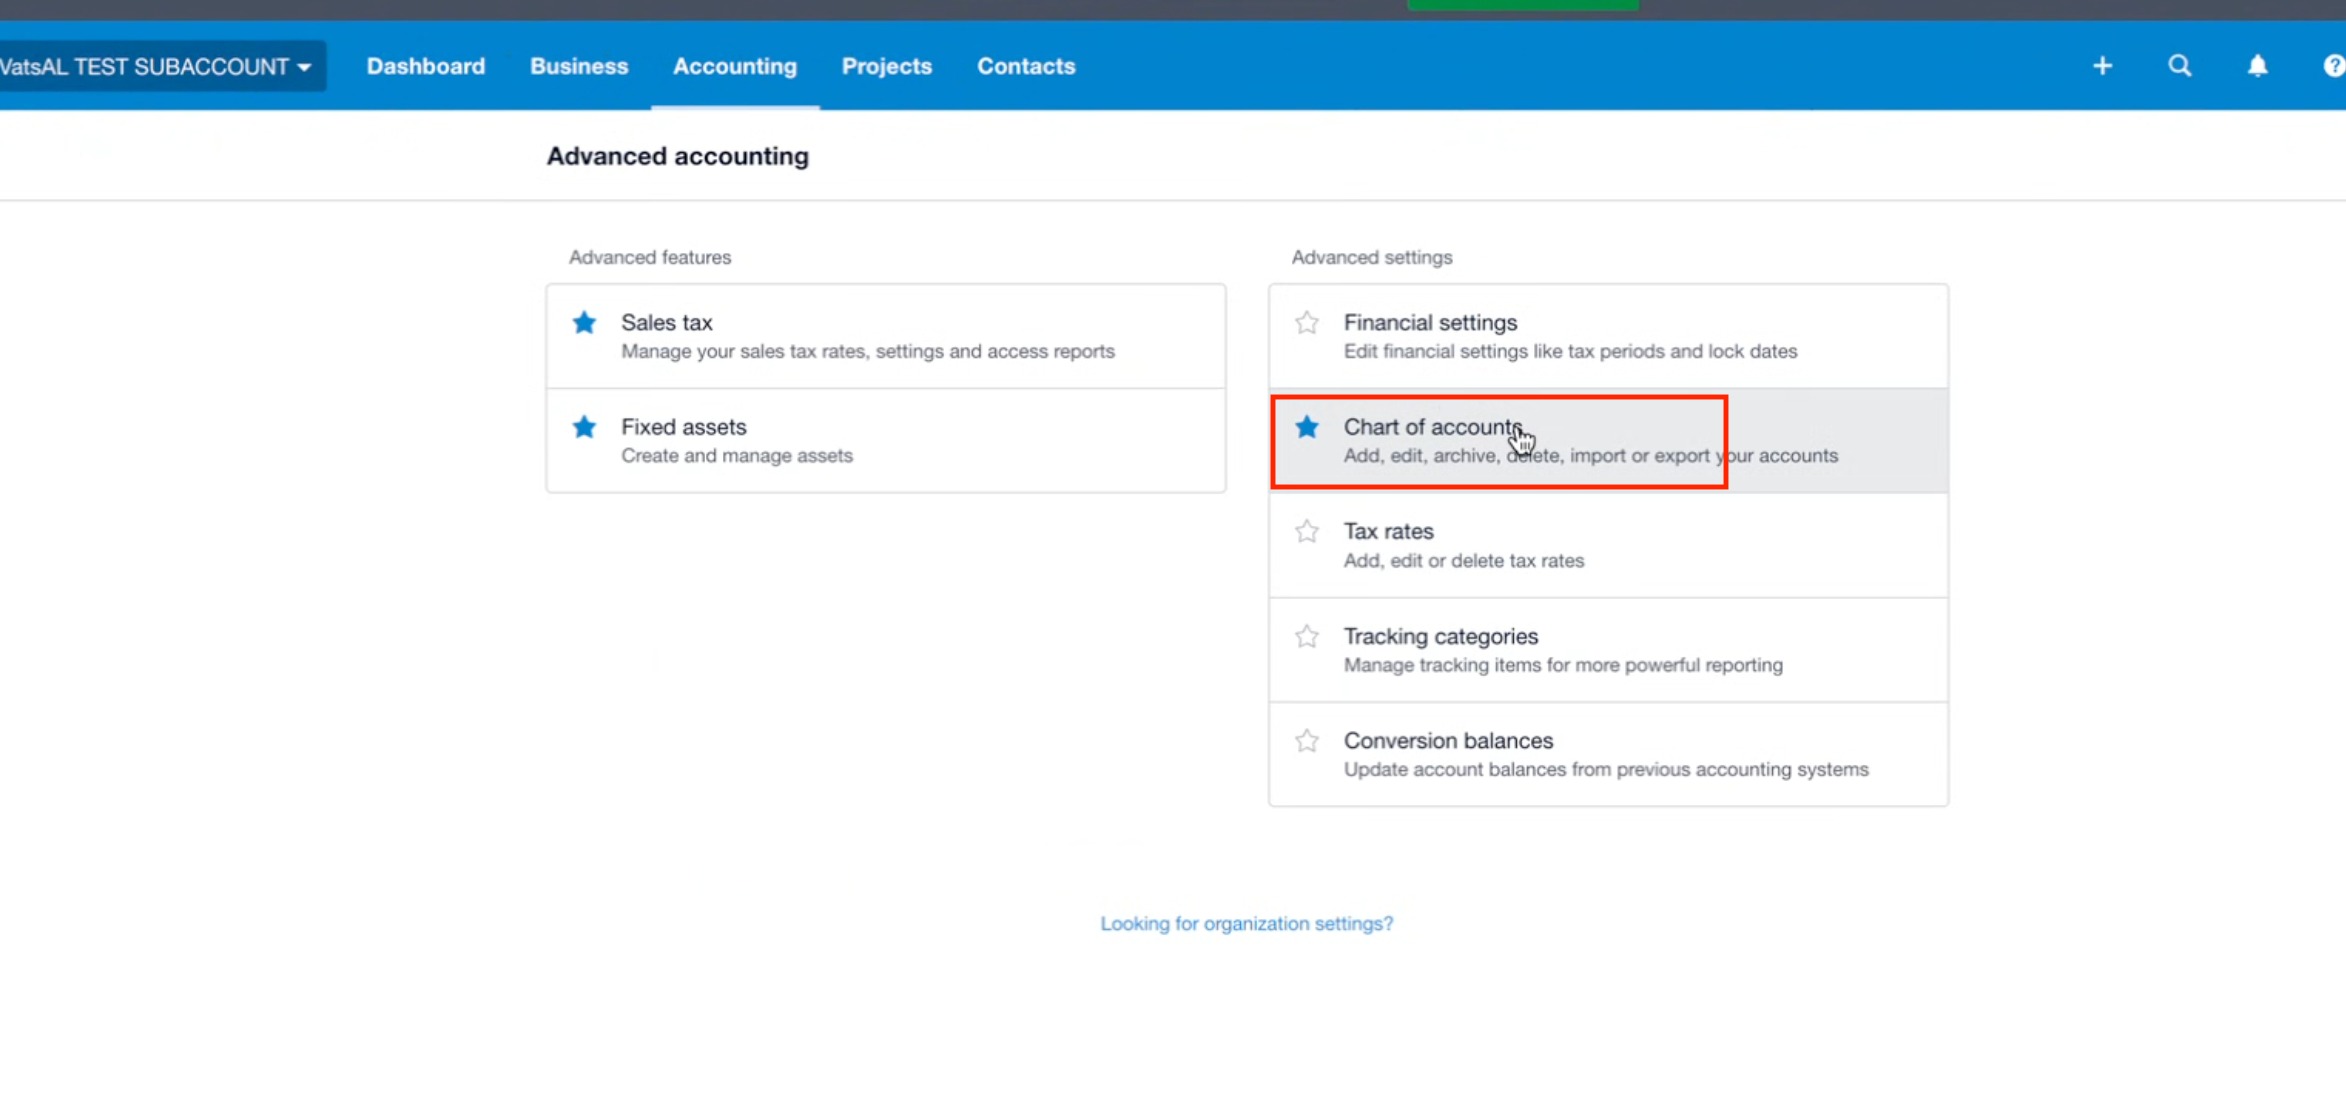
Step 3: Access Chart of Accounts
-
Under Advanced Accounting, click Chart of accounts.
Step 4: Select the Relevant Account
-
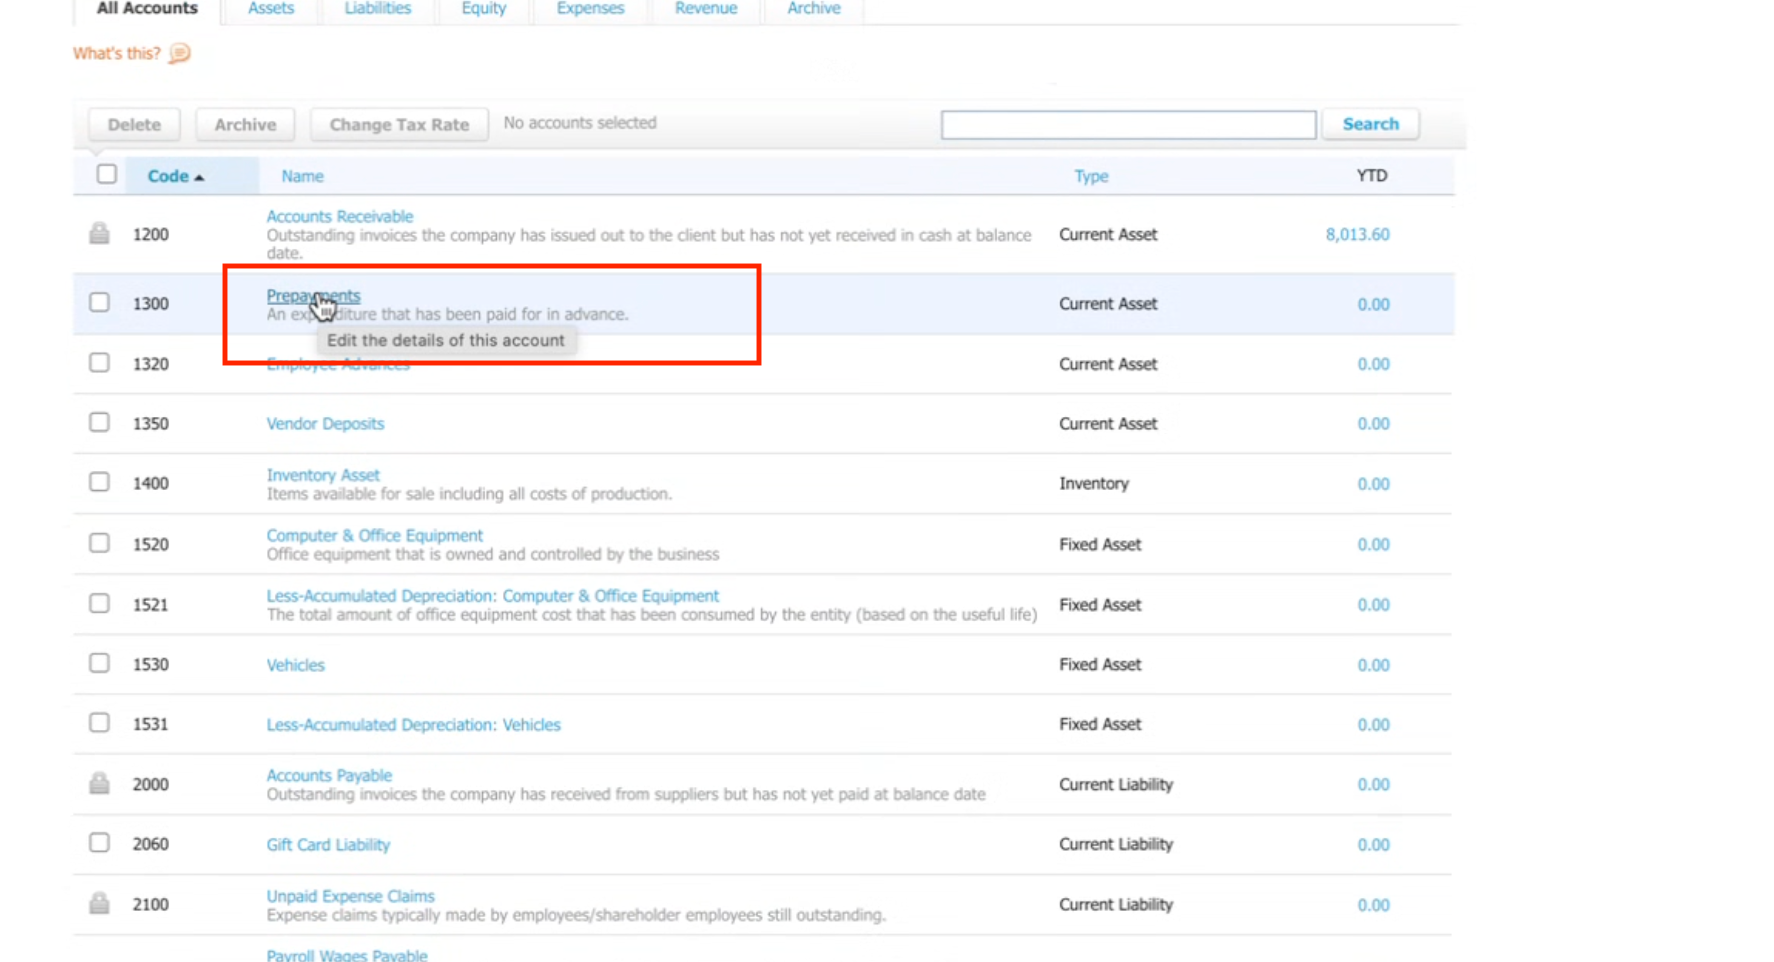
From the list of accounts, choose the account you want to connect (e.g., Prepayments).
-
Click to Edit the details of this account.
Step 5: Enable Payments for the Account
-
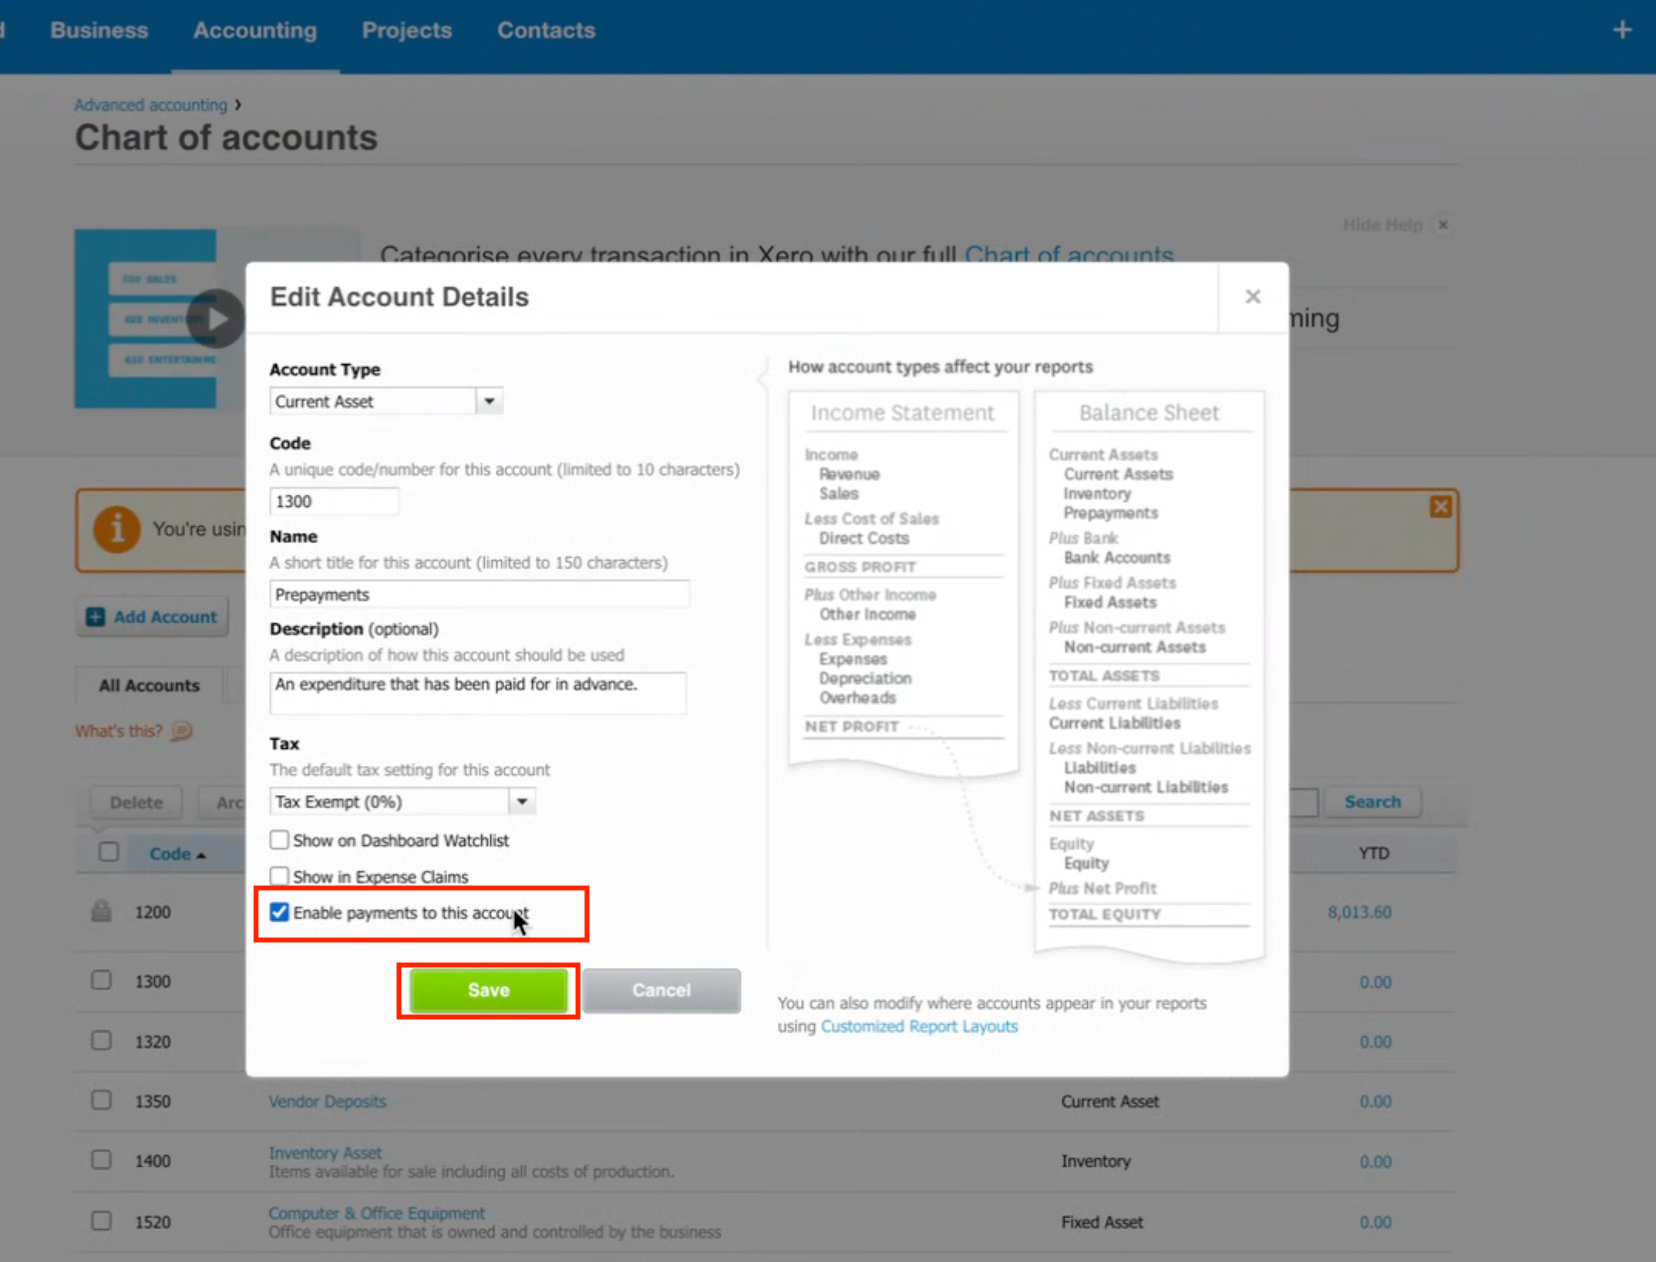
In the edit popup:
-
Tick ✅ Enable payments to this account.
-
Click Save.
-
Step 6: Connect in CRM
-
Go back to your CRM Xero integration.
-
Under Connected Account, select the account you just enabled (e.g., Prepayments).
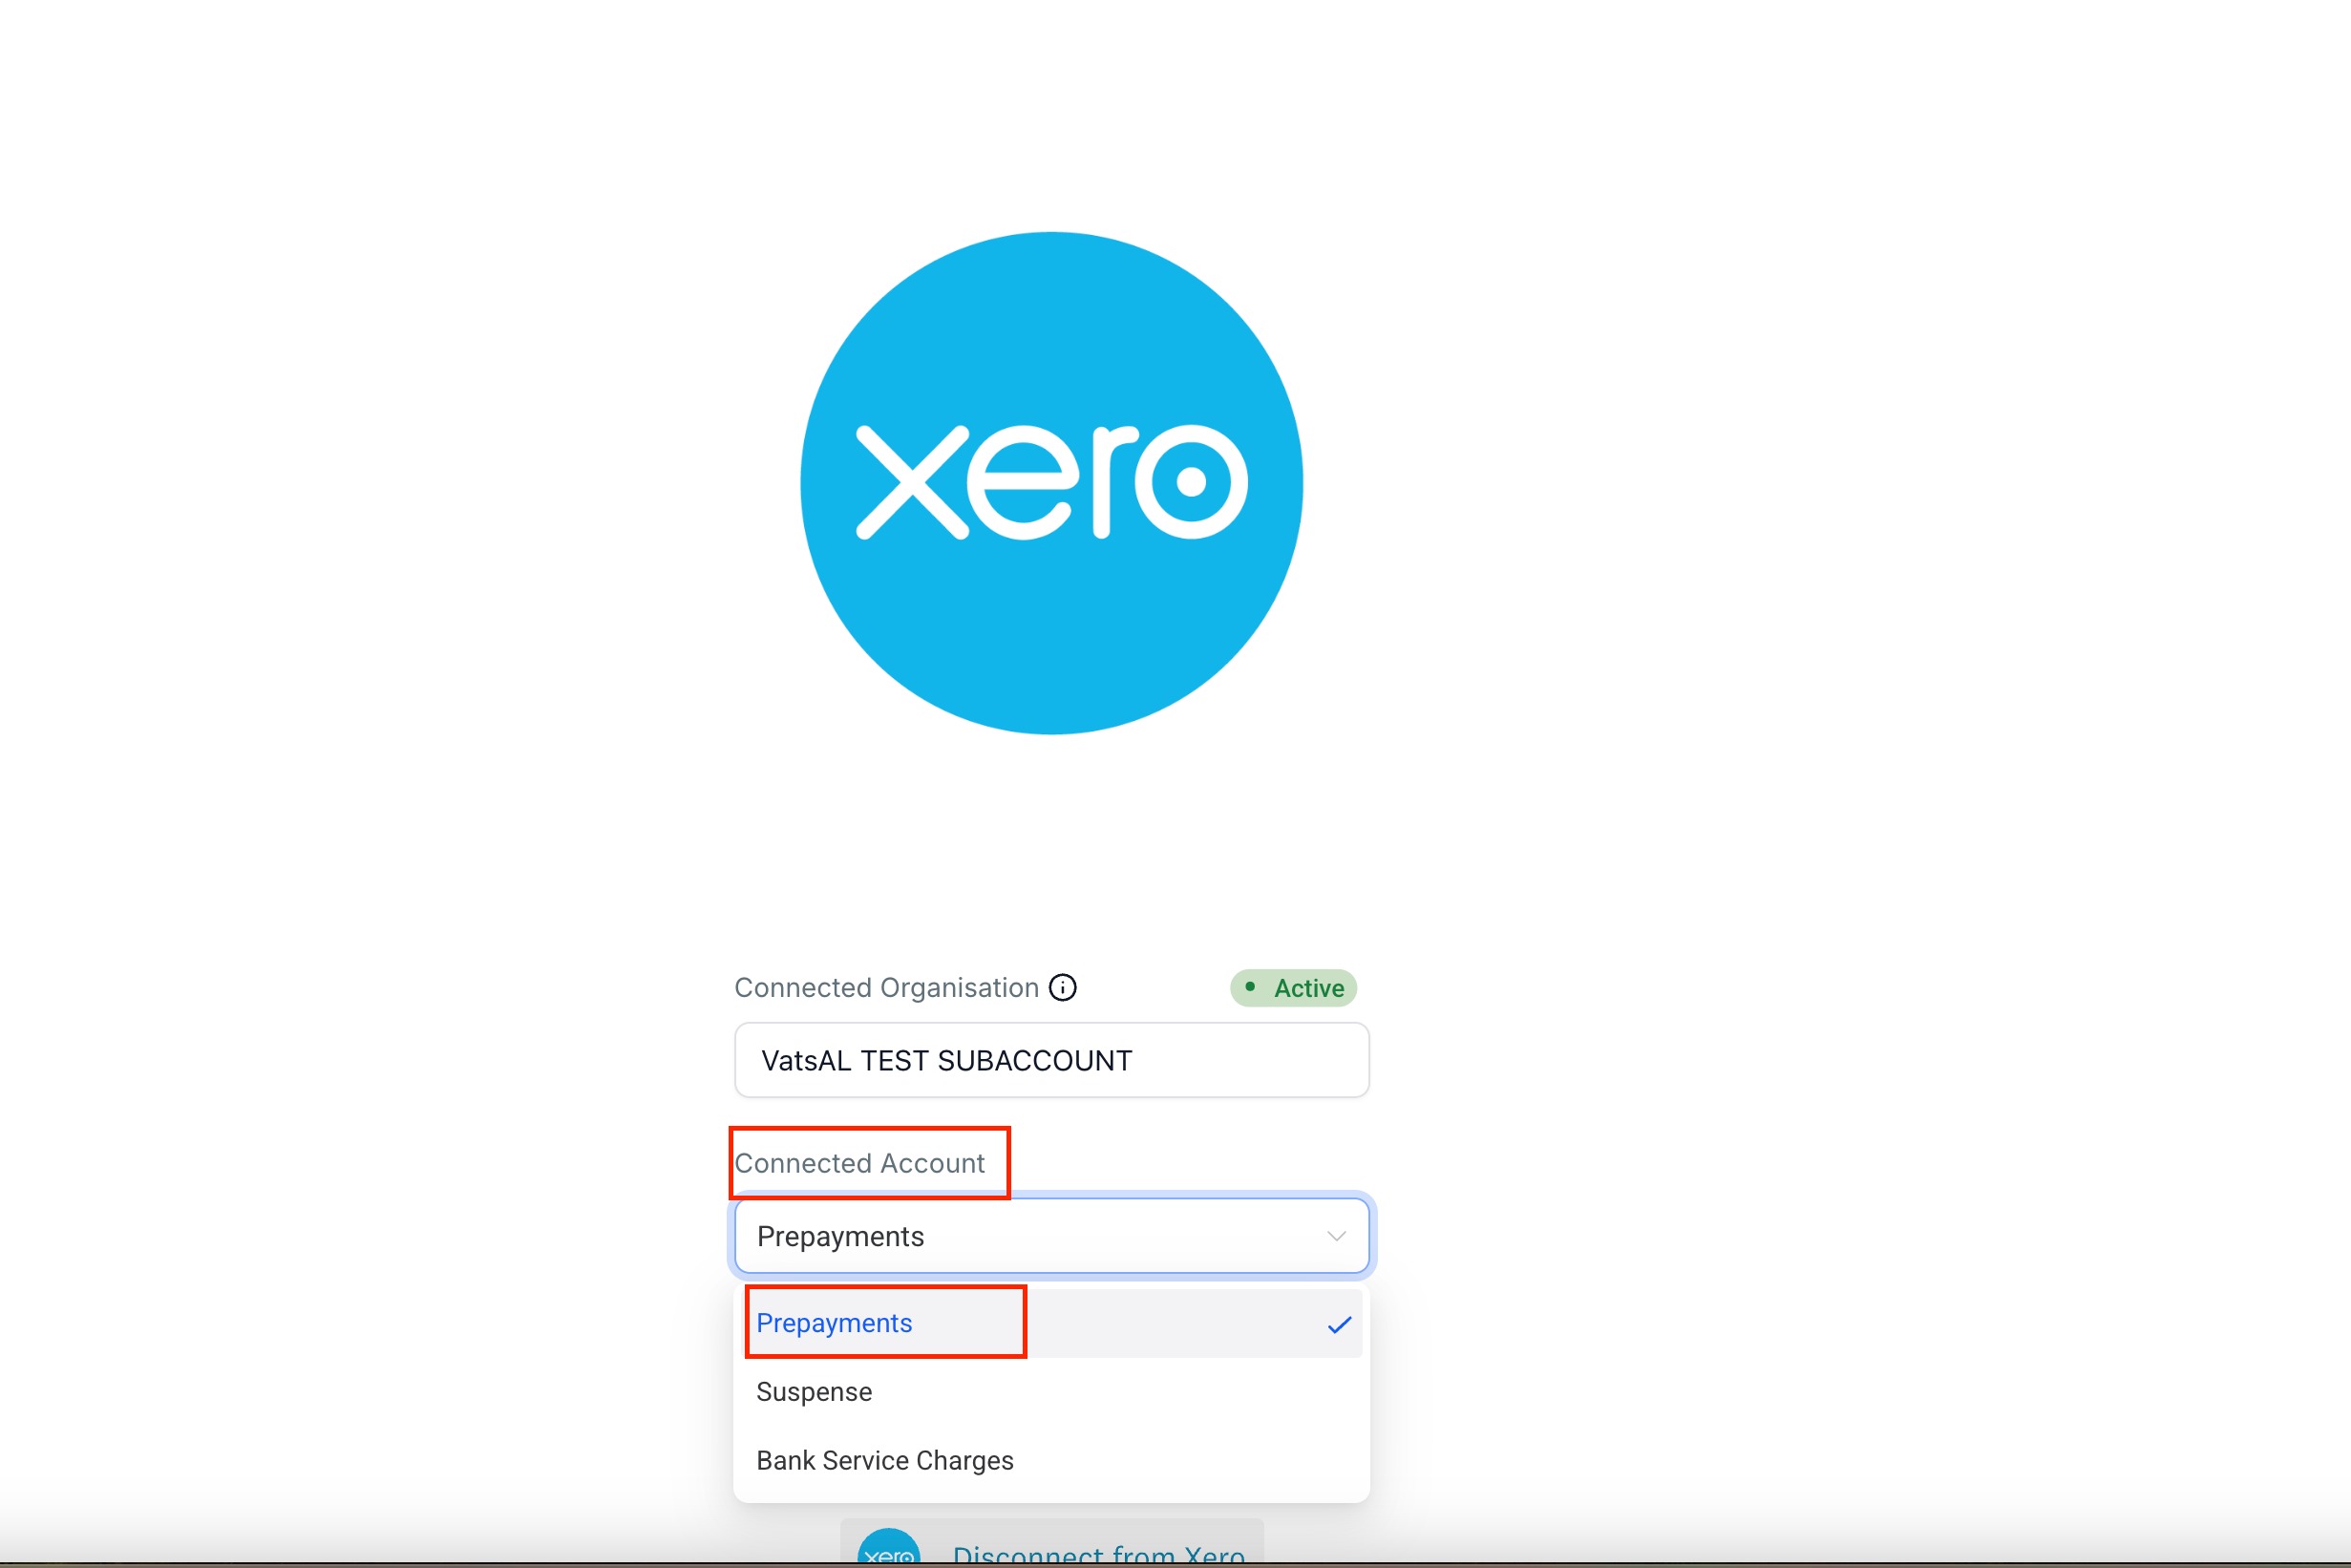
✅ Once done, your Chart of Accounts will now be visible and ready to use in your CRM.