

Building and selling an online course doesn’t have to be complicated. With the right setup, you can quickly turn your knowledge into a structured product, package it into an offer, and start sharing it with your audience. This guide walks through the full process—from creating your course to publishing and selling it.
TABLE OF CONTENTS
Create a Course
Creating a course is the foundation of your digital product. This is where you organize your content, structure your lessons, and prepare the experience your audience will go through.
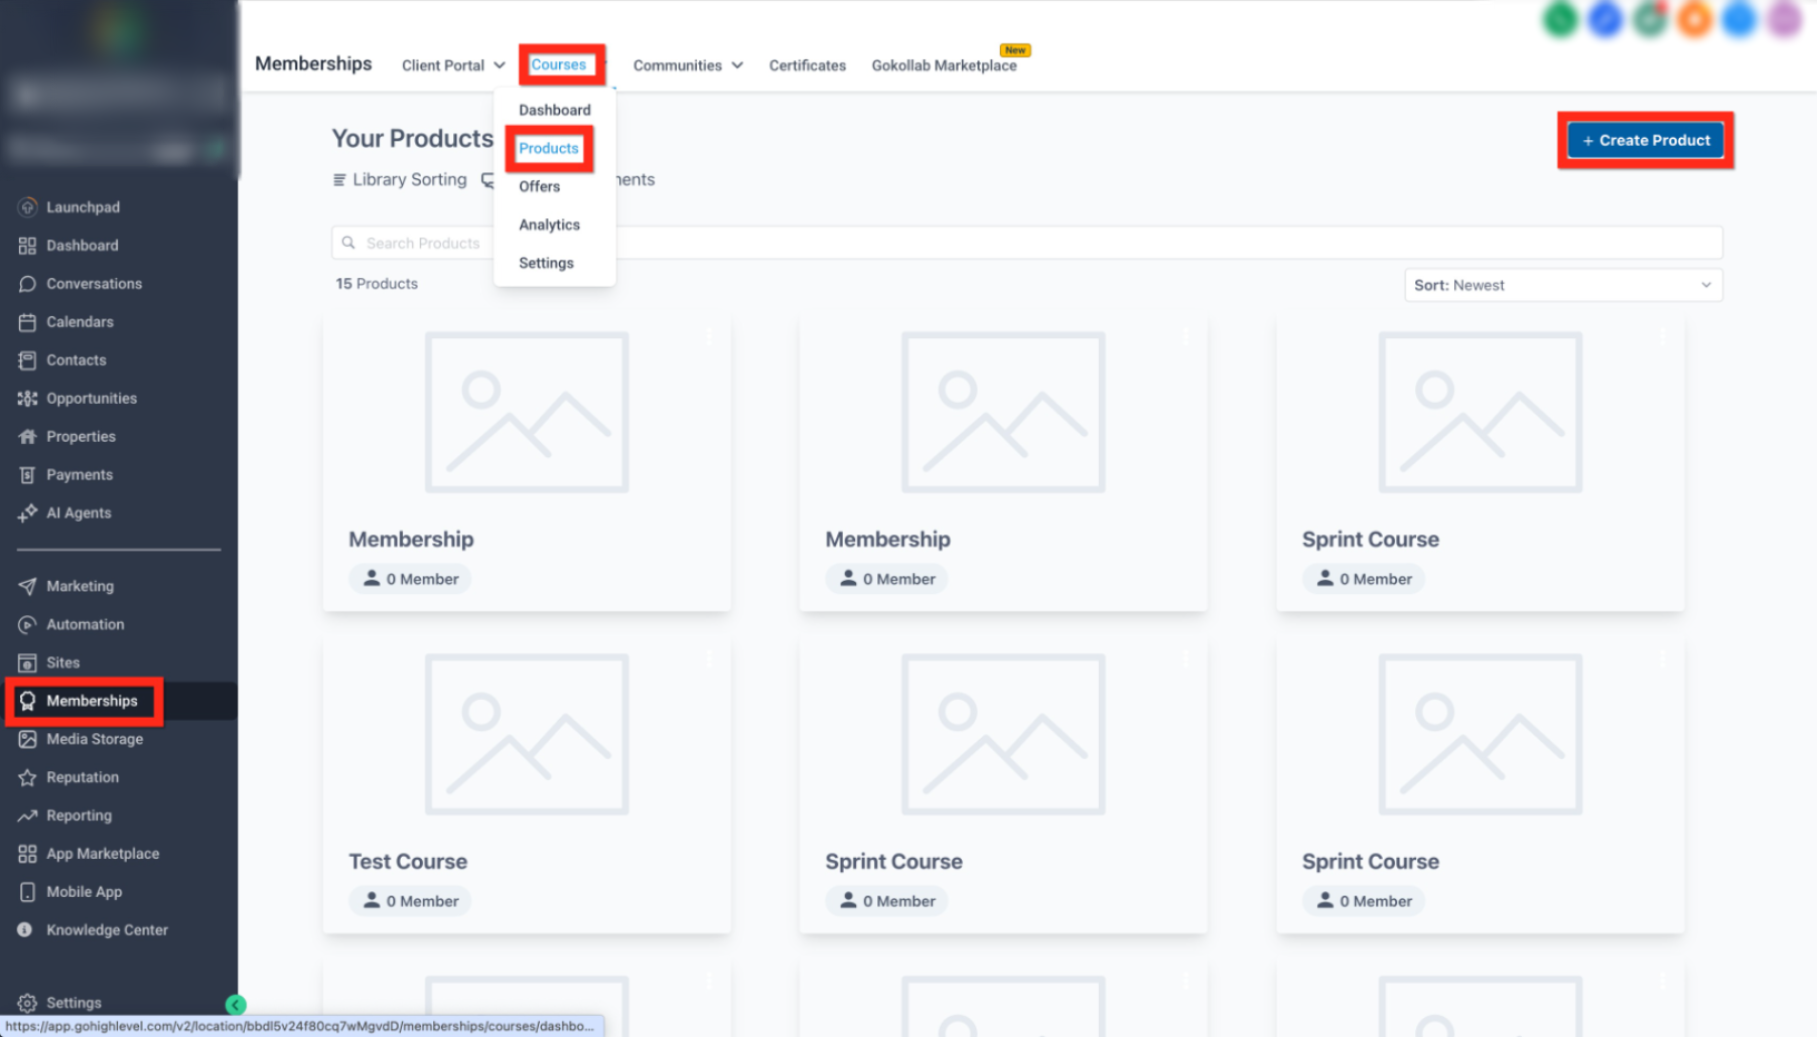
This image shows where to access the course product area from the main navigation.
-
Click Memberships in the left menu
-
Select Courses
-
Click Products
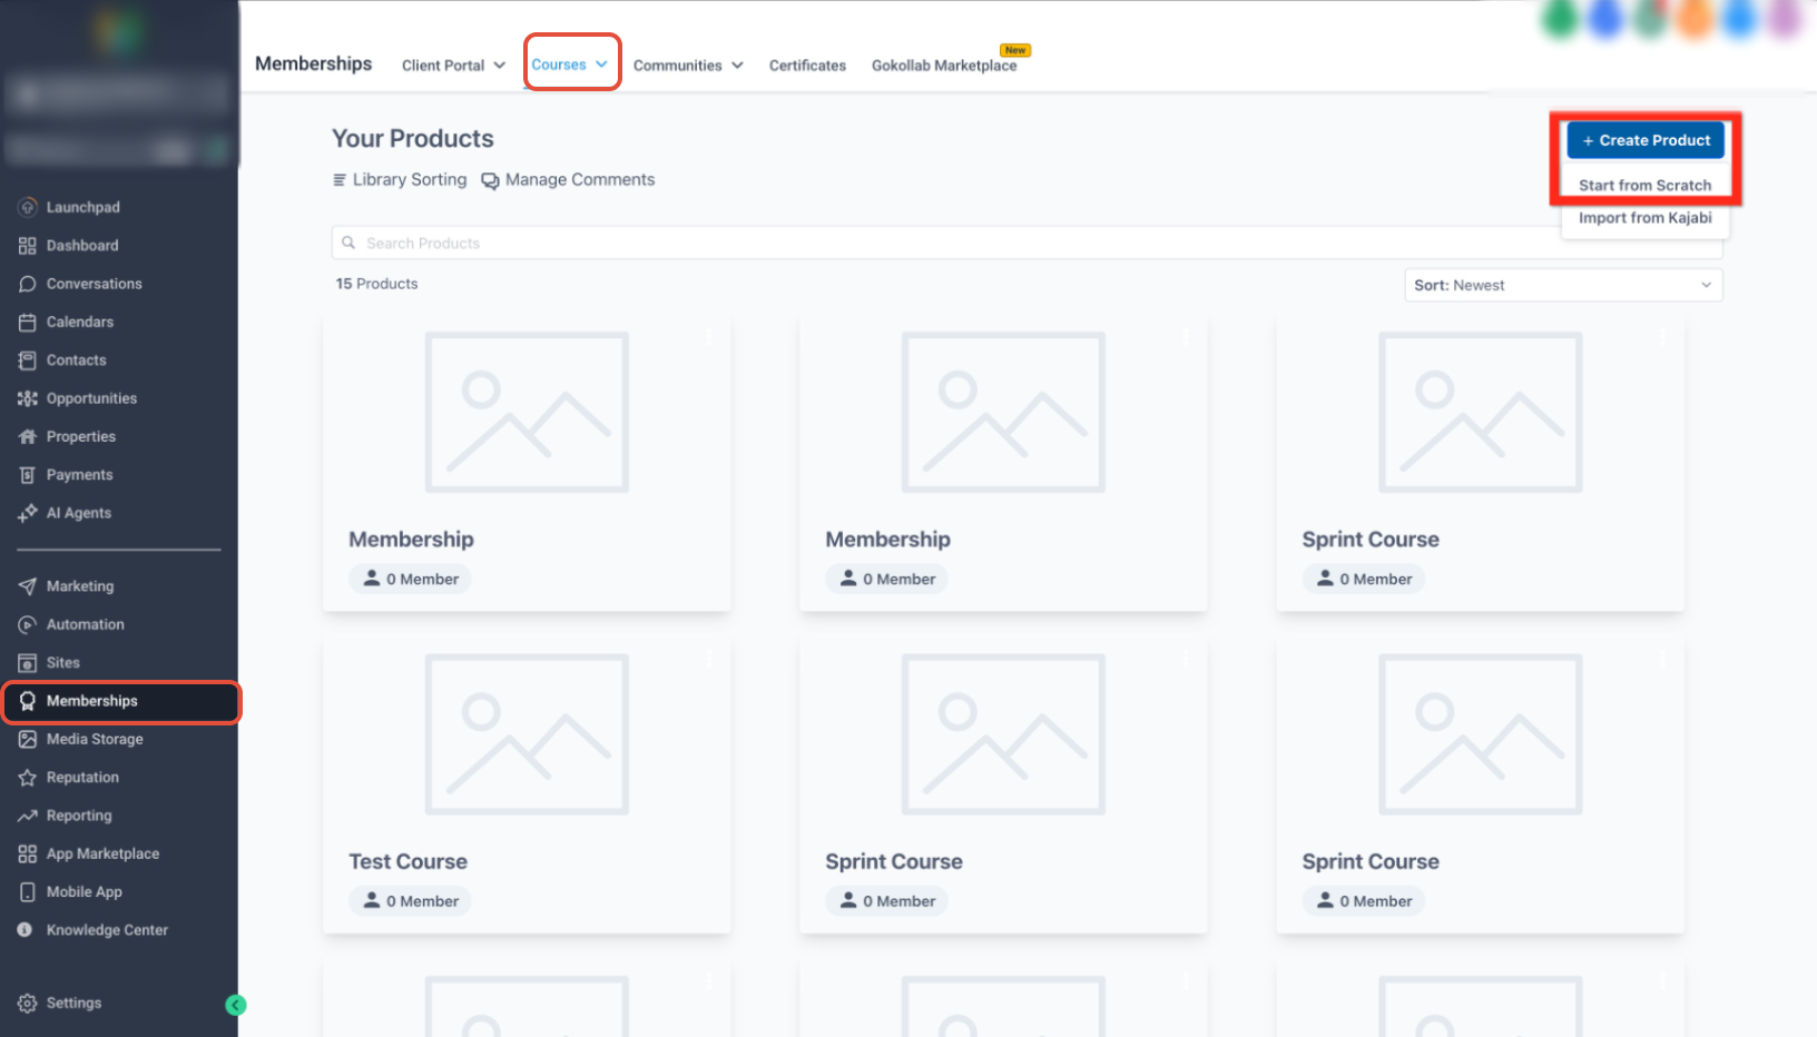
This image highlights where to start creating your course.
-
Click Create Product
-
Select Start from Scratch
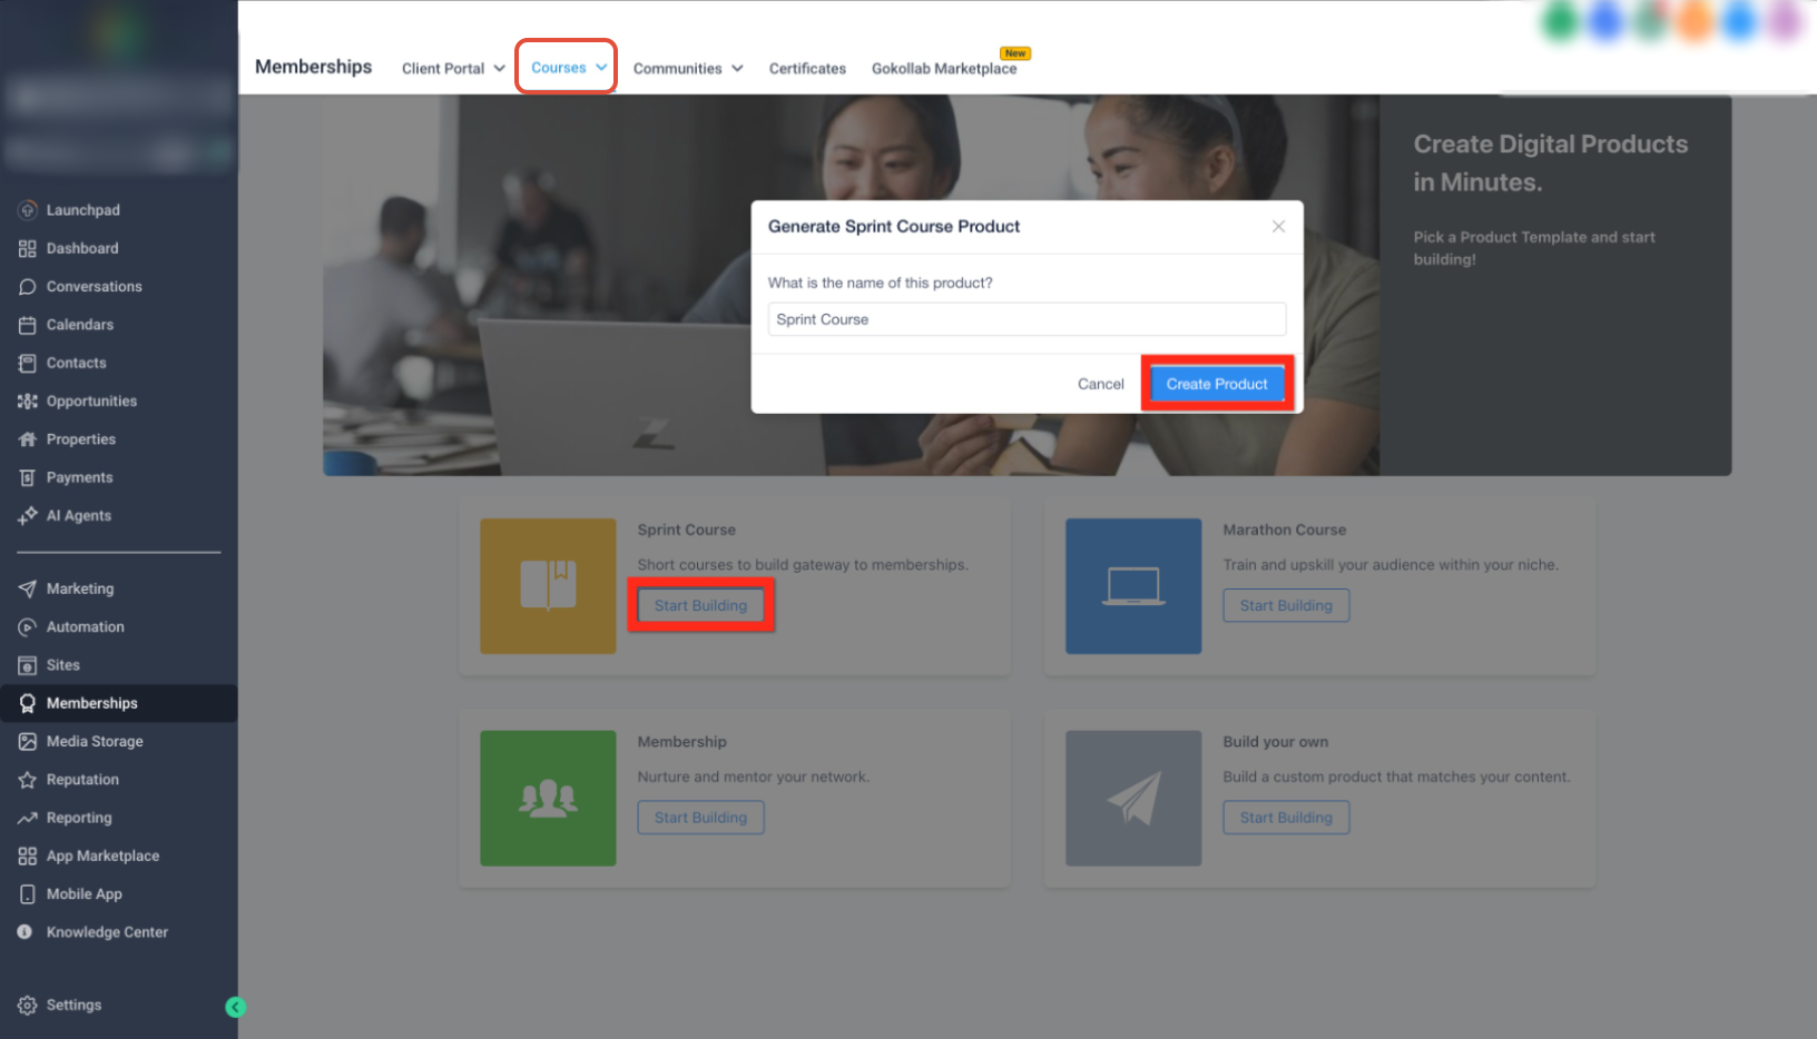
This image shows selecting your course format and naming your product.
-
Choose a format (Sprint, Marathon, Membership, or Custom)
-
Enter your course name
-
Click Create Product
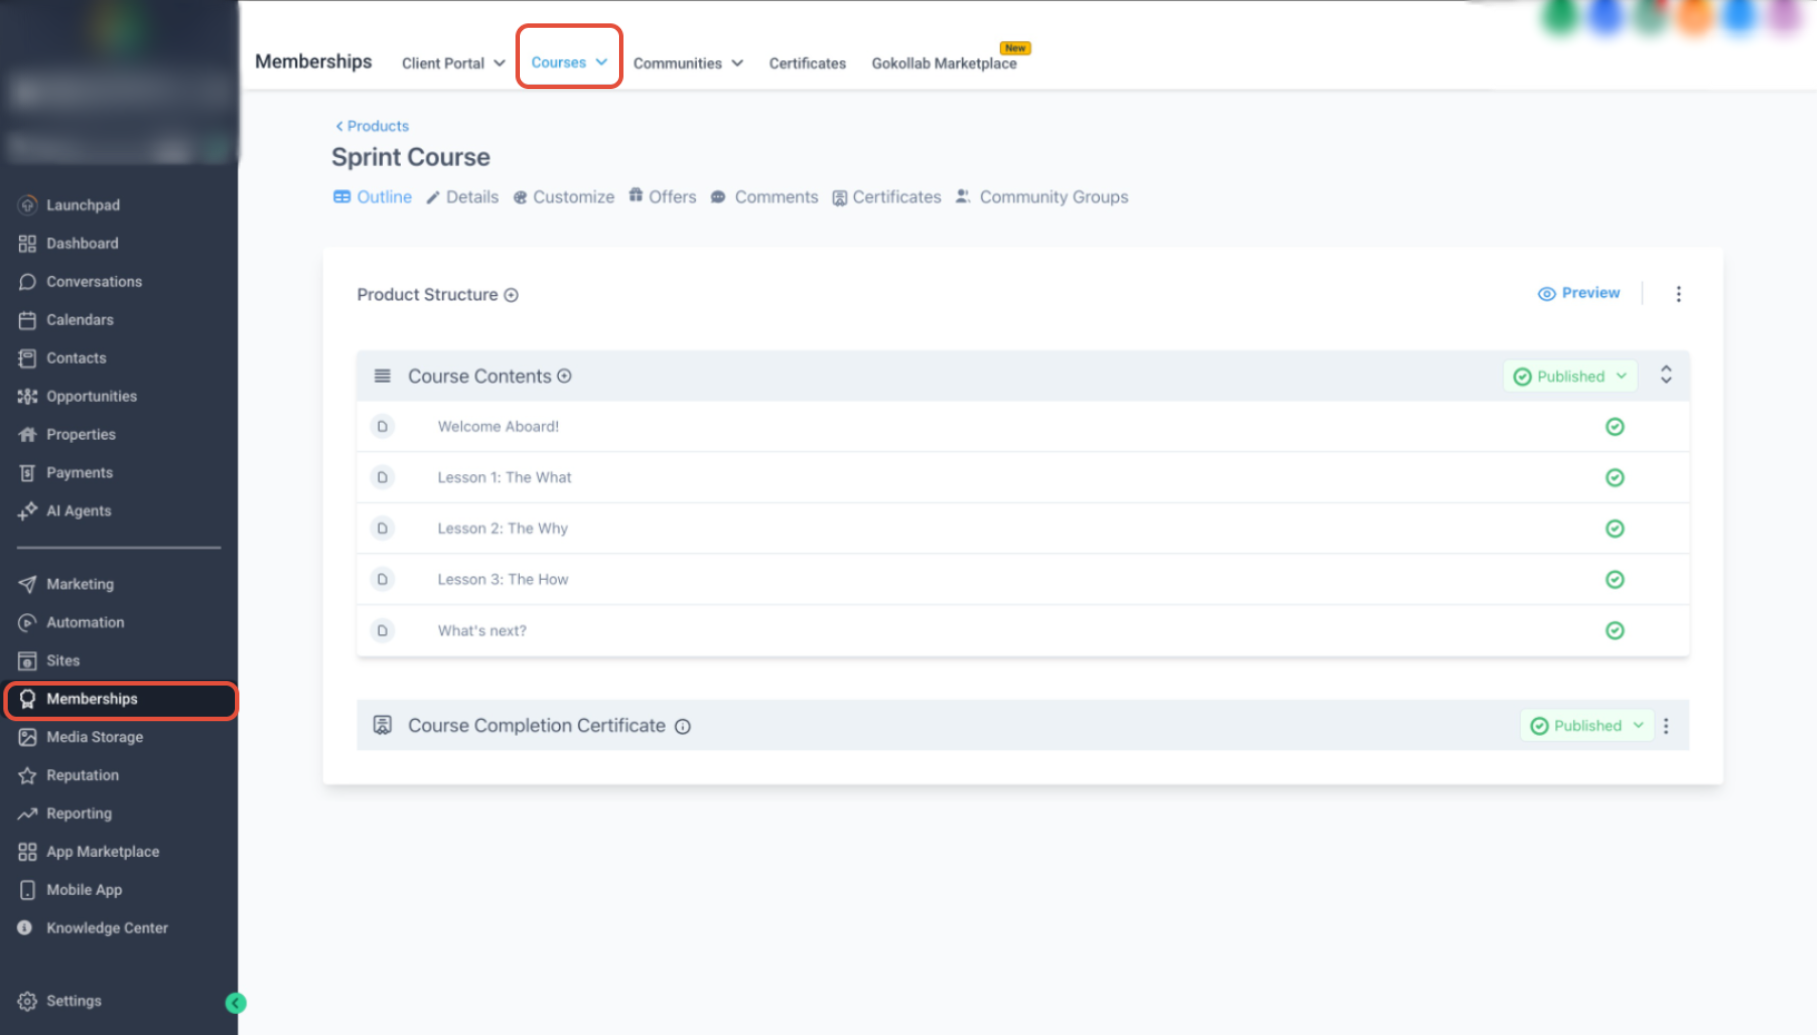
This image shows the course builder where you add lessons and structure content.
-
Add lessons or edit existing sections
-
Organize your course outline
-
Prepare your content for publishing
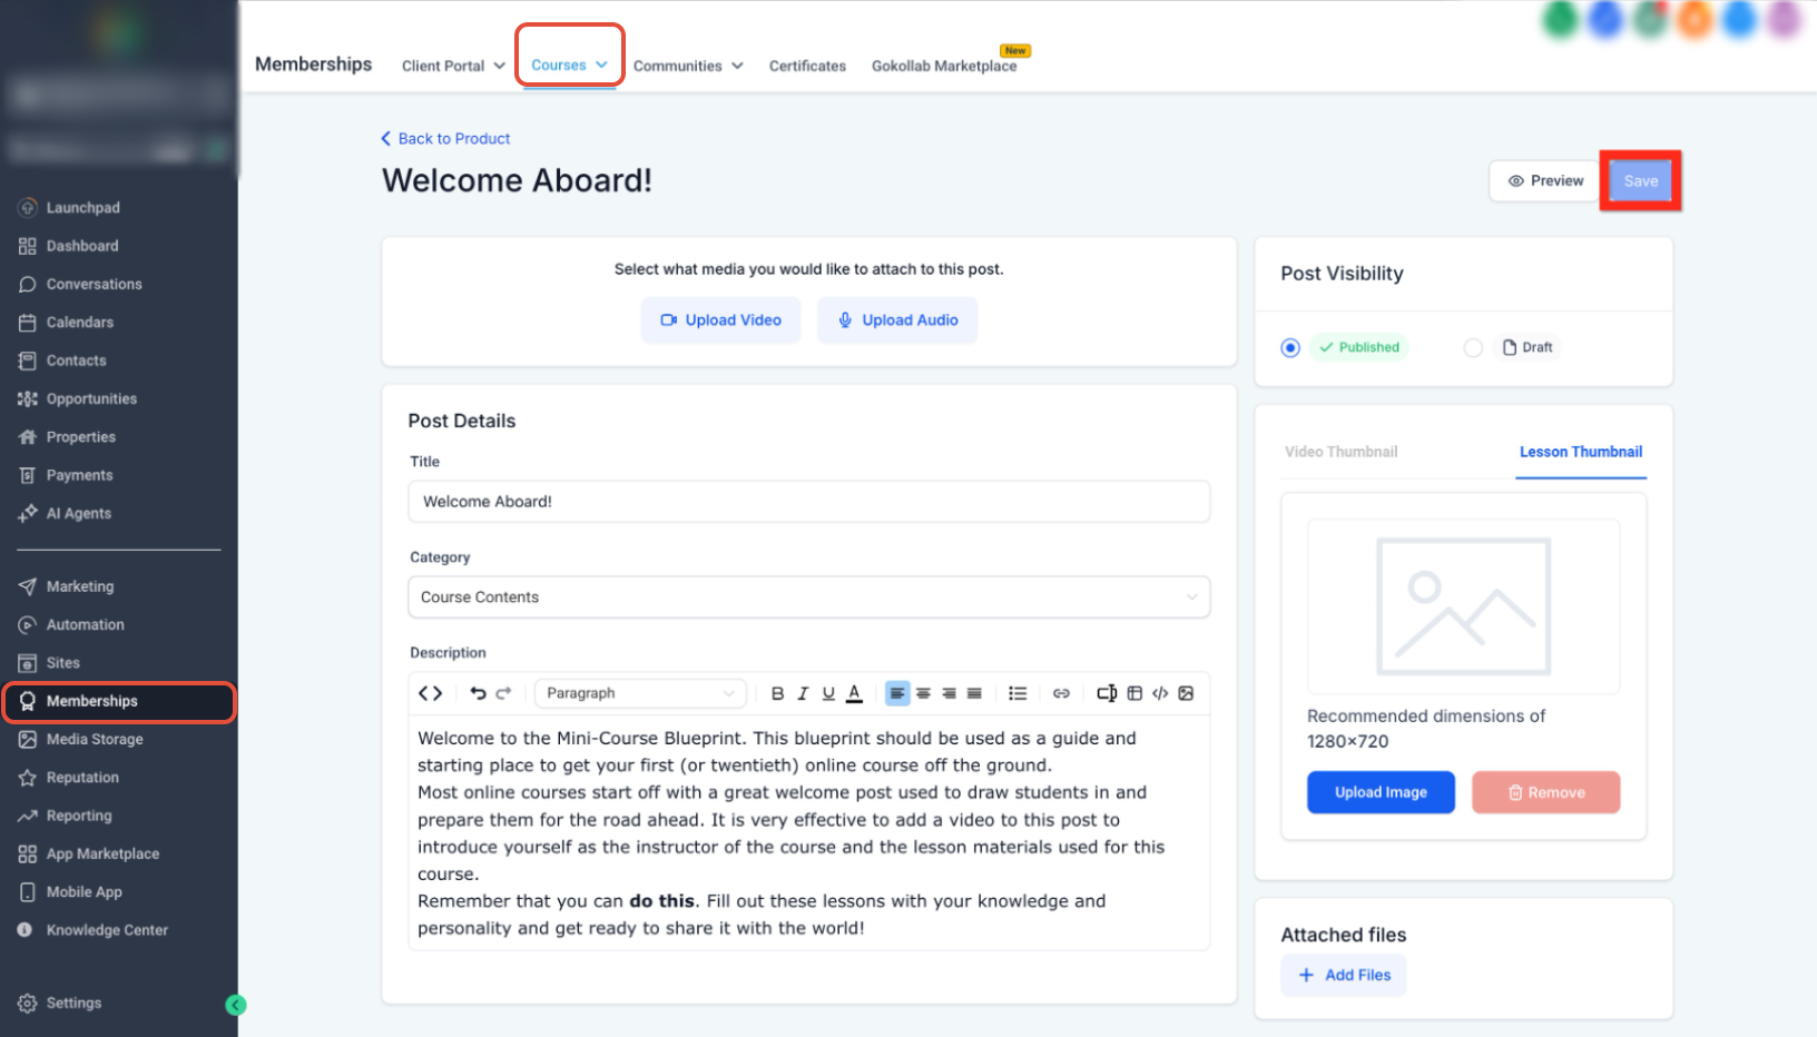
This image highlights saving your course progress.
-
Click Save to apply changes
-
Ensure your content is properly stored before moving forward
Create an Offer
An offer is how your course is presented and sold. It connects your product with pricing, access, and availability.
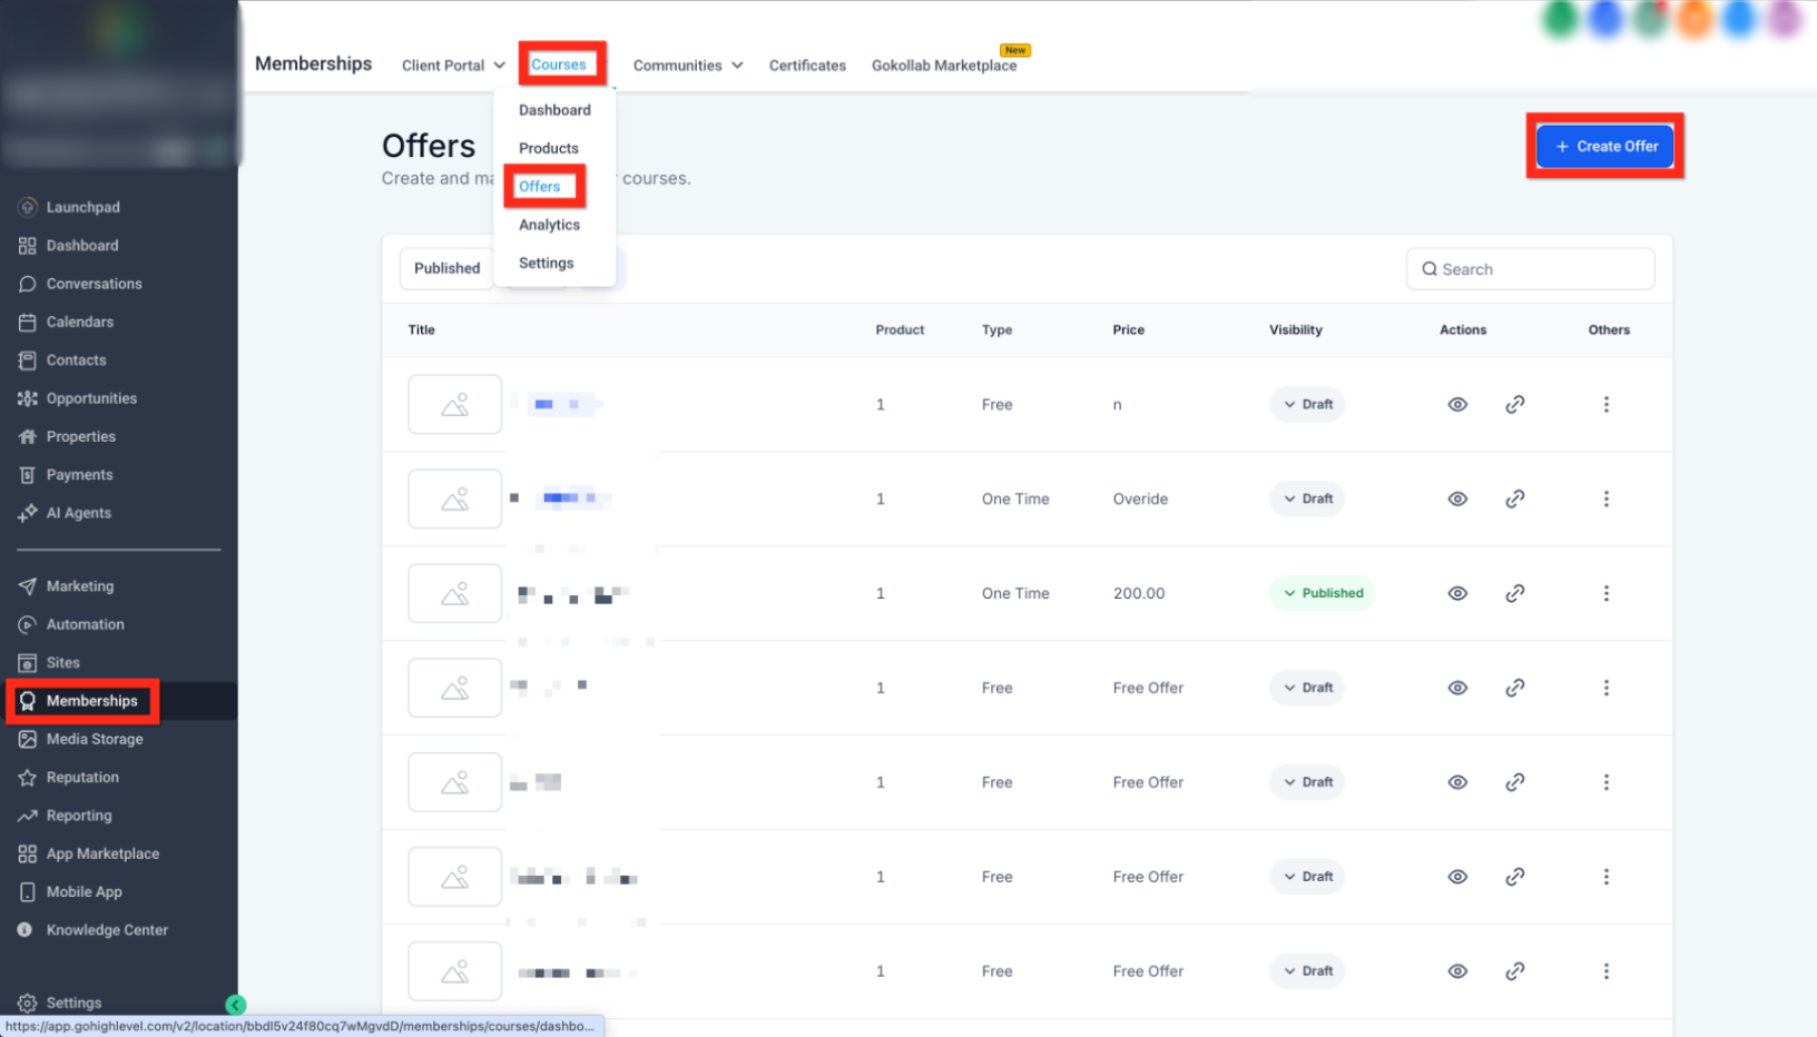
This image shows where to create a new offer.
-
Go to Memberships → Courses → Offers
-
Click Create Offer
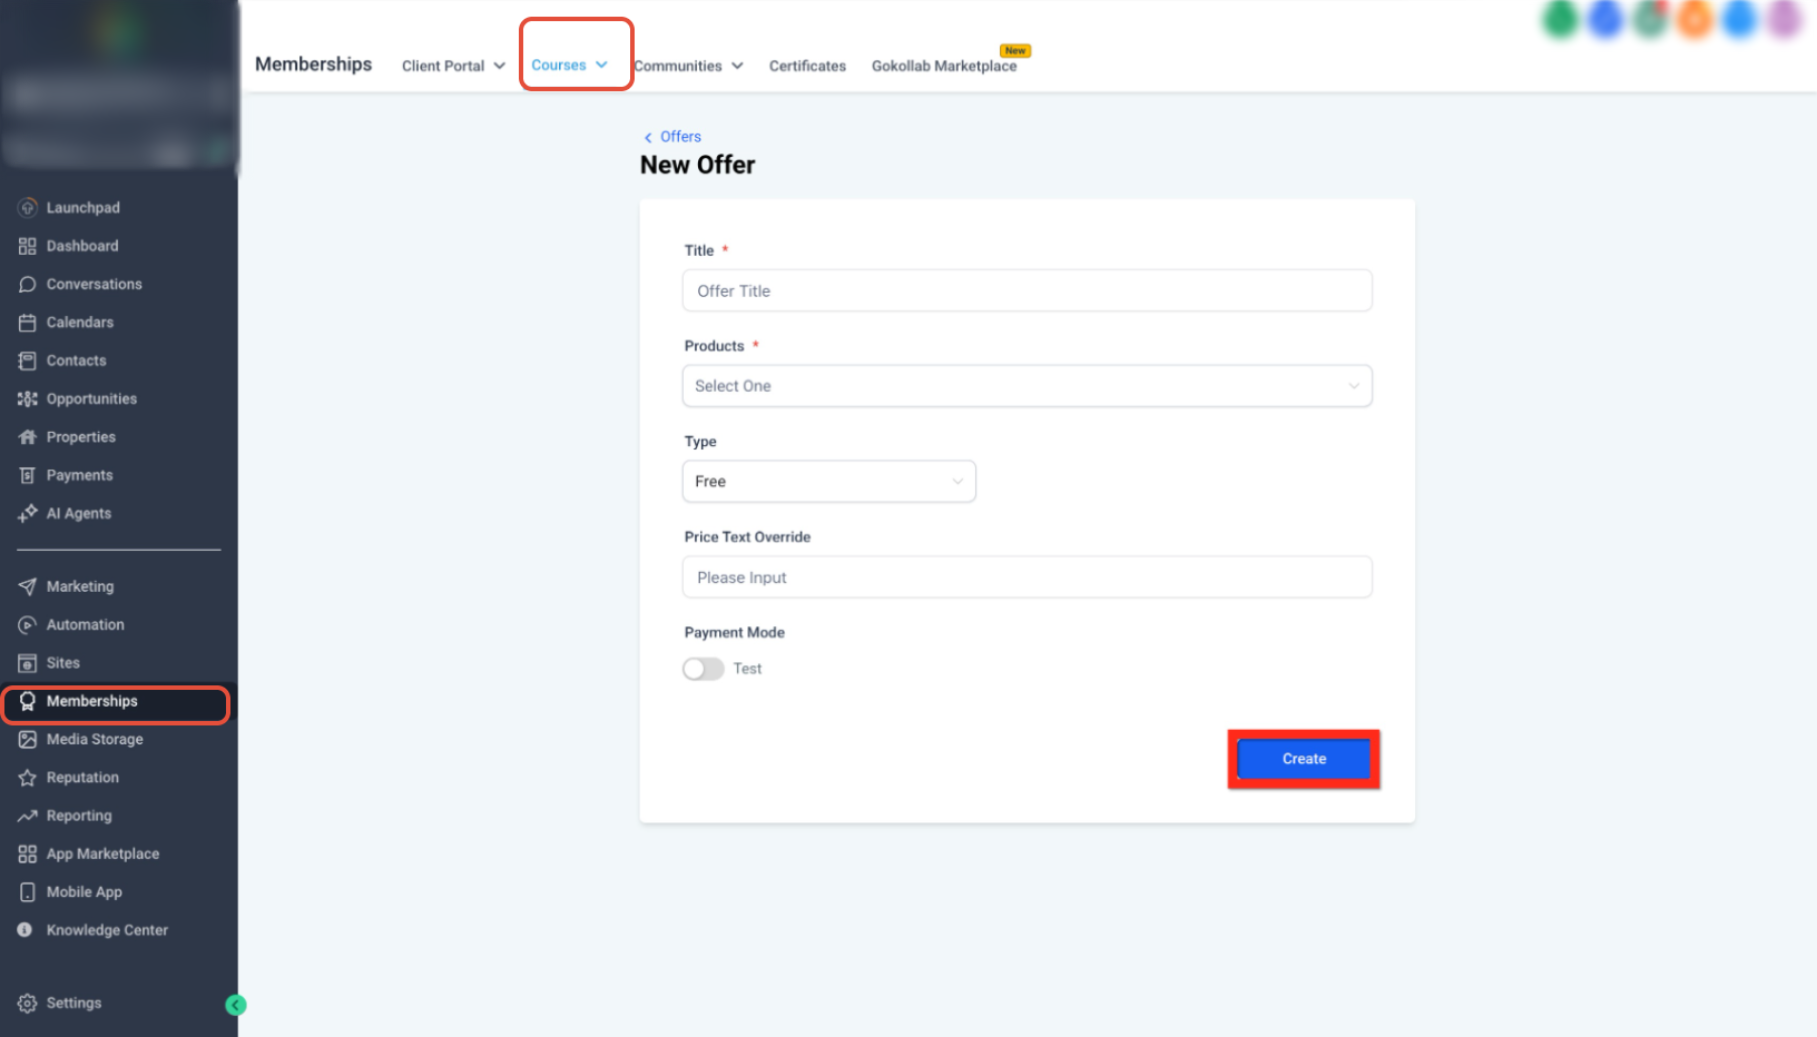
This image shows the offer setup screen.
-
Enter an Offer Title
-
Select your Course Product
-
Set pricing and access settings
-
Click Create
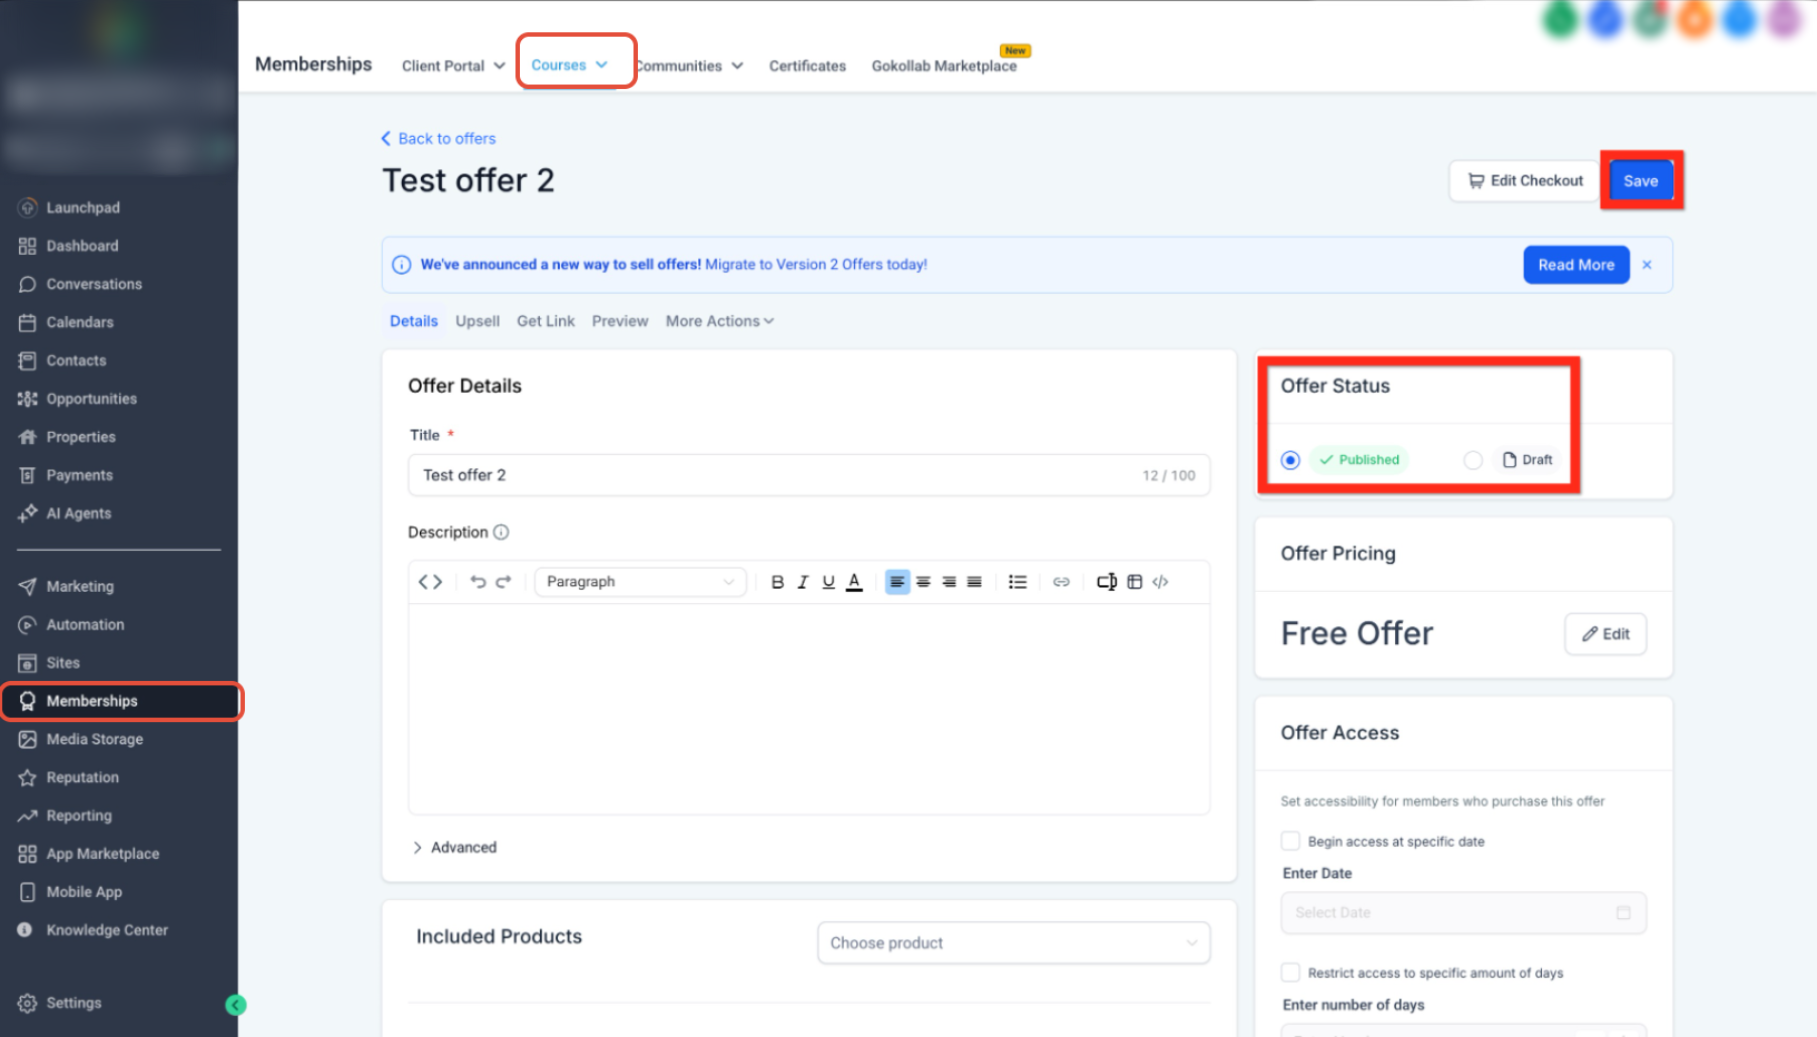
This image highlights switching the offer status.
-
Change status from Draft to Published
-
Click Save to finalize
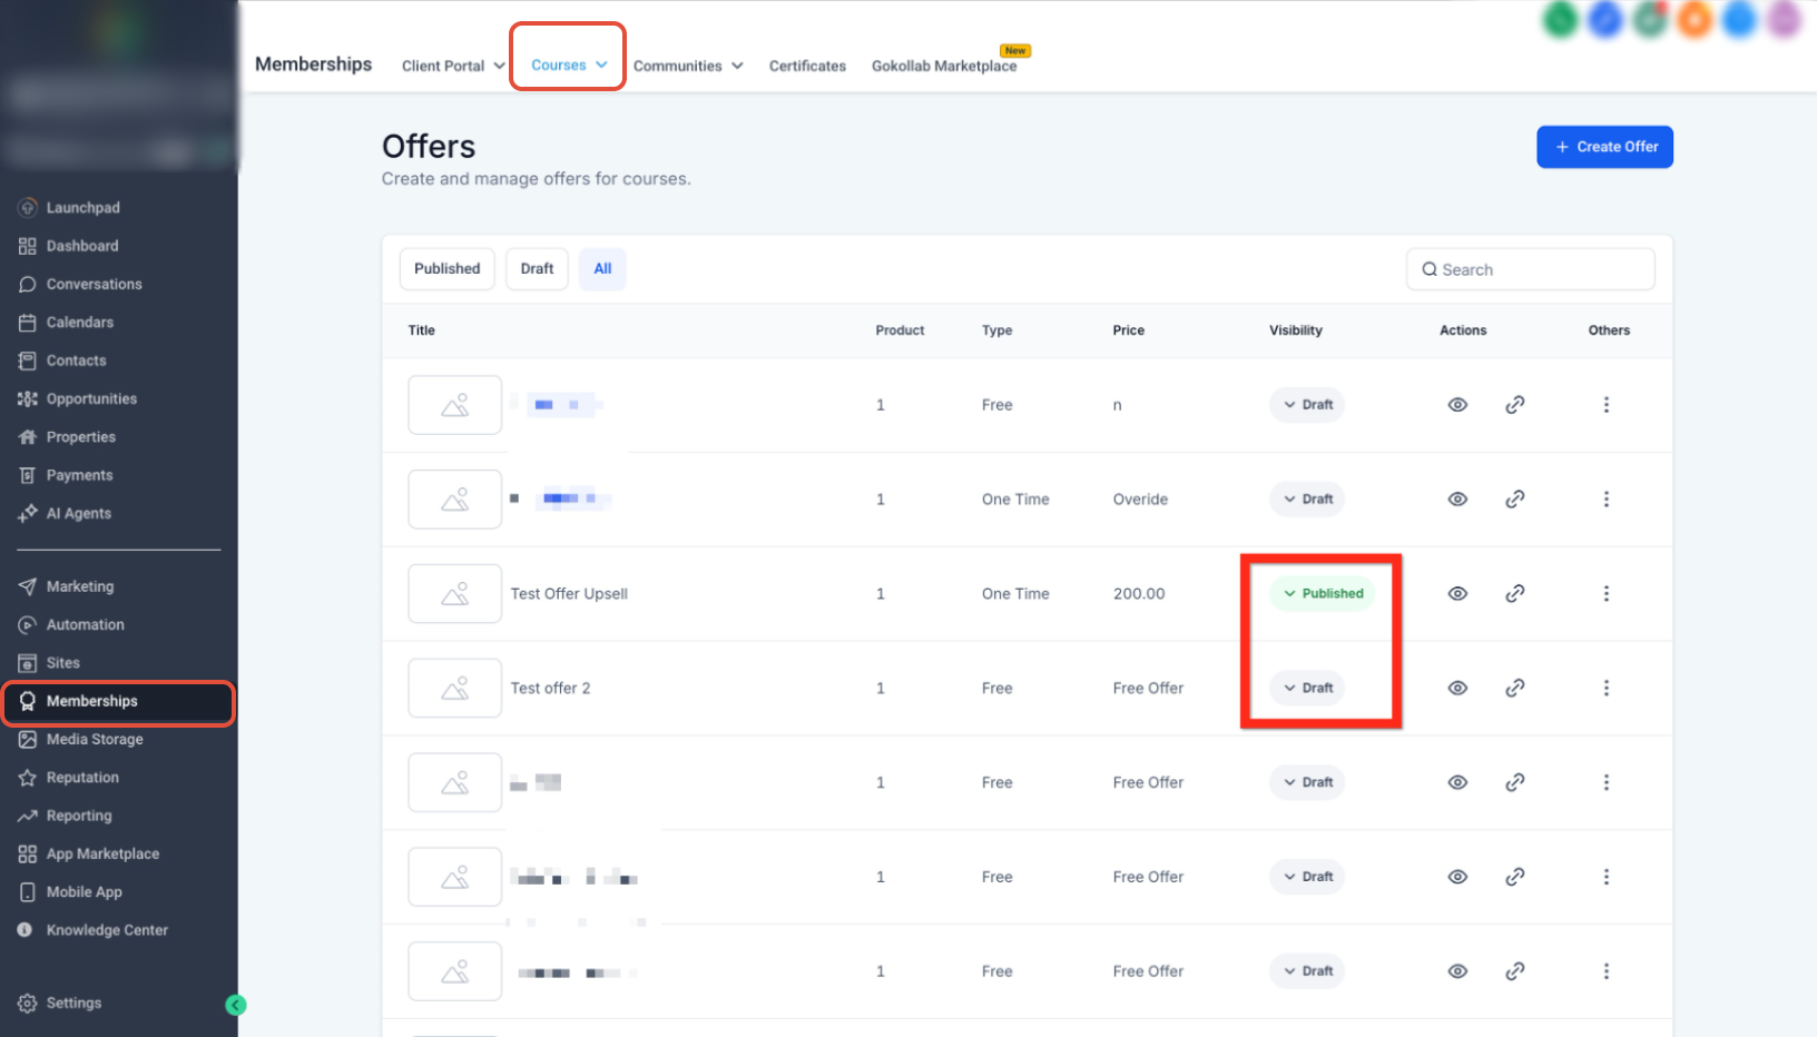
This image shows how offers appear once published.
-
Confirm the offer shows as Published
-
Ensure visibility is correct before sharing
Sell Your Offer
Once your offer is published, the final step is sharing it so people can access and purchase your course.
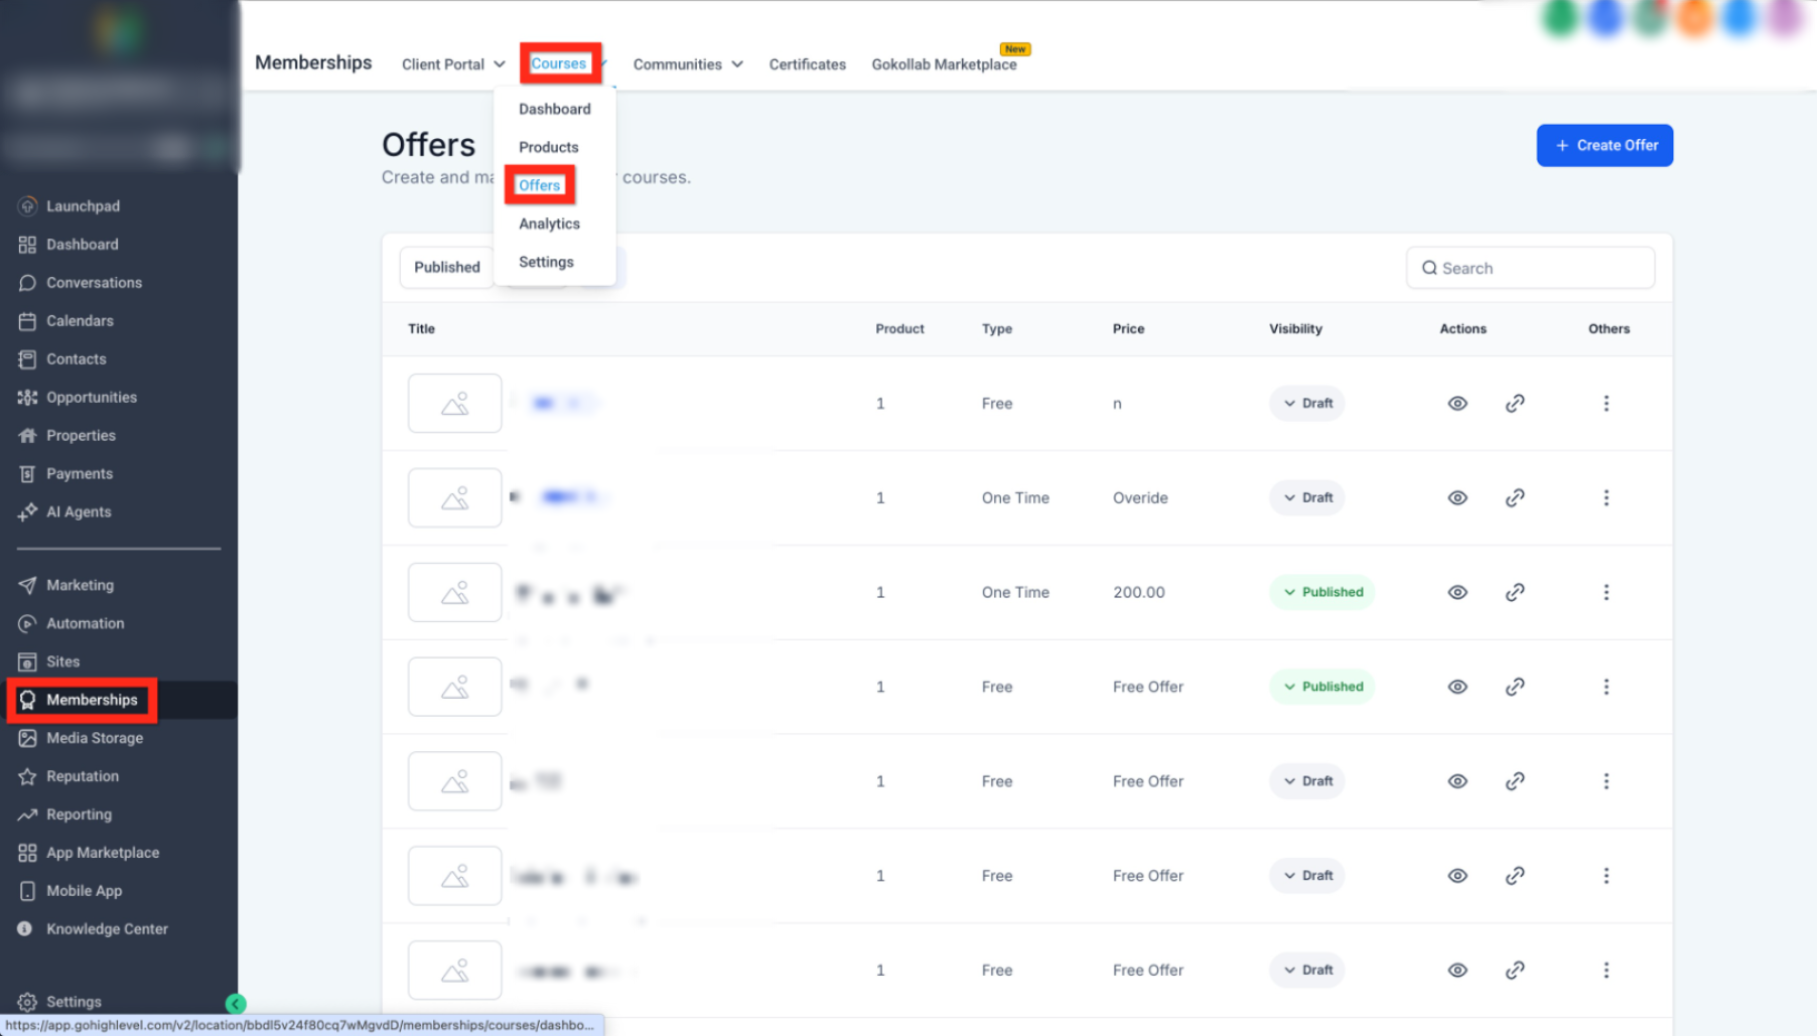
This image shows where to manage and share your offer.
-
Open your offer from the list
-
Copy the offer link
-
Share it via email, social media, or your website
Frequently Asked Questions
Q: Do I need to create a course before creating an offer?
Yes, the offer is connected to a course product, so the course must be created first.
Q: Can I edit my course after publishing it?
Yes, you can update lessons and content at any time.
Q: What happens if my offer is set to Draft?
It will not be visible or accessible to users until it is published.
Q: Can I create multiple offers for one course?
Yes, you can create different pricing options or bundles for the same course.
Q: Where do I share my course link?
You can share it anywhere—email campaigns, landing pages, or social media.
Need More Help?
If you need assistance setting up your course, configuring offers, or improving your sales flow, open the Help Center or contact support for further guidance.