

Bulk importing opportunities allows you to quickly create or update multiple opportunity records at once using a CSV file. This process helps save time, reduces manual data entry, and ensures your sales pipeline remains accurate and up to date.
By preparing your file correctly and following the import steps outlined below, you can upload large datasets and manage opportunities efficiently.
TABLE OF CONTENTS
- Prepare Your Data
- Supported File Types
- File Preparation Requirements
- Structuring Your File
- Monitoring Import Progress
- Viewing Import Statistics
- Additional Tips
- Frequently Asked Questions
- Need Help
Prepare Your Data
Before importing opportunities, prepare your spreadsheet so it aligns with the required structure and formatting rules.
Proper preparation ensures that the system can correctly recognize each column and map the information to the correct opportunity fields.
Supported File Types
Only the following file format is supported for opportunity imports:
CSV (.csv)
Make sure your spreadsheet is exported as a CSV file before uploading.
File Preparation Requirements
To ensure the import process works correctly, your file must meet these requirements:
-
The file must contain only one sheet
-
File size must be smaller than 30 MB
-
The first row must contain column headers
-
At least one column must match a system field
Following these requirements helps prevent upload failures or mapping errors.
Mandatory Fields
Certain fields must be included depending on whether you are creating or updating opportunities.
Required Fields for Creating Opportunities
When creating new opportunities, your file must include:
-
Contact ID
-
Opportunity Name
-
Pipeline ID or Pipeline Name
Default Values Applied Automatically
If some optional fields are missing, the system will apply default values:
-
Stage → Defaults to the first stage in the selected pipeline
-
Opportunity Value → Defaults to 0
-
Opportunity Status → Defaults to Open
-
Lost Reason → If a valid lost reason is provided, status updates to Lost automatically
Where to Find Required IDs
Some values may need to be exported first:
-
Opportunity ID, Pipeline ID, and Stage ID can be retrieved by exporting opportunities
-
Contact ID can be retrieved by exporting contacts
Required Fields for Updating Opportunities
To update existing opportunities, include:
-
Opportunity ID
Understanding Import Options
During import, you will choose how the uploaded records should be handled.
Create Opportunities
Uploads only new opportunity records.
Update Opportunities
Updates existing records using the Opportunity ID.
Create and Update Opportunities
Creates new opportunities while updating existing ones within the same import.
Structuring Your File
Ensure each column follows the correct formatting rules.
Field Formatting Guidelines
Date Fields
Accepted formats:
-
mm/dd/yyyy
-
yyyy/mm/dd
-
mm-dd-yyyy
-
yyyy-mm-dd
Example: 10/28/2020 or 2020-10-28
Multiple Choice or Checkbox Fields
Values should be separated by commas, semicolons, or periods.
Example:
Blue, Yellow, Green
Single Option Fields
Only one value should be present.
Example:
Blue
Opportunity Owner
Use the format:
FirstName LastName
Example:
Logan Paul
Tags
Separate multiple tags using commas or semicolons.
Example:
Lead, Follow-up, VIP
Phone Numbers
Recommended format:
+1 1234567890
For US numbers, these formats also work:
123-456-7890
(123) 456-7890
Numeric Values
Accepted formats:
1.23
1234
.123
Monetary Values
Accepted formats:
1234
1,234,234.33
Opportunity Followers
Multiple names should be separated by commas.
Example:
Adam Smith, David Lee
Importing Your File
Follow these steps to upload and import opportunities.
Access the Opportunities Section
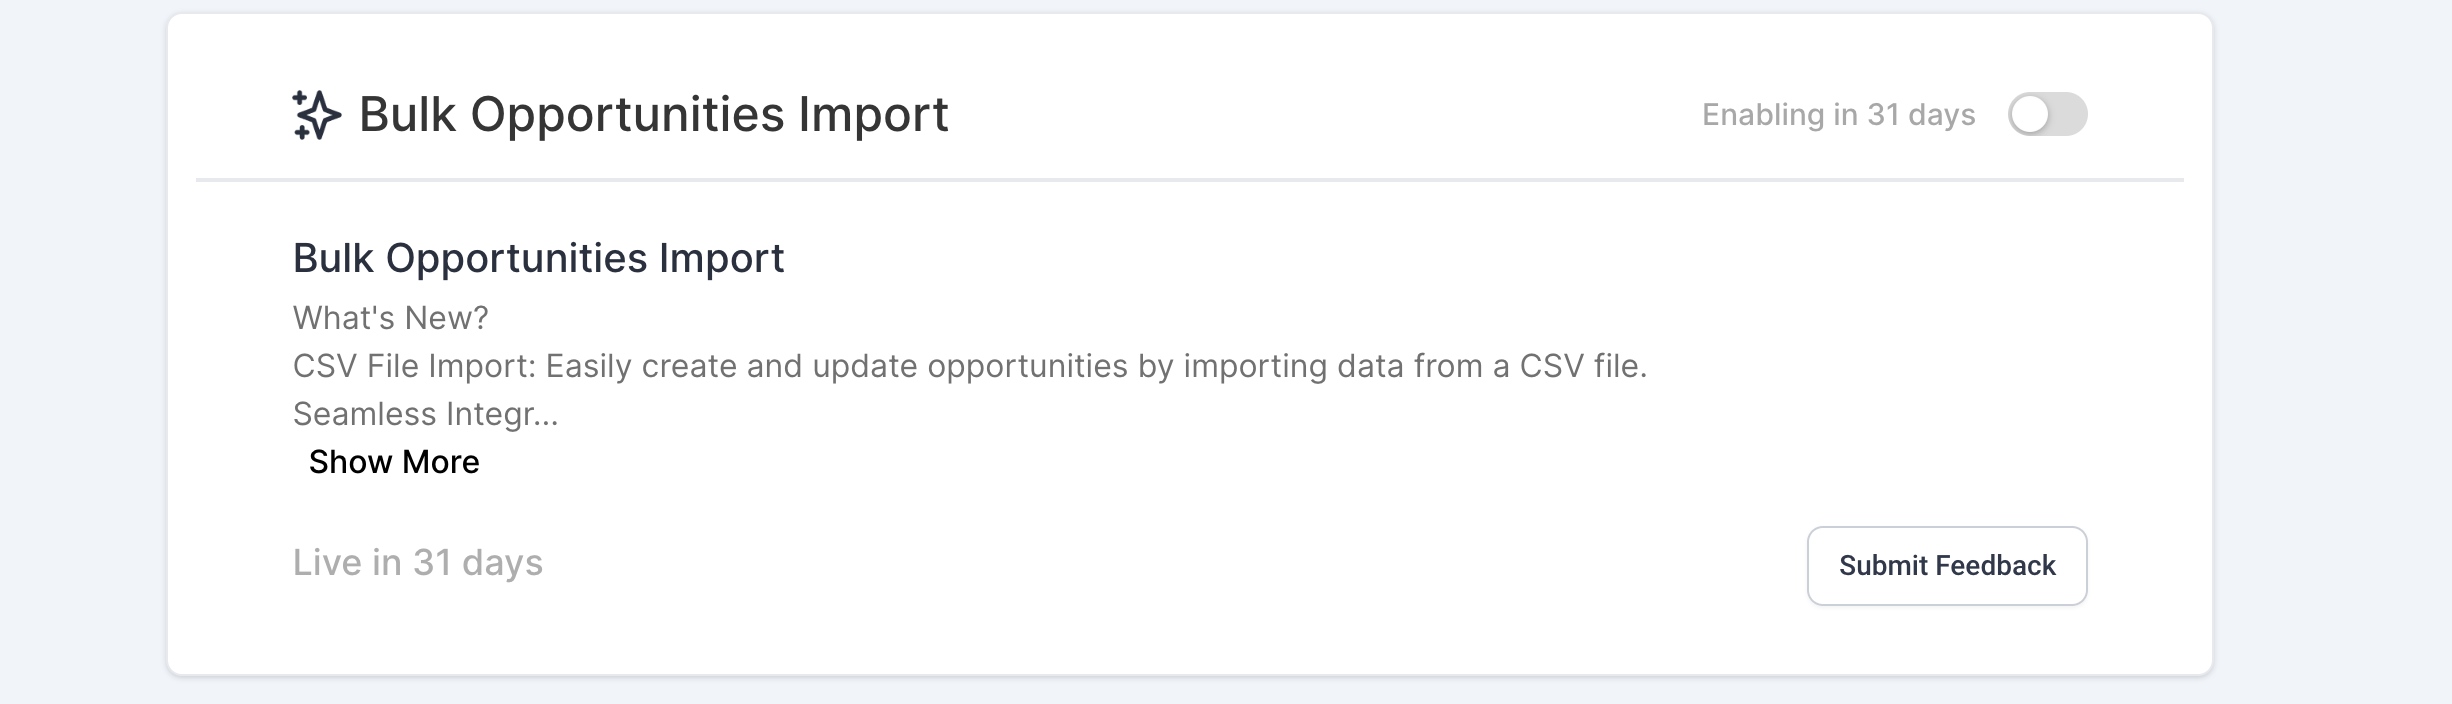
This screenshot shows the navigation area where opportunities can be accessed.
Open the Opportunities section to manage your opportunity pipeline.
Open the Import Option
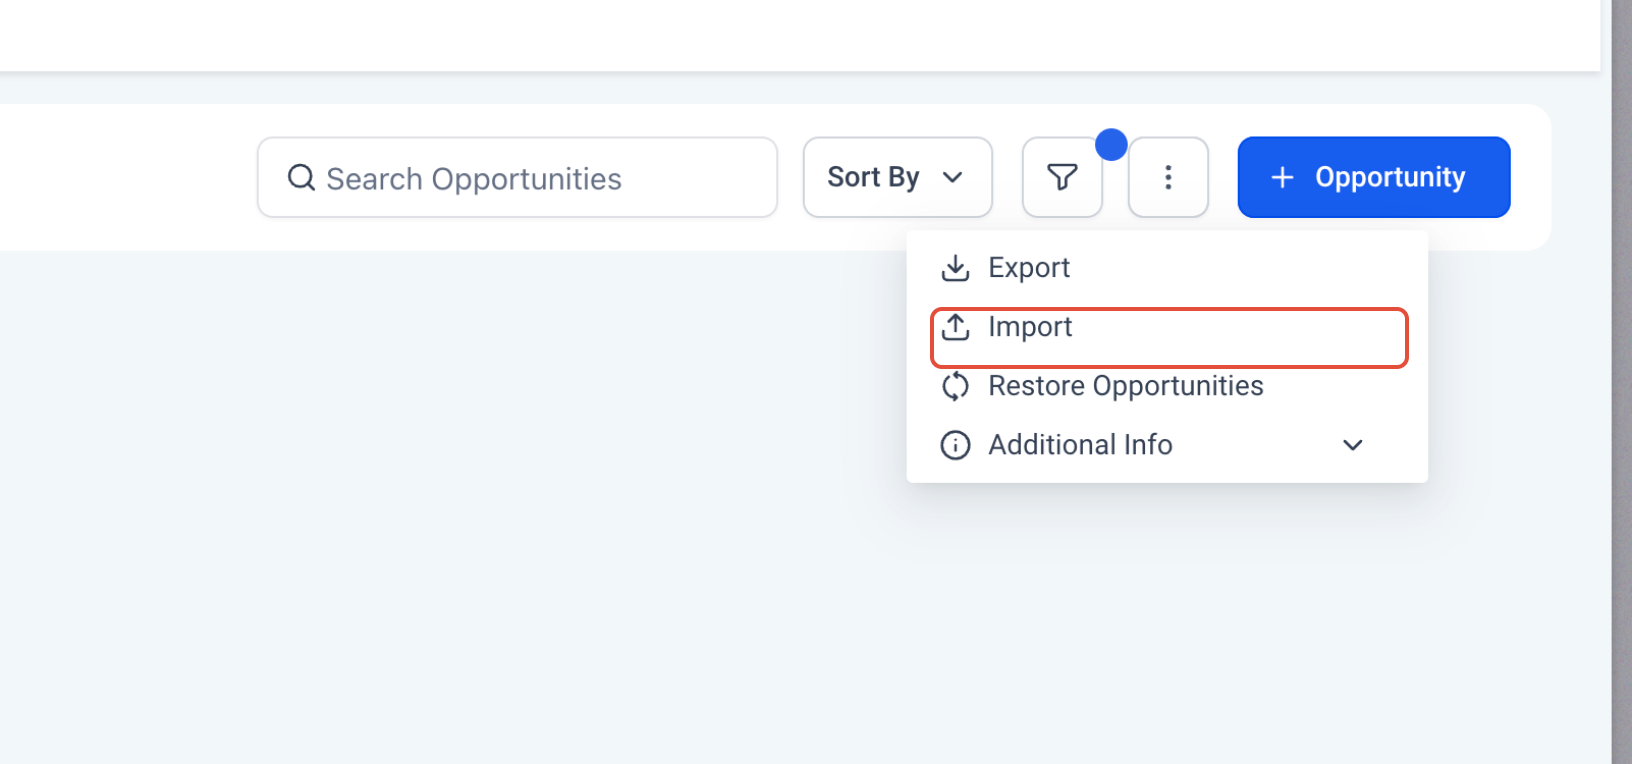
This screenshot shows the options menu where the import action is available.
Click the menu icon and select Import to begin the import process.
Select the Opportunities Object
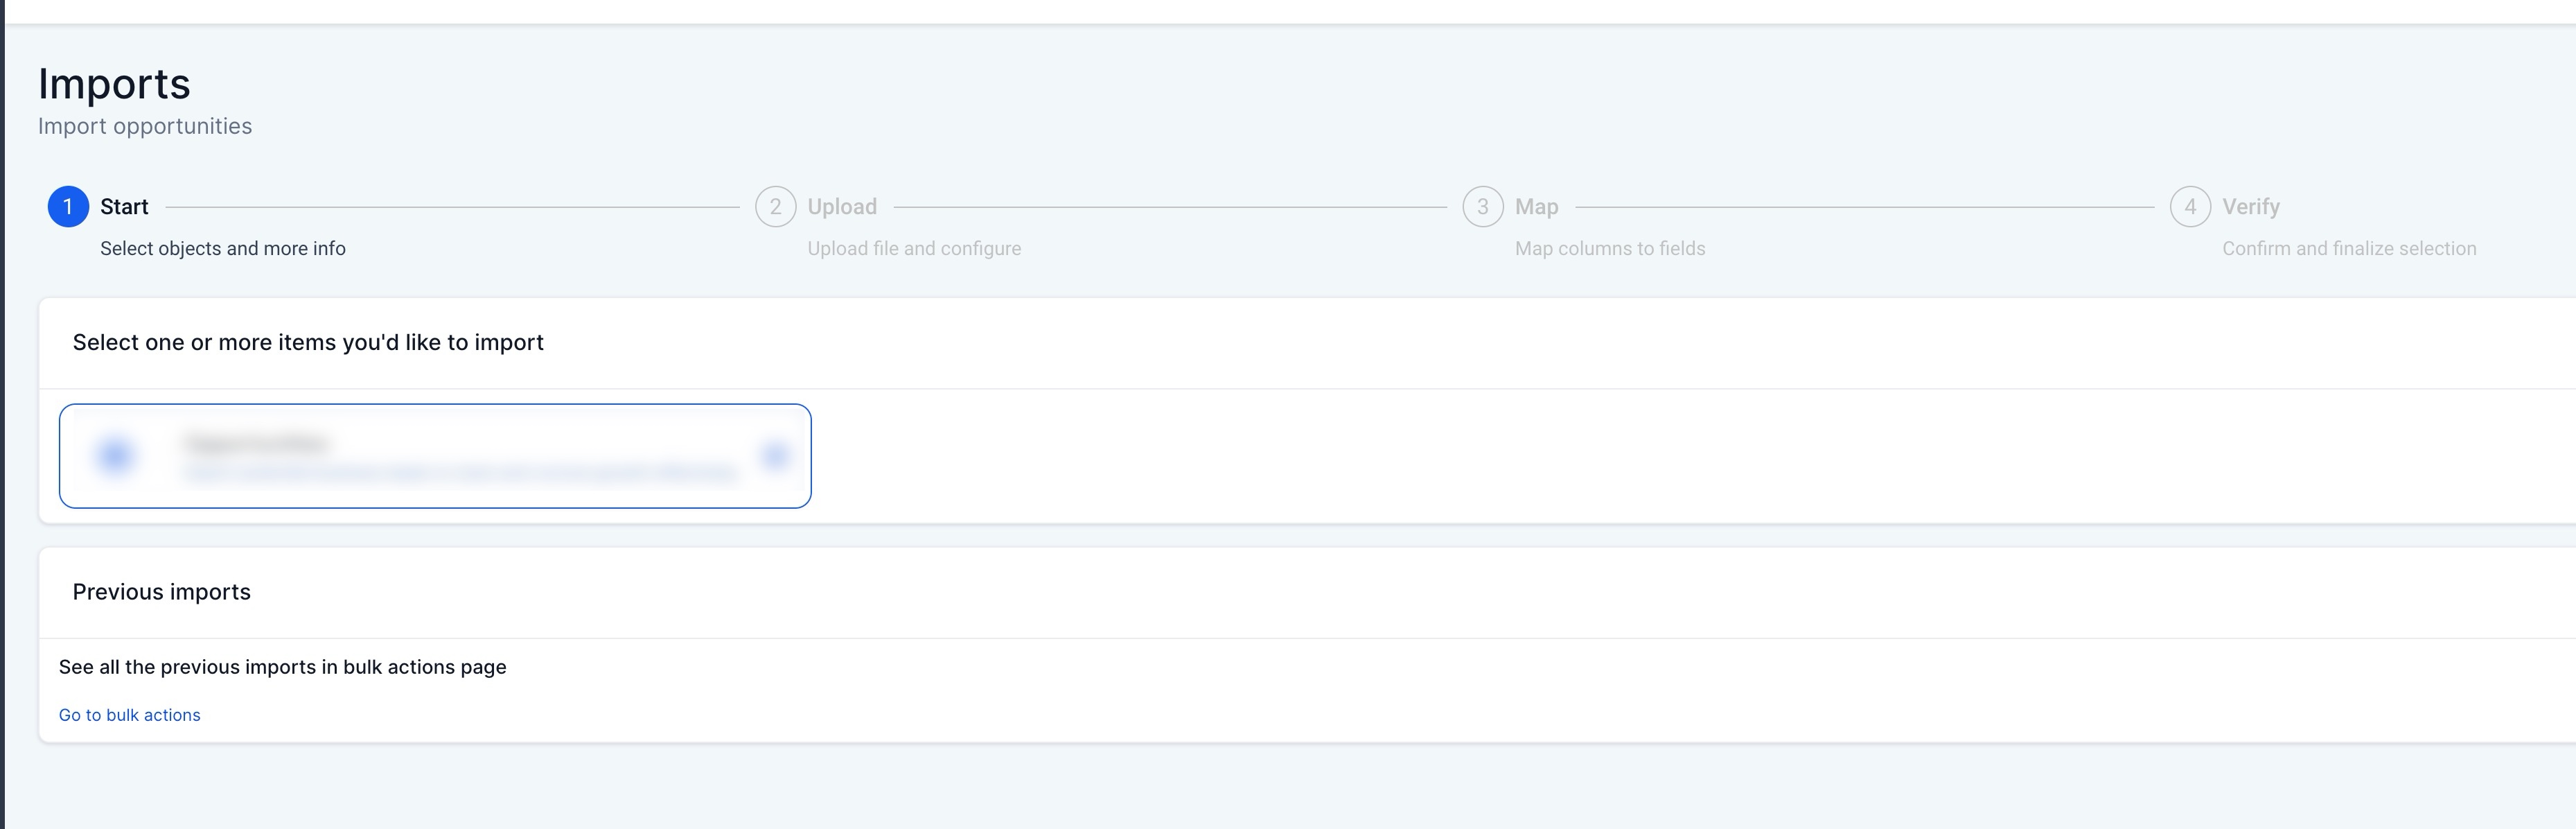
This screen allows you to select the type of data you want to import.
Select Opportunities and continue to the next step.
Upload Your CSV File
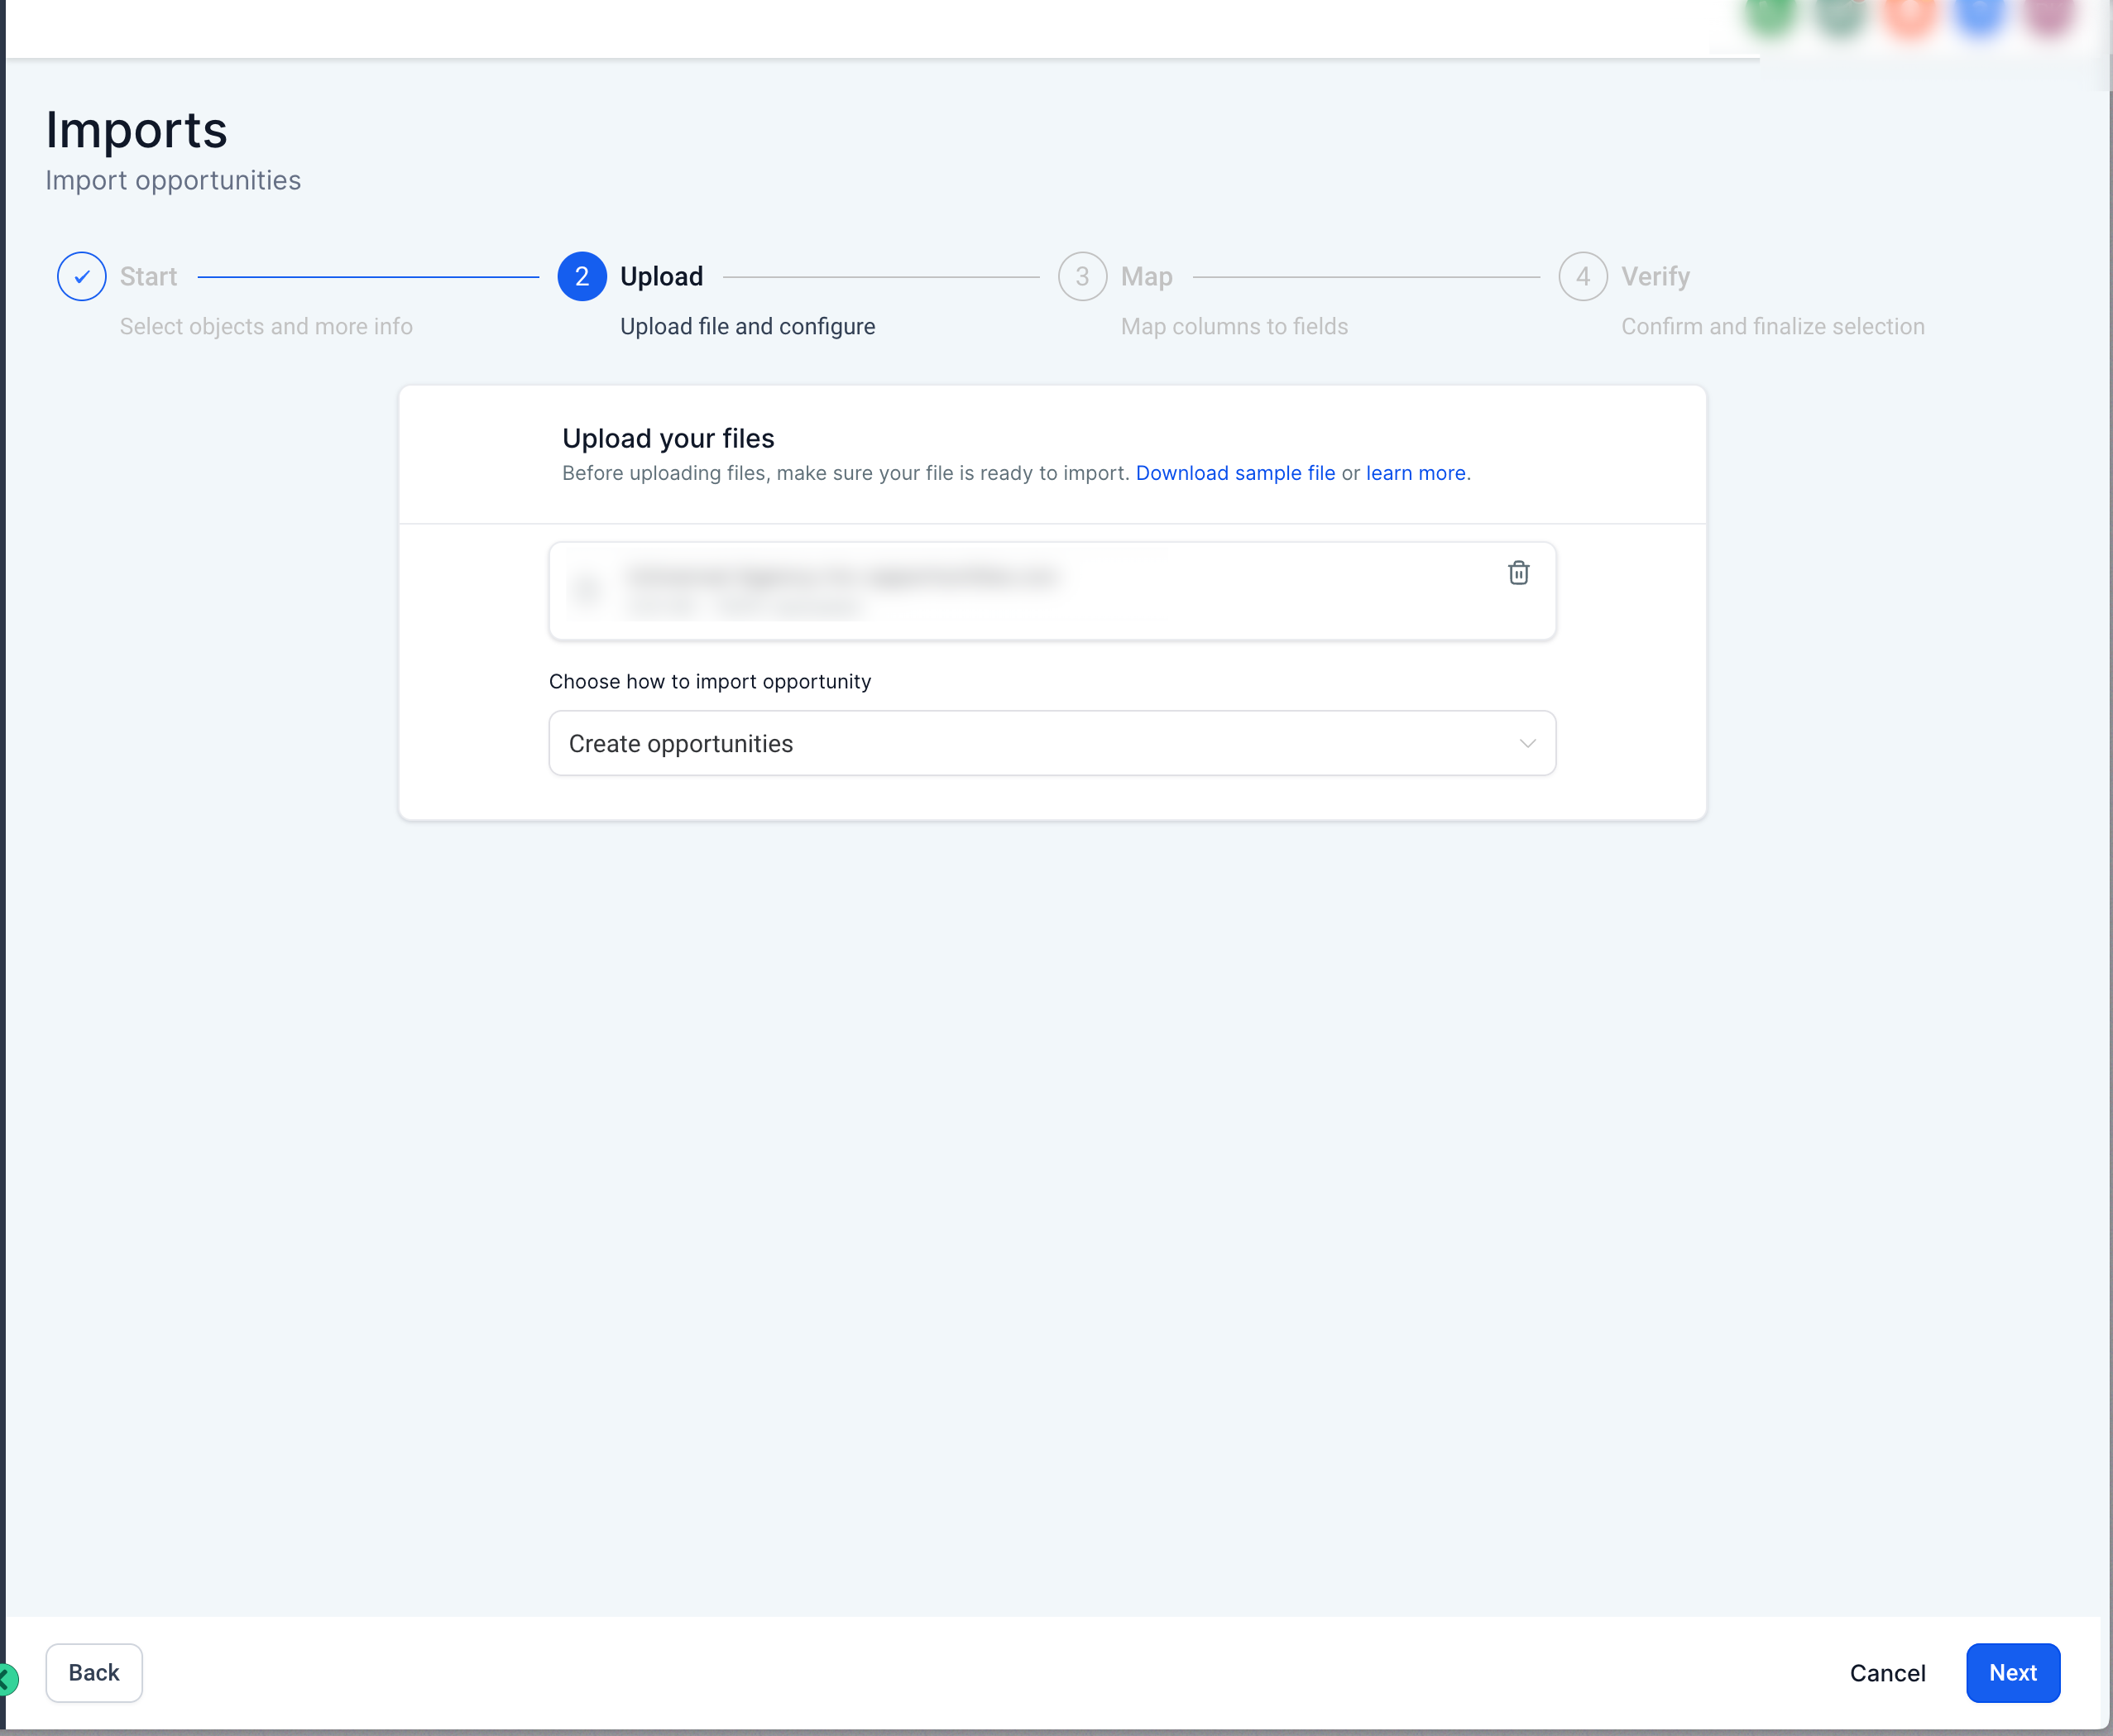
Upload the CSV file containing your opportunity data.
After uploading the file, choose whether to:
-
Create opportunities
-
Update opportunities
-
Create and update opportunities
Then proceed to the mapping stage.
Map Your Fields
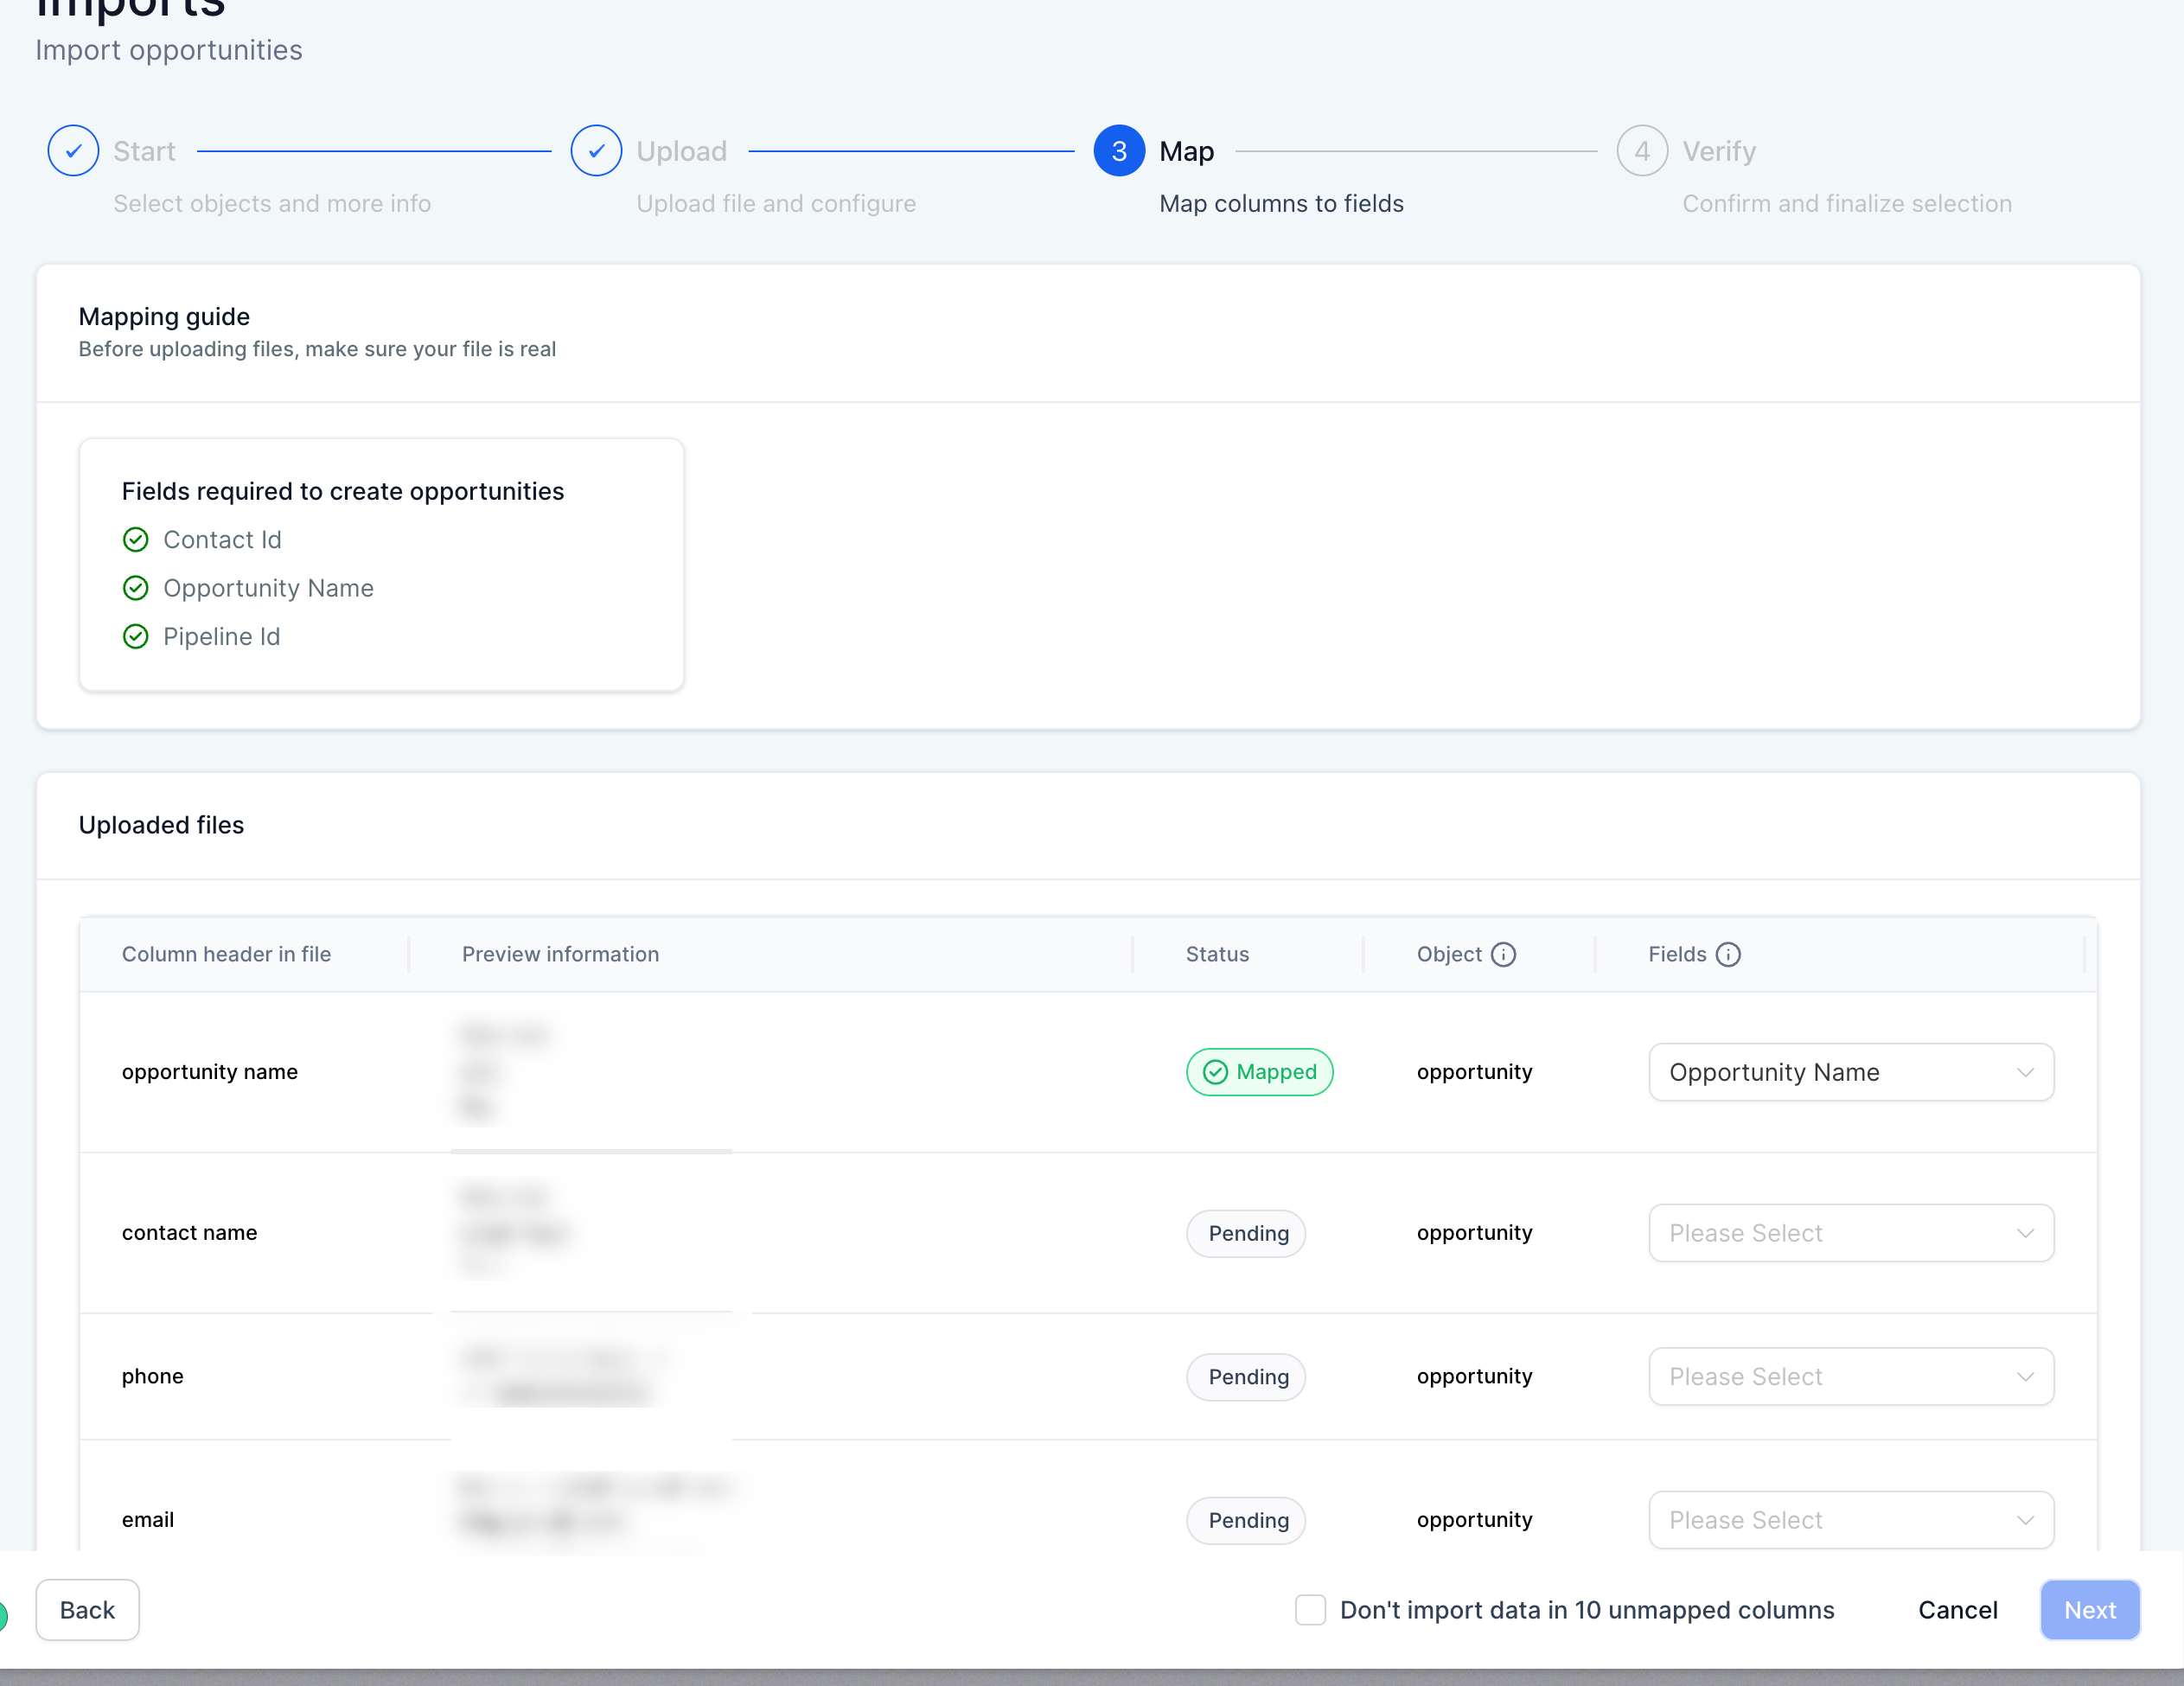
This screen displays the columns from your CSV file and allows you to map them to opportunity fields.
Review each column and confirm it is mapped to the correct field.
Important notes:
-
Required fields must be mapped
-
Unmapped columns can be ignored if necessary
-
Empty values can be skipped using the Don’t update empty values option
Review and Confirm the Import
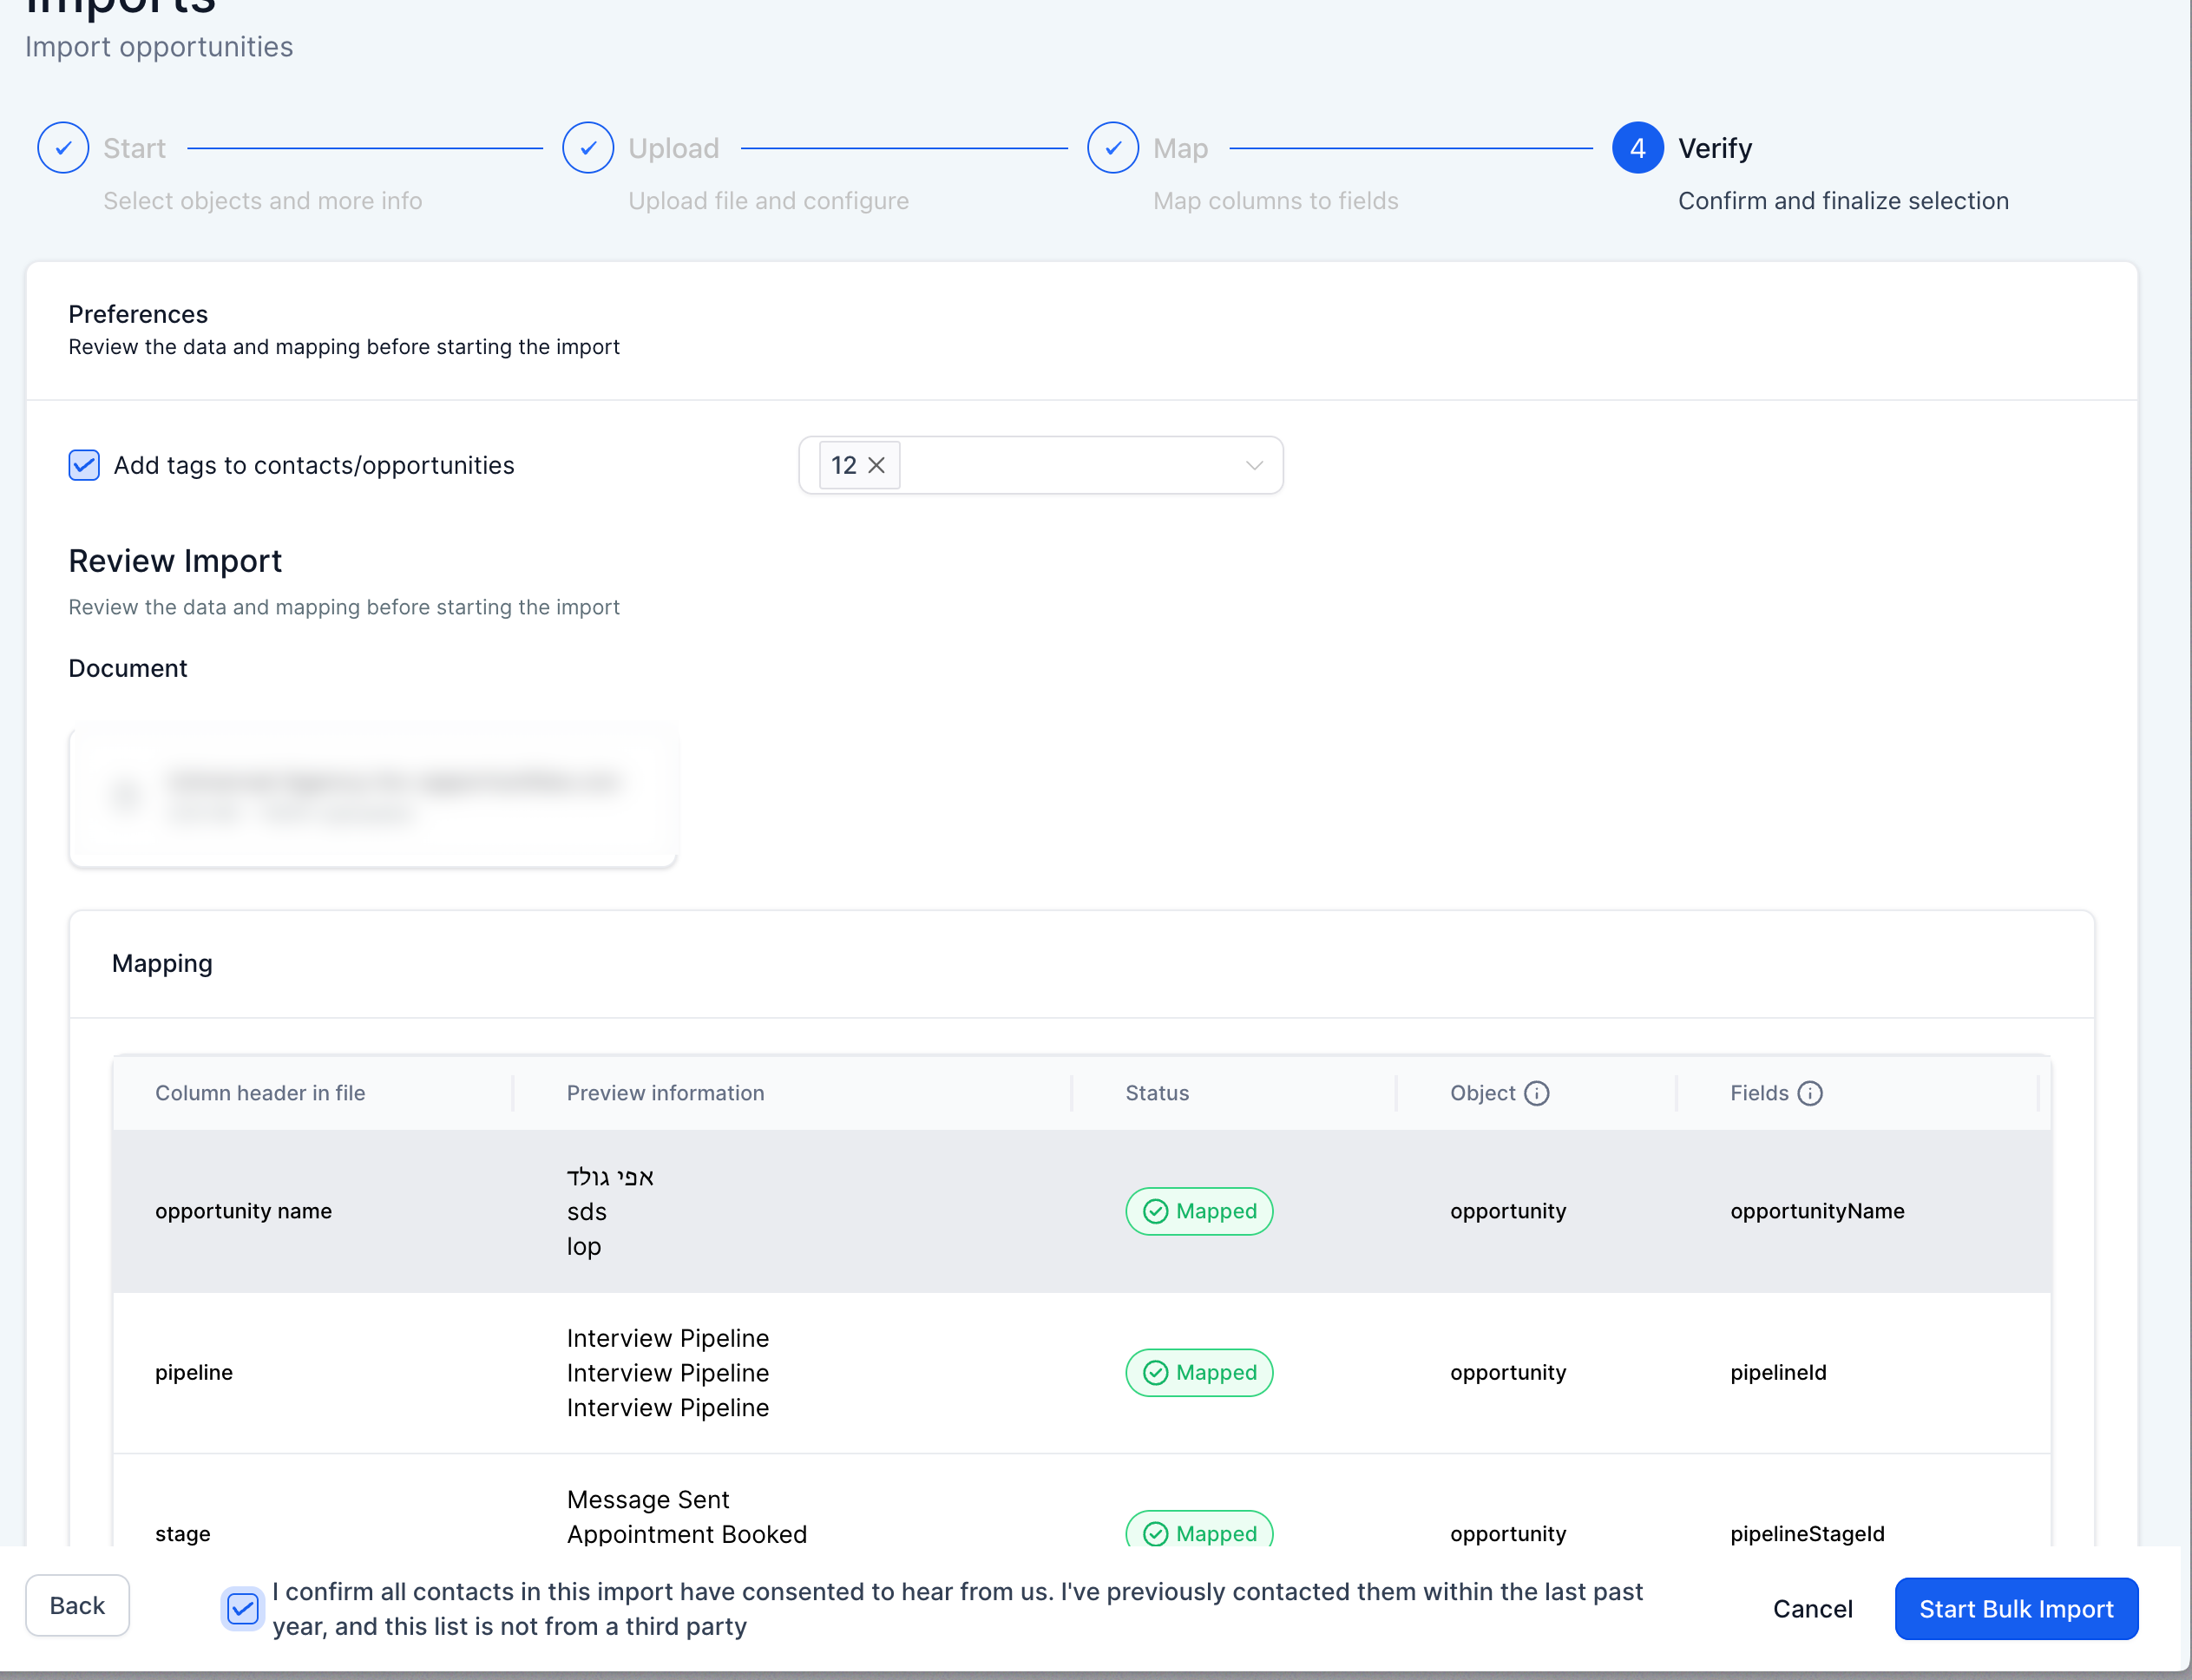
This screen allows you to review the imported file and confirm your mappings.
Before starting the import:
-
Confirm all mappings are correct
-
Select any tags you want applied to contacts or opportunities
-
Check the required confirmation box
Then click Start Bulk Import.
Monitoring Import Progress
After starting the import, you can monitor the results.
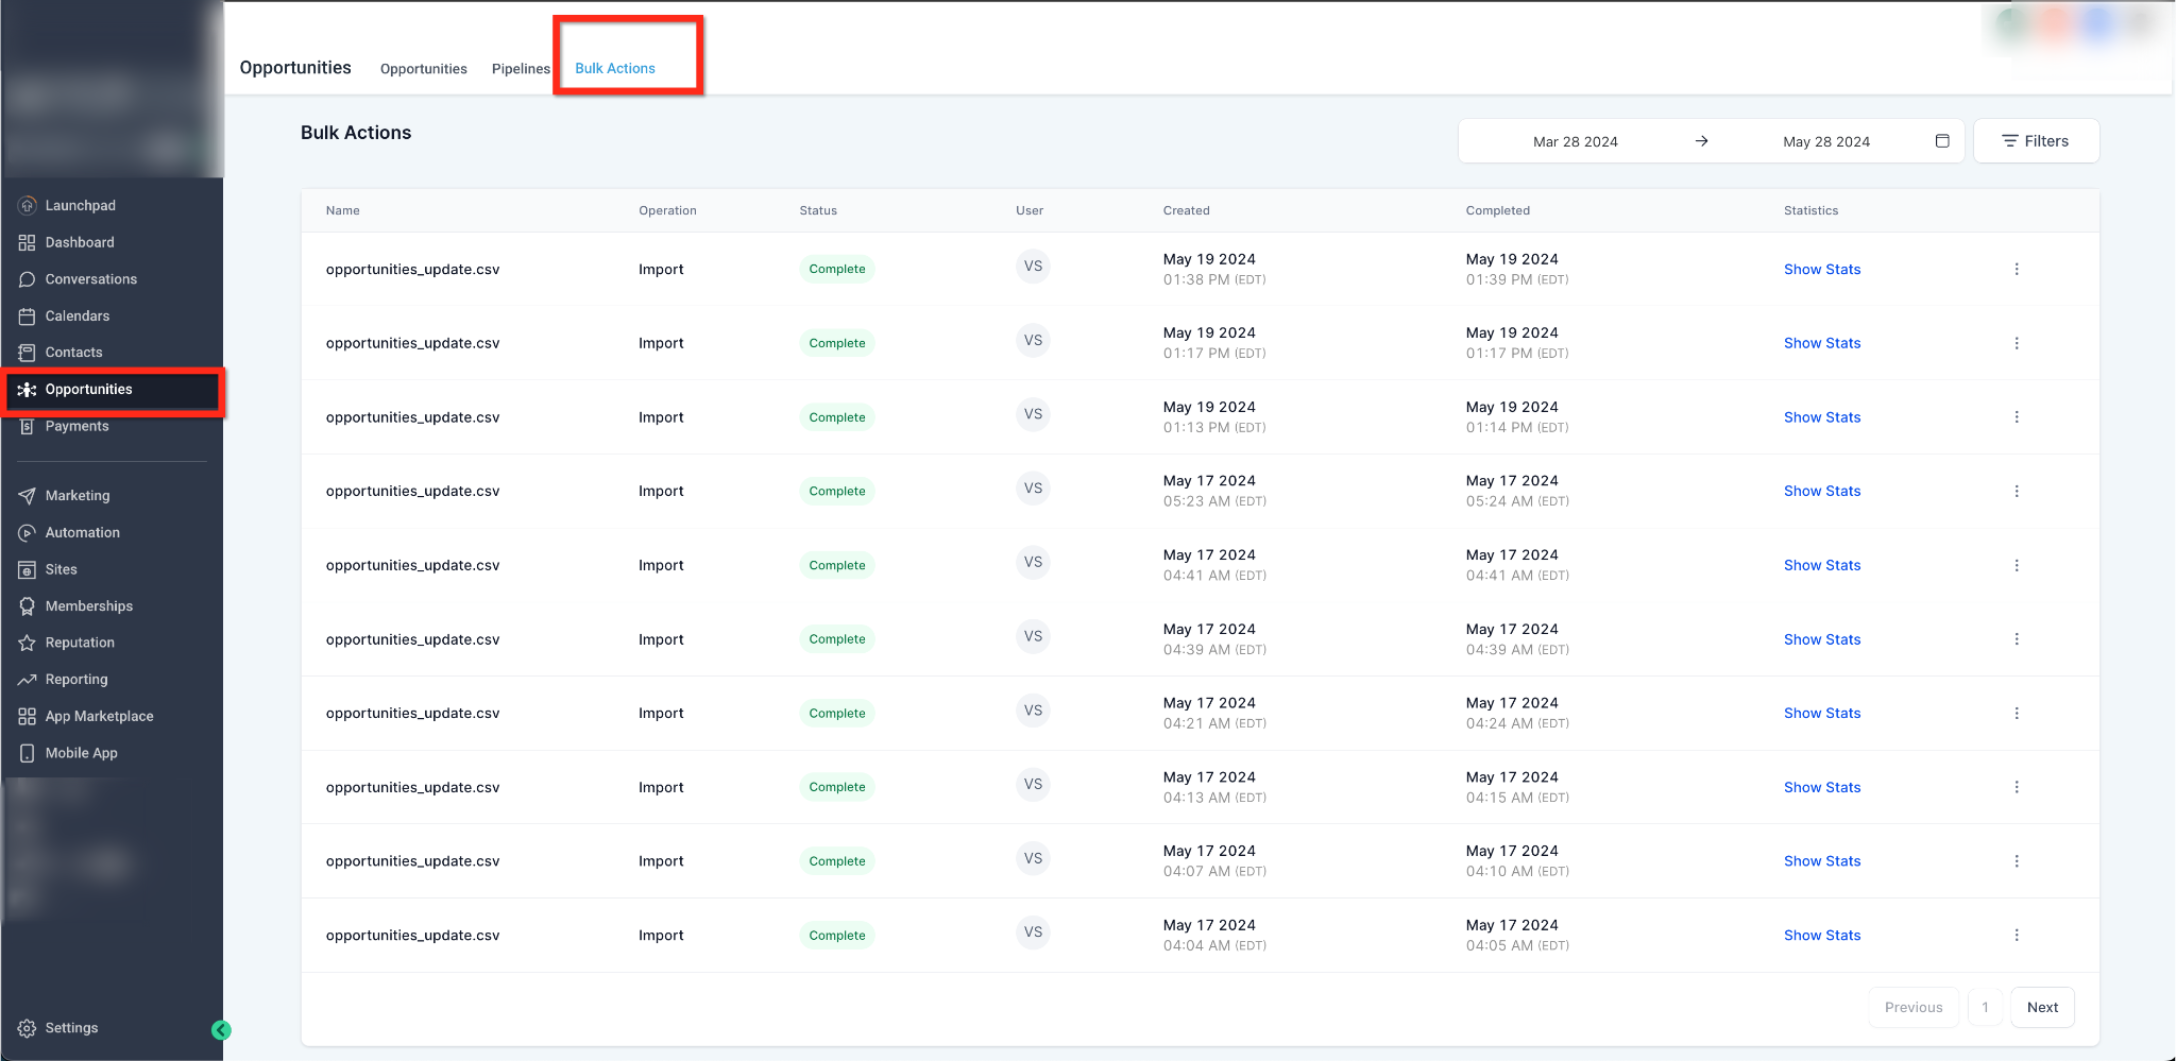
The bulk actions page displays the history of import jobs.
Each import shows the status, completion time, and available statistics.
Viewing Import Statistics
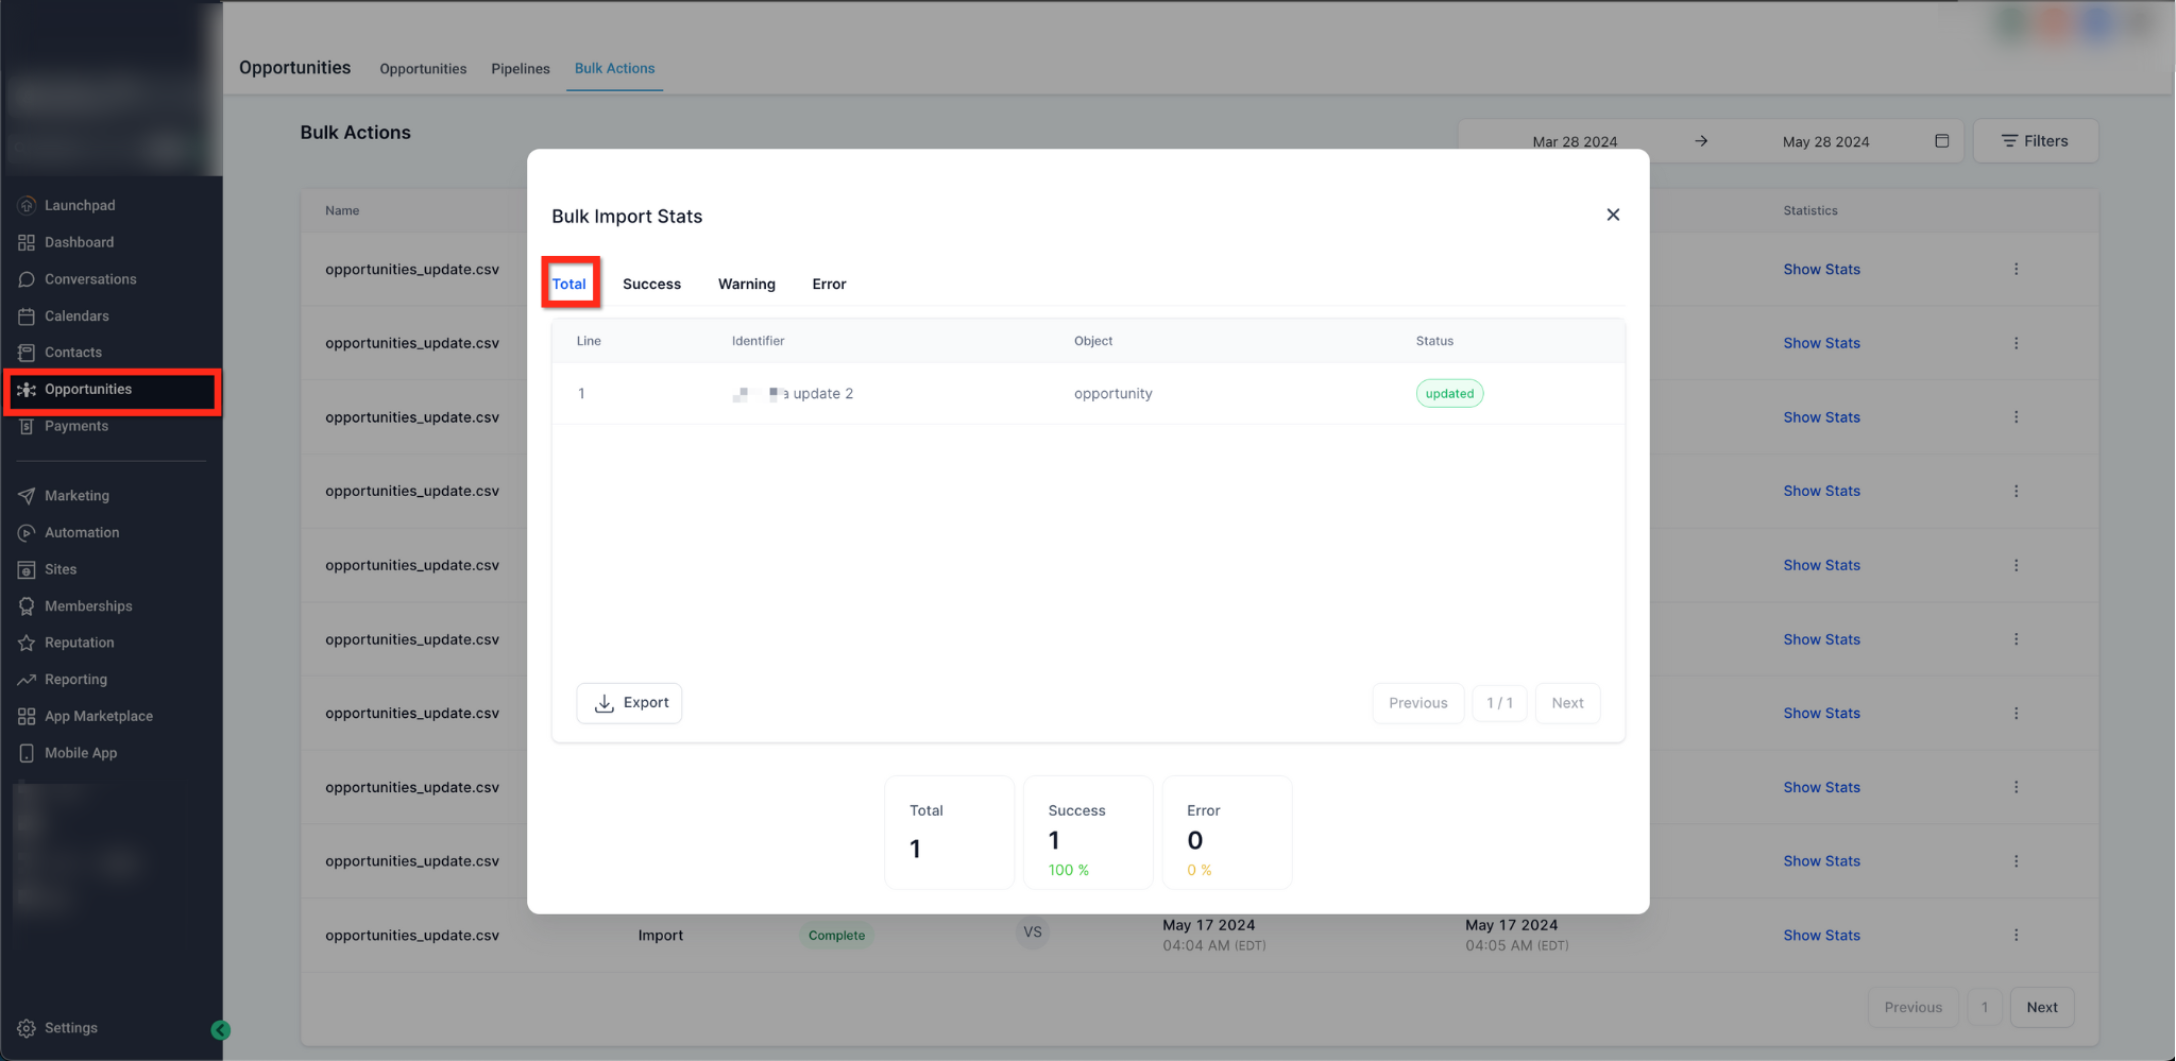
Selecting Show Stats opens a detailed report showing:
-
Total records processed
-
Successful imports
-
Warnings
-
Errors
Warnings usually affect optional fields, while errors prevent specific rows from importing.
Troubleshooting Common Errors
Invalid Option for Multi-Select Fields
Check that the value in your file matches an existing option exactly.
Invalid Contact ID
Ensure the Contact ID exists in the system or remove the value if creating a new record.
Date Format Error
Make sure date values follow one of the accepted formats.
Duplicate Unique Property Value
Ensure unique fields such as identifiers do not contain duplicate values.
File Not Found
Confirm the uploaded file is a valid CSV and that the file path is correct.
Missing Required Fields
Ensure all mandatory fields such as Opportunity Name, Contact ID, and Pipeline ID are included.
Additional Tips
-
Review your file carefully before importing
-
Ensure column headers match existing fields where possible
-
Test imports with a smaller dataset first
-
Always verify mapping before confirming the import
Following these tips will help prevent errors and improve the accuracy of your data.
Frequently Asked Questions
Q: Can I update existing opportunities using a CSV file?
Yes. Include the Opportunity ID in your file and choose the update option during import.
Q: What happens if a stage is not included in the file?
If a stage is not provided, the opportunity will automatically be assigned to the first stage in the selected pipeline.
Q: Can I import both new and existing opportunities at the same time?
Yes. Choose the Create and Update option during import.
Q: Why did some rows fail to import?
Rows may fail if required fields are missing, IDs are invalid, or data formatting does not match accepted formats.
Q: Can I add tags during the import process?
Yes. Tags can be applied to contacts or opportunities during the confirmation step before starting the import.
Need Help
If your opportunity import fails or produces unexpected results:
-
Review your CSV file structure and formatting
-
Confirm that required fields are included
-
Verify that IDs such as Contact ID and Pipeline ID exist
-
Check the import statistics page to identify errors
If issues continue, gather your CSV file and import details and contact support for assistance.