
Gain complete control over how you design and customize emails with drag-and-drop Elements in the Email Builder. From text and buttons to images, videos, and countdown timers, elements let you craft visually engaging and functional emails without coding.
TABLE OF CONTENTS
What are elements?
Elements are pre-built content components that allow you to easily customize your email layout and content without writing any code. Each element serves a specific purpose, such as adding text, images, social links, or dynamic content.
List of Elements and Their Uses
| Element | Description | Common Use Cases |
|---|---|---|
| Text | Add written content to your email. You can style it with fonts, colours, and alignment. | Add headers, descriptions, CTAs, or body content. |
| Image | Insert images or banners to make emails visually appealing. | Showcase products, logos, or announcements. |
| Button | Add clickable call-to-action (CTA) buttons. | Encourage actions like Book Now, Shop Now, or Learn More. |
| Logo | Insert your brand logo. | Reinforce brand identity at the top or bottom of emails. |
| Divider | Create visual separation between sections. | Improve readability and structure. |
| Social | Add social media icons linked to your profiles. | Drive users to your social channels. |
| Footer | Add contact info, unsubscribe links, or legal disclaimers. | Provide mandatory compliance information. |
| Code | Insert custom HTML or snippets. | Add tracking pixels, dynamic content, or custom designs. |
| Video | Embed a YouTube or Vimeo video preview with a play button. | Share tutorials, announcements, or testimonials. |
| Shopping Cart | Show items from a connected e-commerce store. | Display products customers left in their cart. |
| RSS Header / RSS Items | Automatically display latest posts from an RSS feed. | Great for newsletters or blog updates. |
| FAQ | Add collapsible question-answer sections. | Share help content or address common queries. |
| Products | Display product listings with images, prices, and buy buttons. | Showcase featured or new arrivals. |
| Image Slider | Create a carousel of multiple images. | Highlight multiple products or events. |
| Preview URL | Add a link preview box showing a website snippet. | Promote blog posts or external content. |
| Countdown Timer | Add a live timer to create urgency. | Perfect for limited-time offers or events. |
| Spacer | Add blank space between elements. | Fine-tune email layout spacing. |
| Review Link | Insert a link asking recipients for feedback or reviews. | Collect testimonials or satisfaction data. |
| Forms | Embed a form directly in the email (if supported by client). | Capture user input like survey answers or registrations. |
How to Add an Element
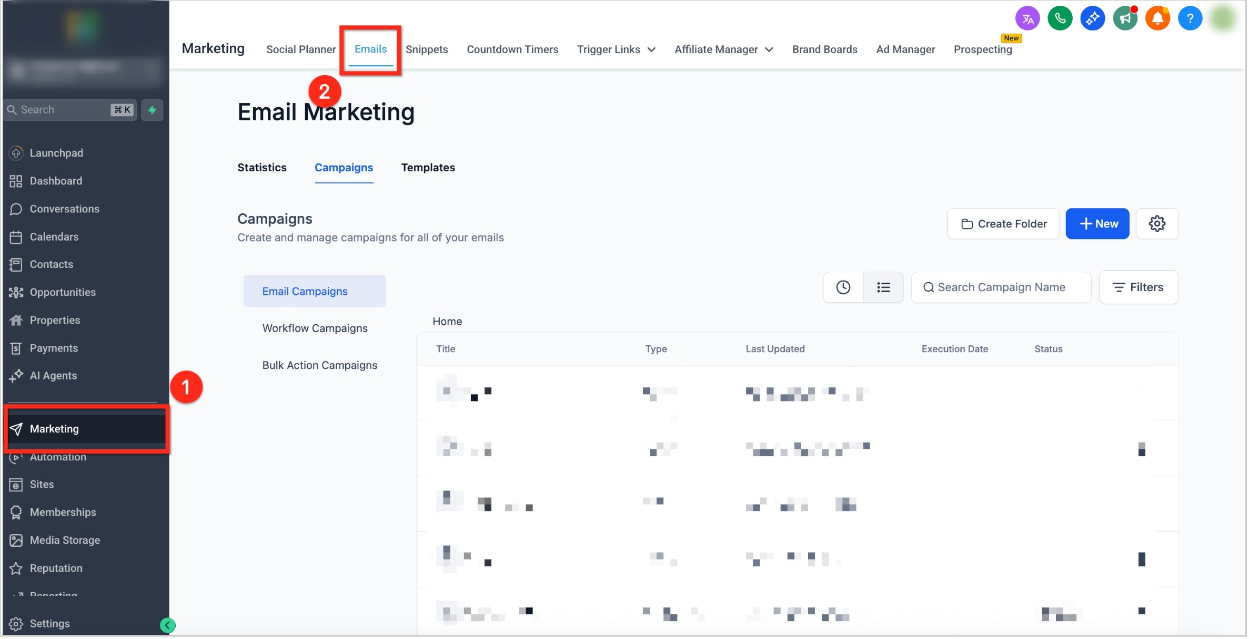
Step 1: Navigate to Email
- From the dashboard, select Marketing in the left-side navigation bar
- Click Emails in the top navigation ribbon
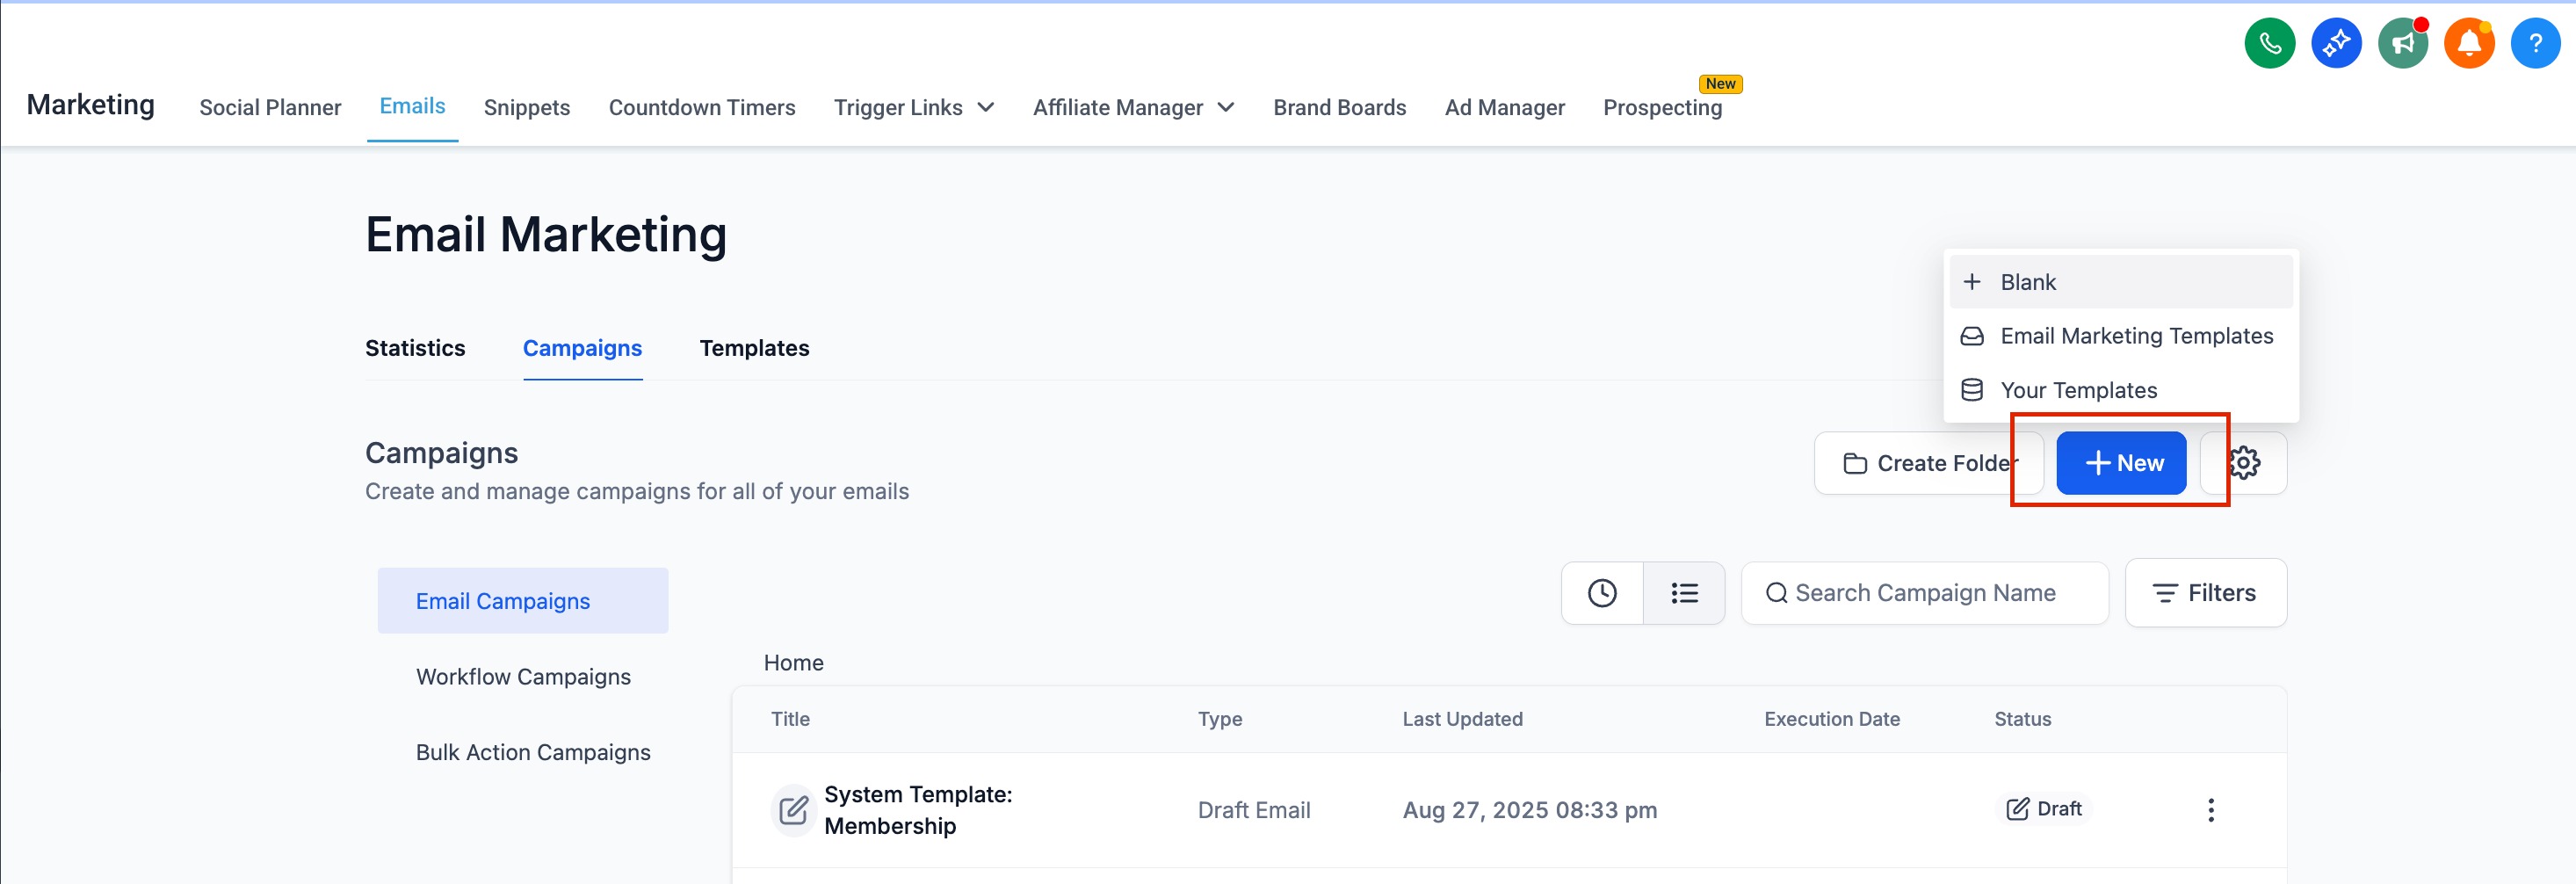
Step 2: Create a New email
- Select the starting type for creation of new email.
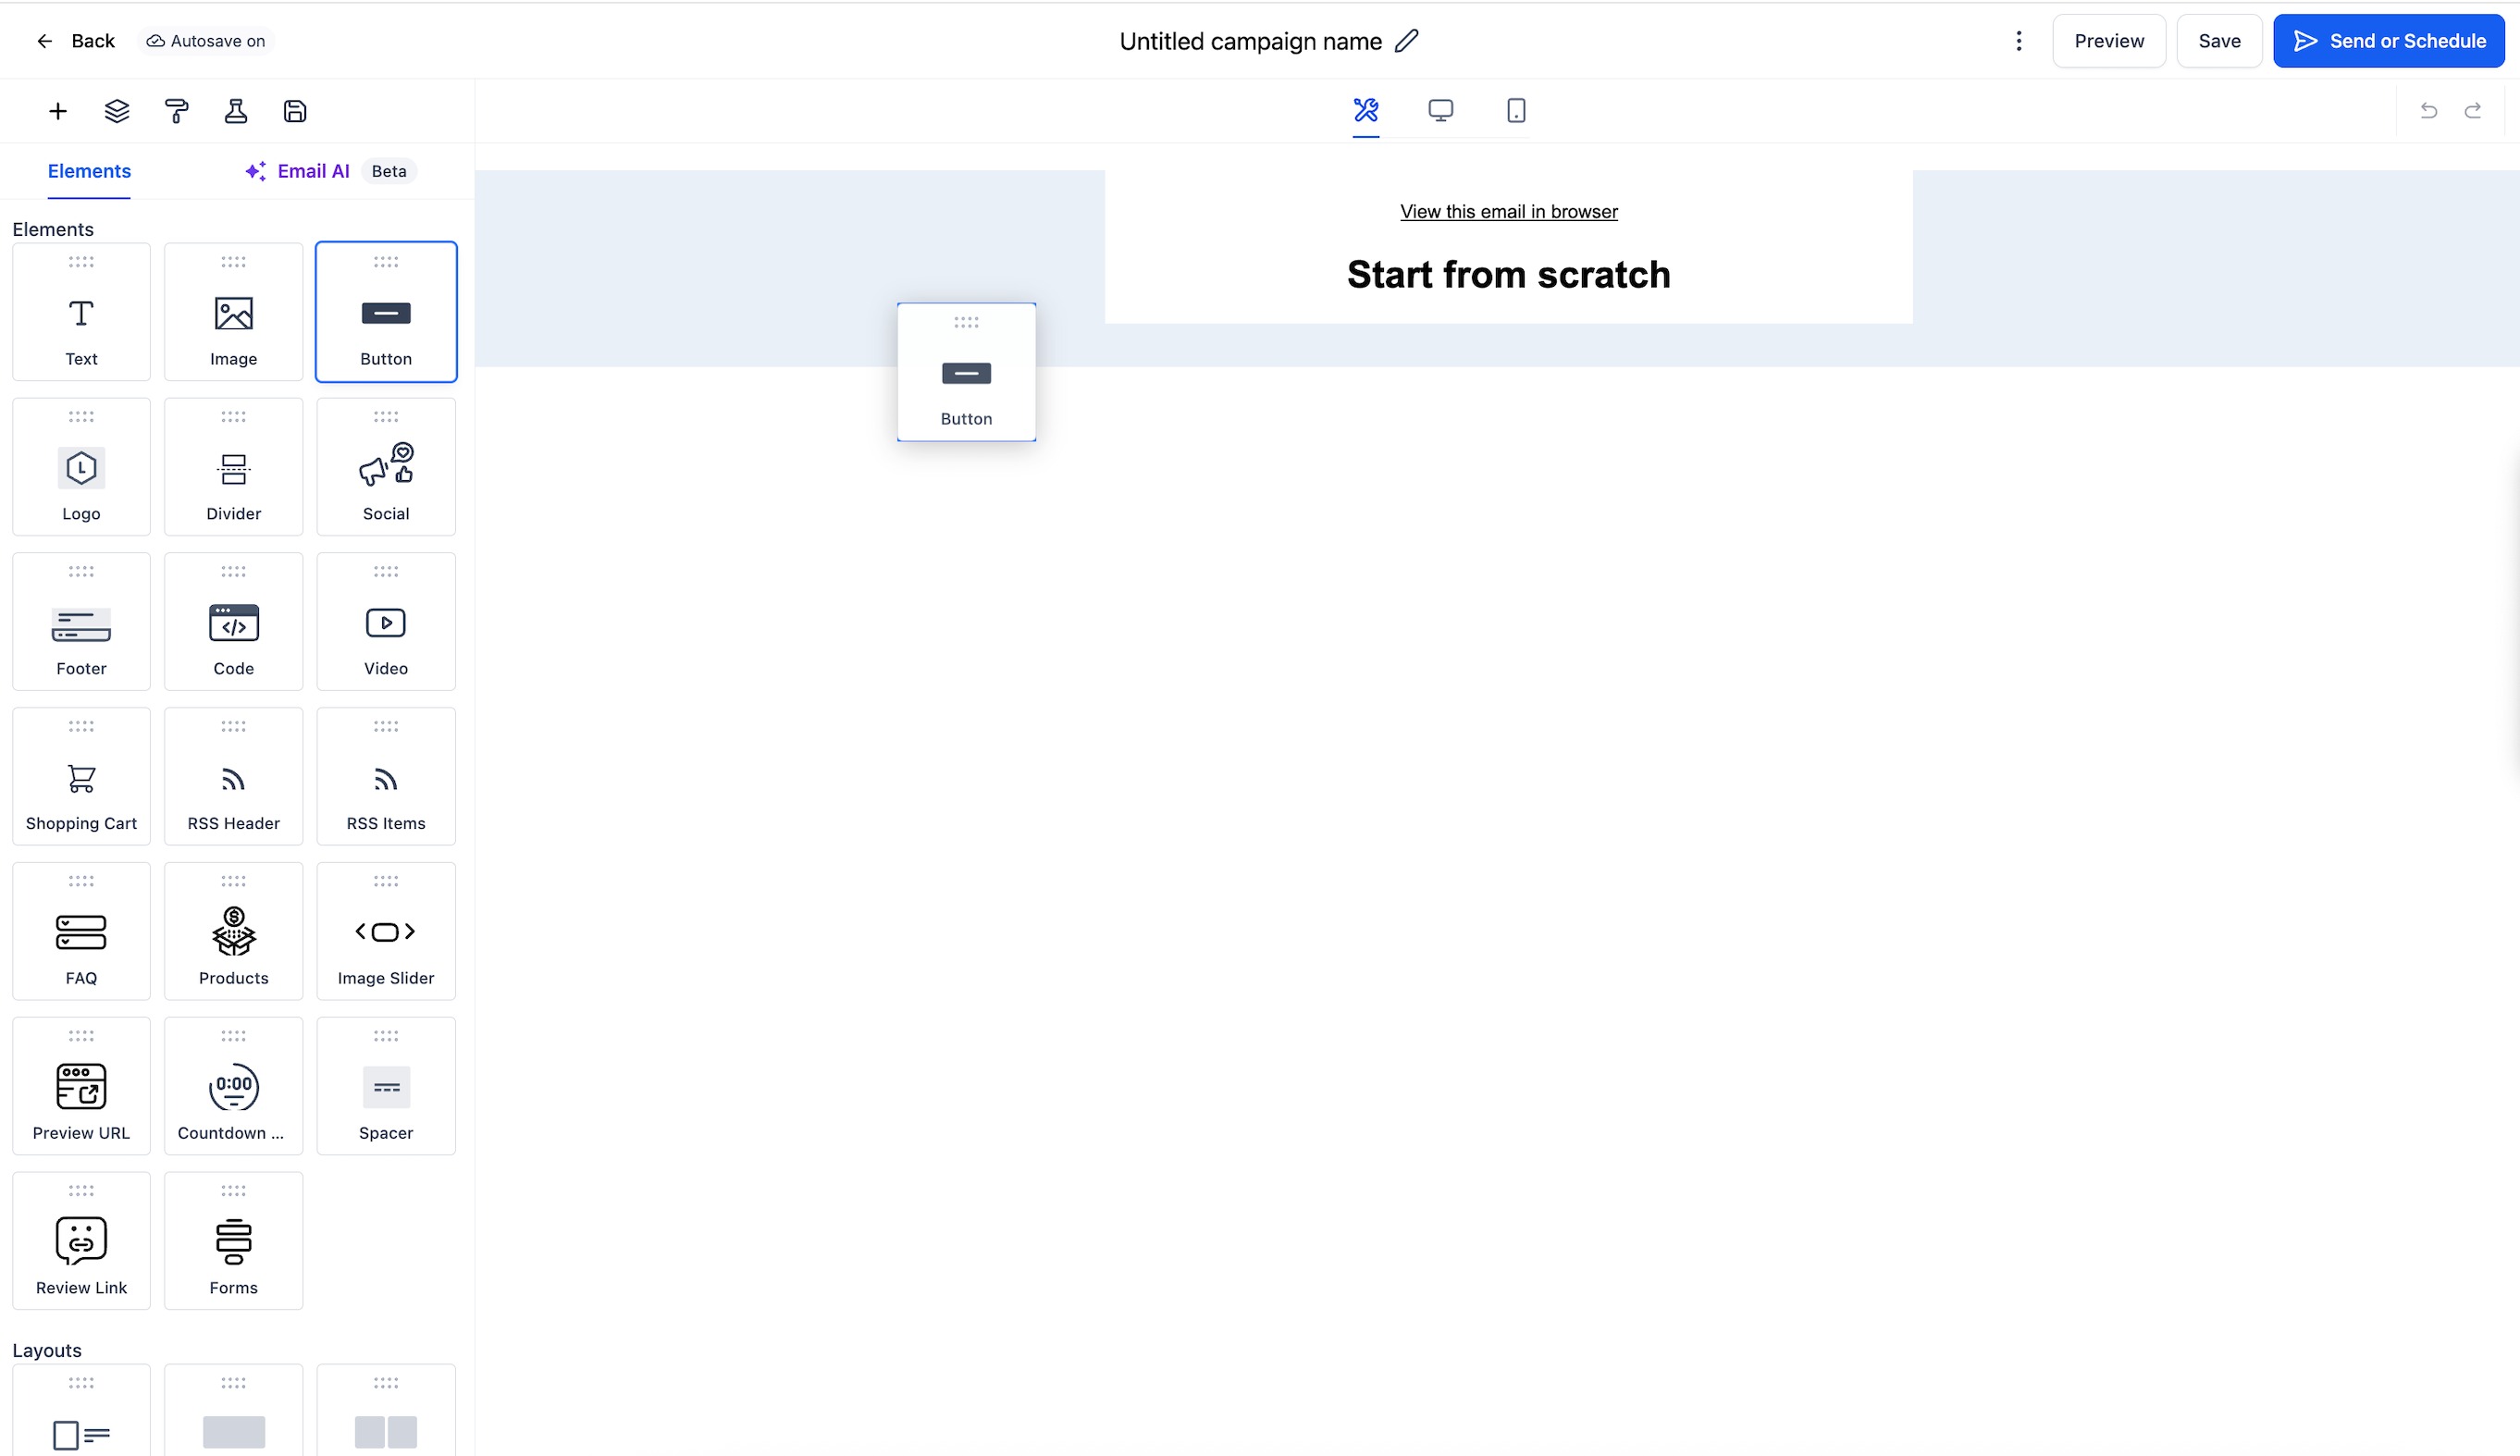
Step 3: Add elements
-
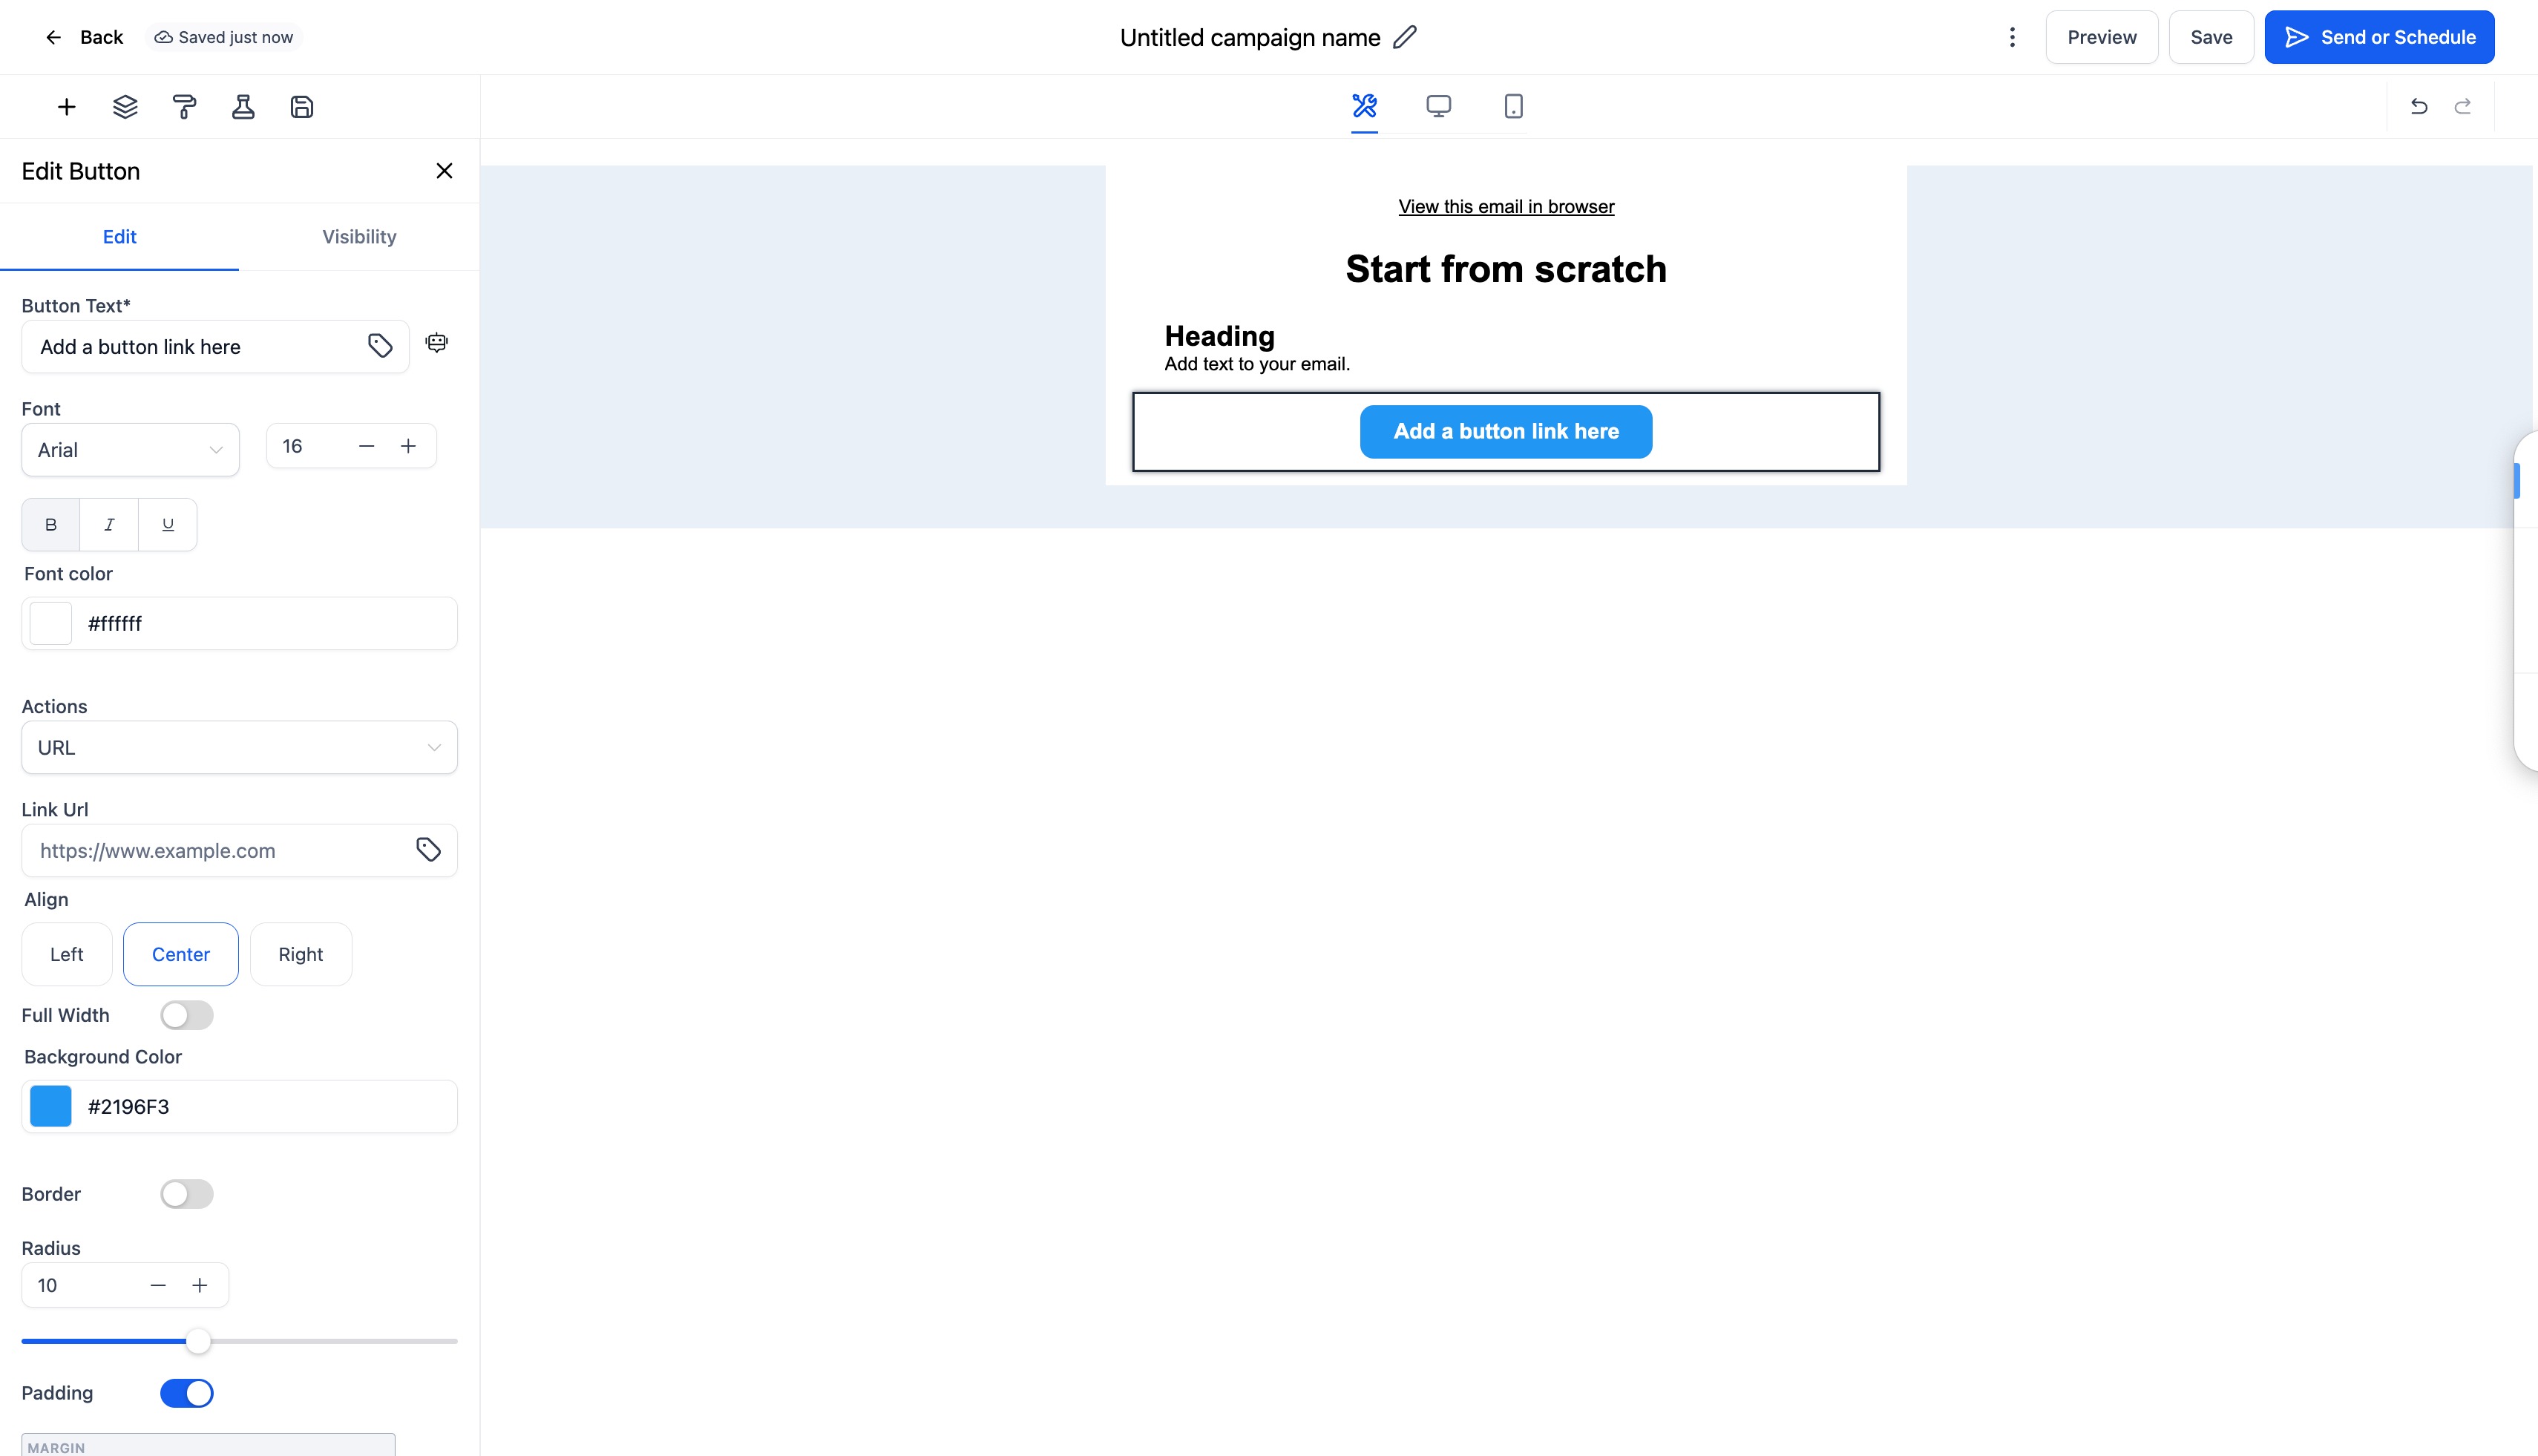
From the Elements tab, drag and drop the desired element into your email canvas.
-
Click on the element to customise its content, style, and settings.
Frequently Asked Questions
Q: Can I rearrange elements after adding them?
Yes, you can drag and drop elements anywhere in your email layout.
Q: Are all elements responsive on mobile?
Yes, all elements are responsive by default, you can preview and adjust mobile spacing or alignment under the Mobile View tab.
Q: What’s the difference between “Text” and “Code” elements?
The Text element lets you add and format content visually, while the Code element allows you to insert custom HTML for advanced designs or integrations.
Q: What’s the difference between “Spacer” and “Divider”?
A Spacer adds empty vertical space, while a Divider adds a visible line between sections for visual separation.