

Learn how Share as Post works, what you need before sharing a recording, how to select the correct Community, review the pre-filled composer, publish the post, and troubleshoot common sharing issues.
A recording must already be available before it can be shared. You also need access to the destination Community and permission to publish content in the selected destination.
Key Benefits of Share as Post
Sharing recordings directly into Communities reduces repetitive work while making meeting content easier to reuse. It also gives members a convenient place to continue discussing information that was covered during a live session.
- Faster Sharing Workflow: Publish recordings without manually downloading and uploading the video again.
- Improved Collaboration: Continue conversations with Community members after a meeting ends.
- Reduced Manual Work: Start with the recording title and video attachment already added to the composer.
- Flexible Publishing: Change the selected Community before publishing without restarting the sharing process.
- Reusable Content: Turn recorded sessions into ongoing Community resources and discussion posts.
Before You Share a Recording
Confirming the recording and Community access before starting helps prevent interruptions during publishing. The Community picker only helps you choose from destinations available to you, and publishing still depends on your ability to create content in the selected destination.
- Recording Availability: Confirm the completed meeting recording is available in the recordings area.
- Community Access: Make sure you can access the Community where the recording should be shared.
- Posting Permission: Confirm you are allowed to create a post in the intended Community destination.
- Correct Recording: Open and review the recording before sharing if multiple sessions have similar names.
- Audience and Context: Prepare any description, summary, discussion prompt, or follow-up instructions you want to add before publishing.
Permission reminder: Some Community destinations may restrict who can publish. If a Community or posting destination is unavailable, check your access and posting permissions before troubleshooting the recording itself.
How To Share a Meeting Recording as a Community Post
Sharing from the recording workflow keeps the video and post creation process connected. Review each step carefully so the recording is published to the correct Community with the context members need.
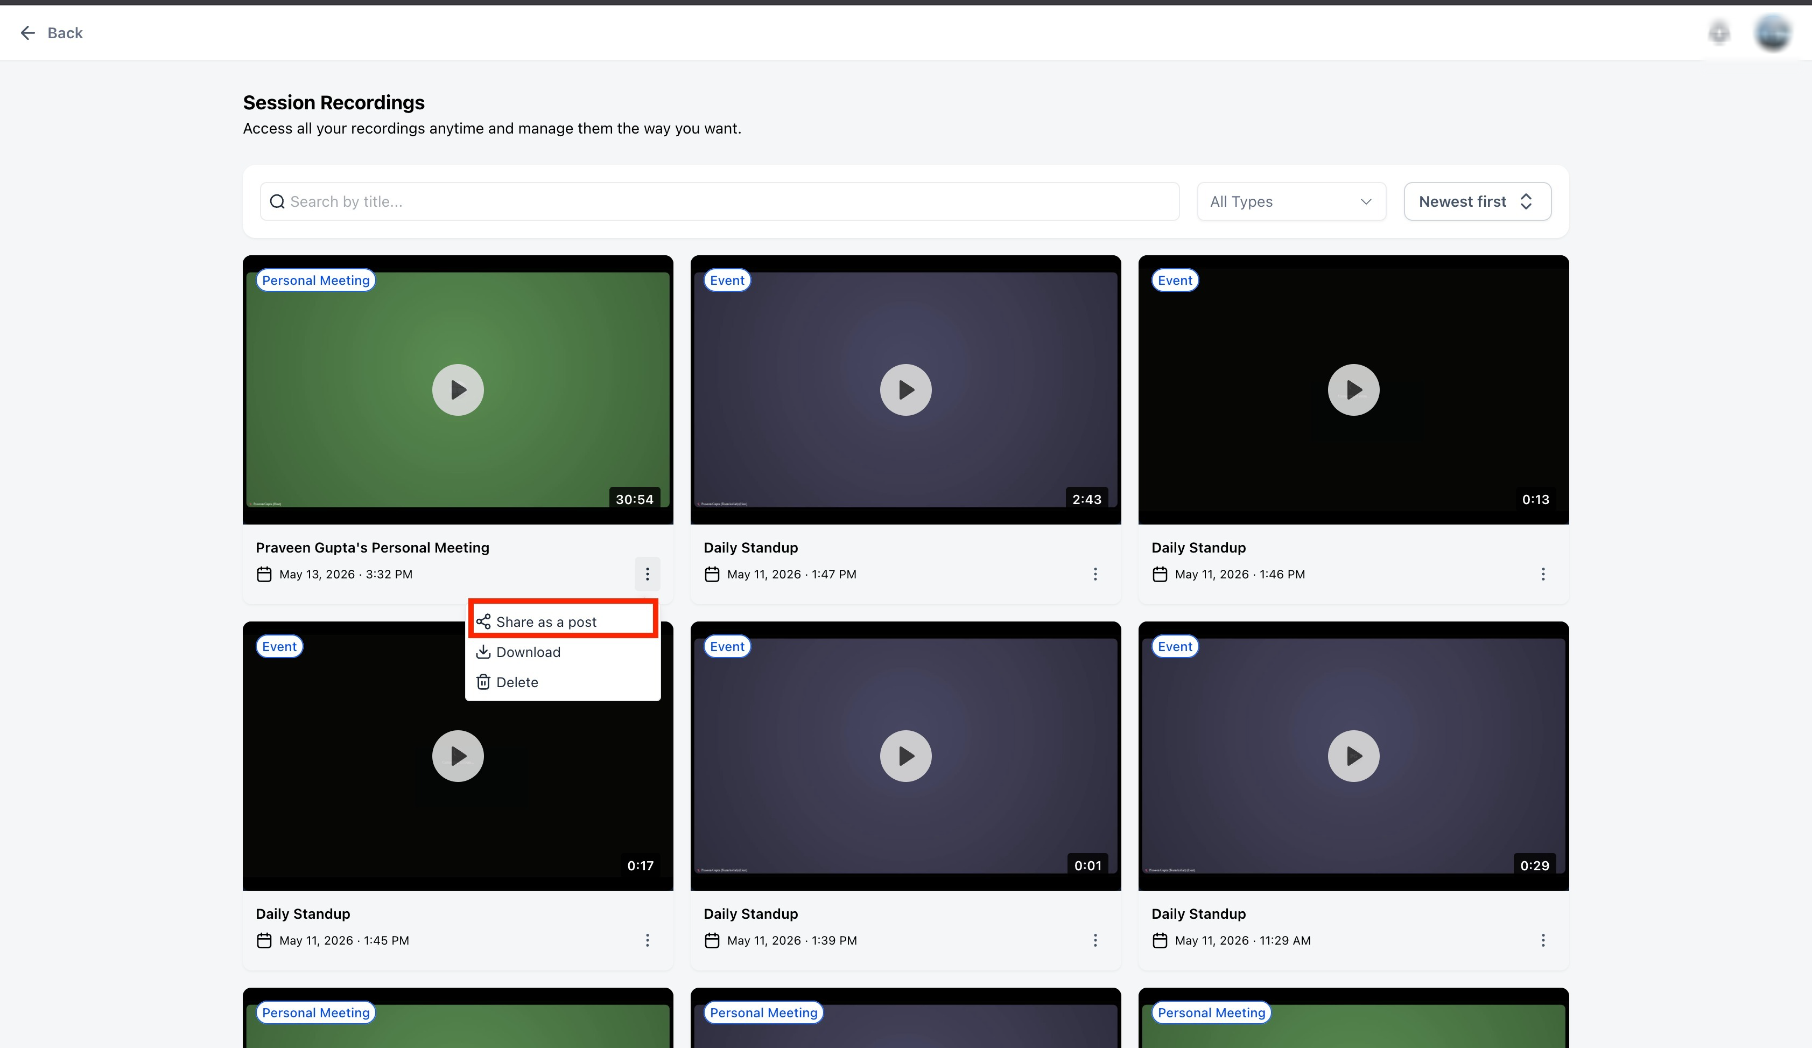
Open the recordings area and select the meeting recording you want to share.
Select Share as Post from the recording controls to begin the Community-sharing workflow.
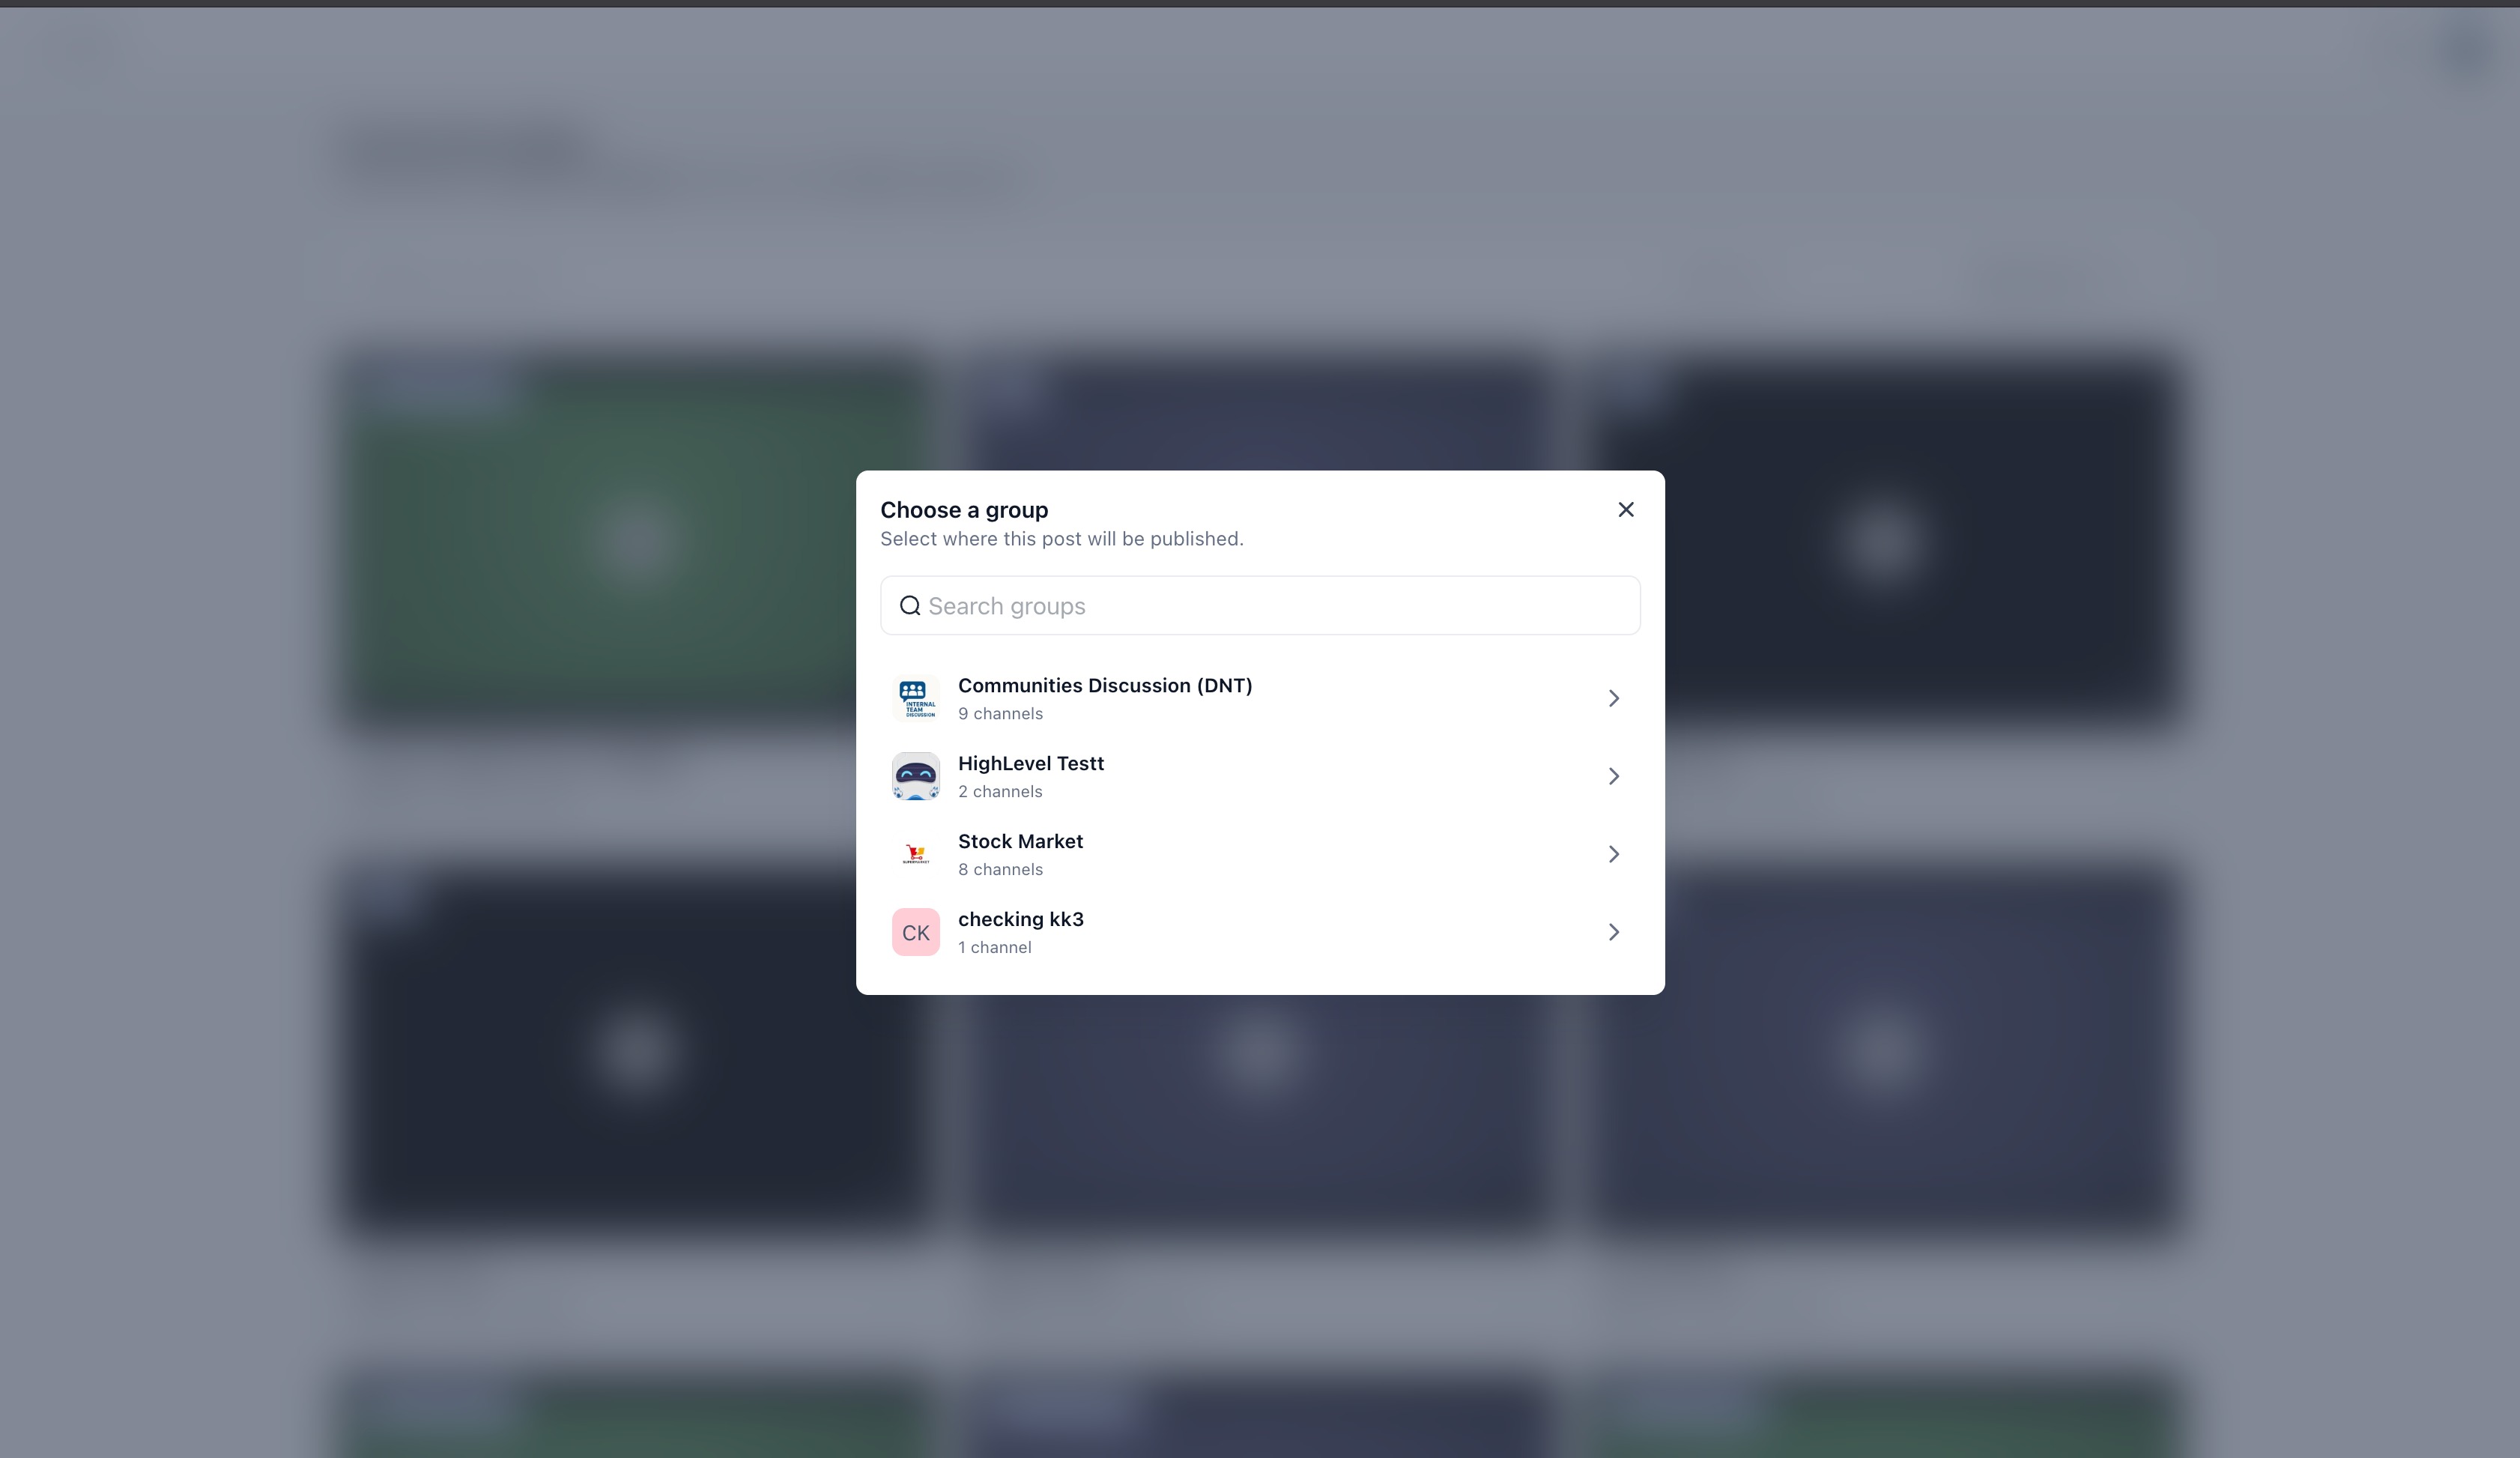
Choose the Community where the recording should be published. Use the search field when you need to locate a Community quickly.
The post composer opens with the recording title and video attachment already included. Review the information before publishing.
Add any optional summary, instructions, key takeaways, or discussion prompts you want Community members to see with the recording.
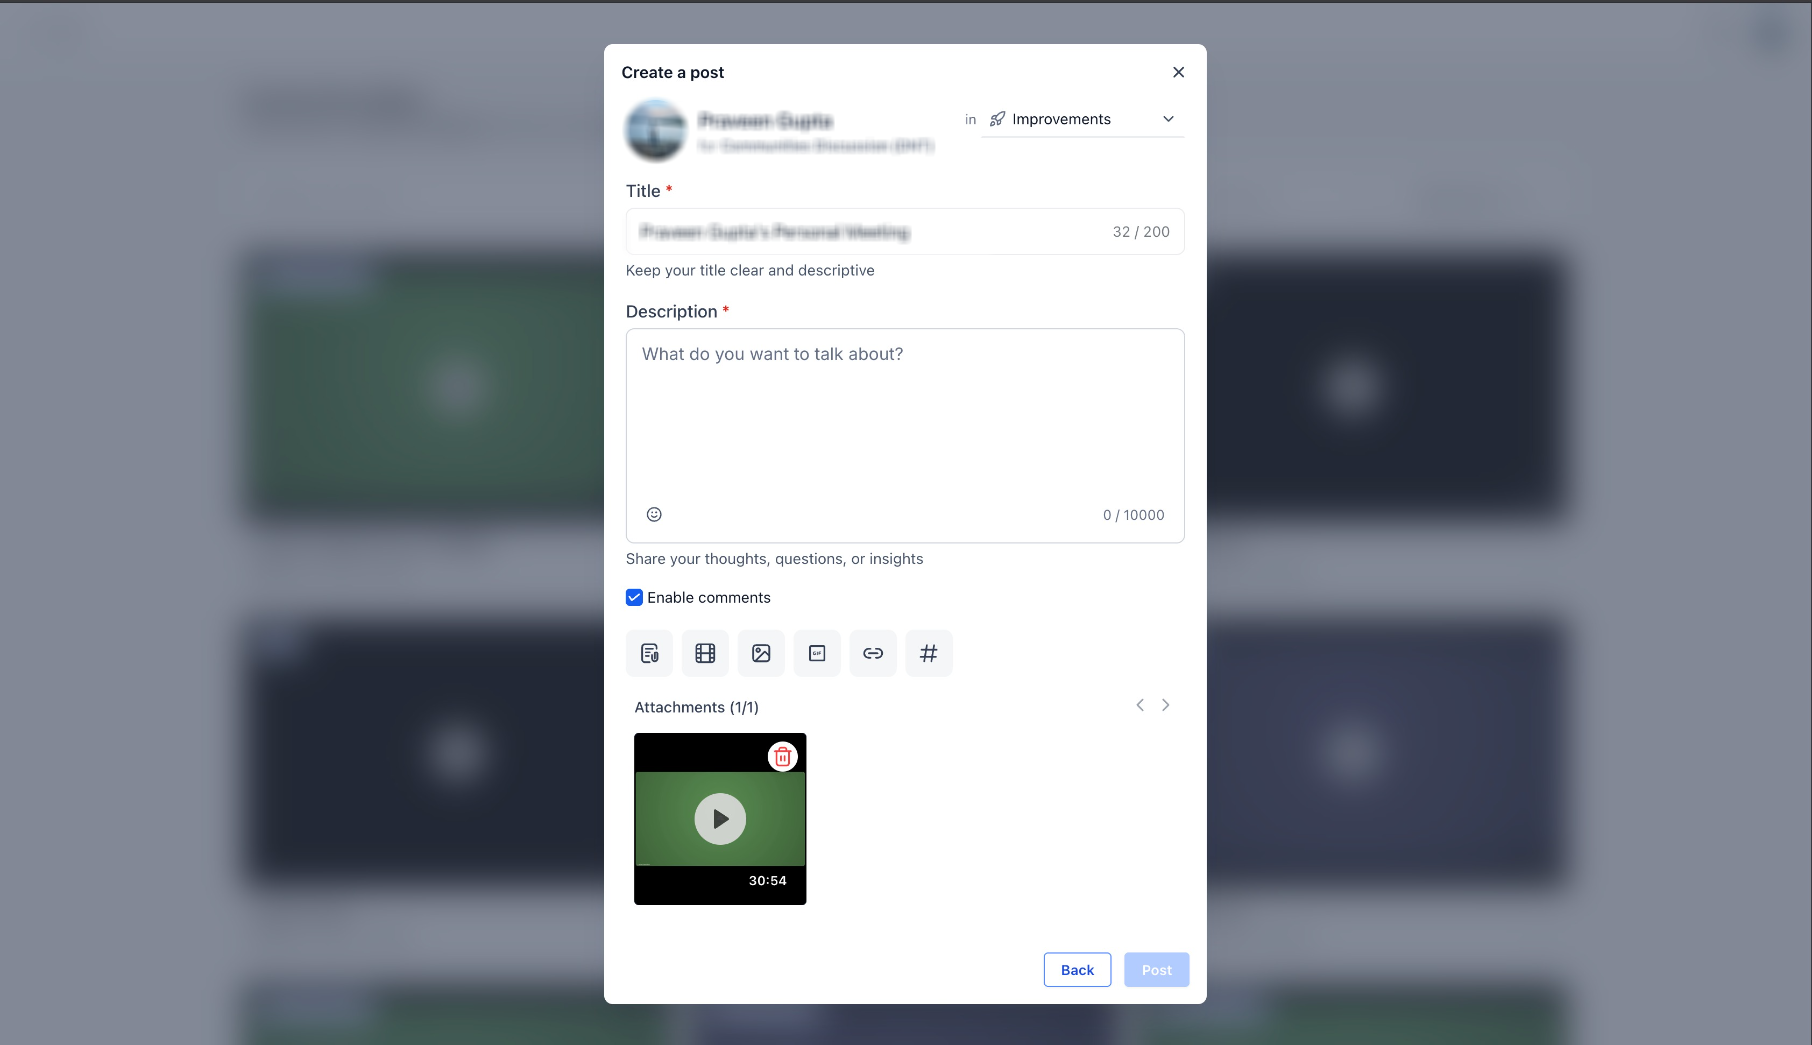
Before publishing, verify the selected Community is correct. If needed, switch to another available Community directly from the composer.
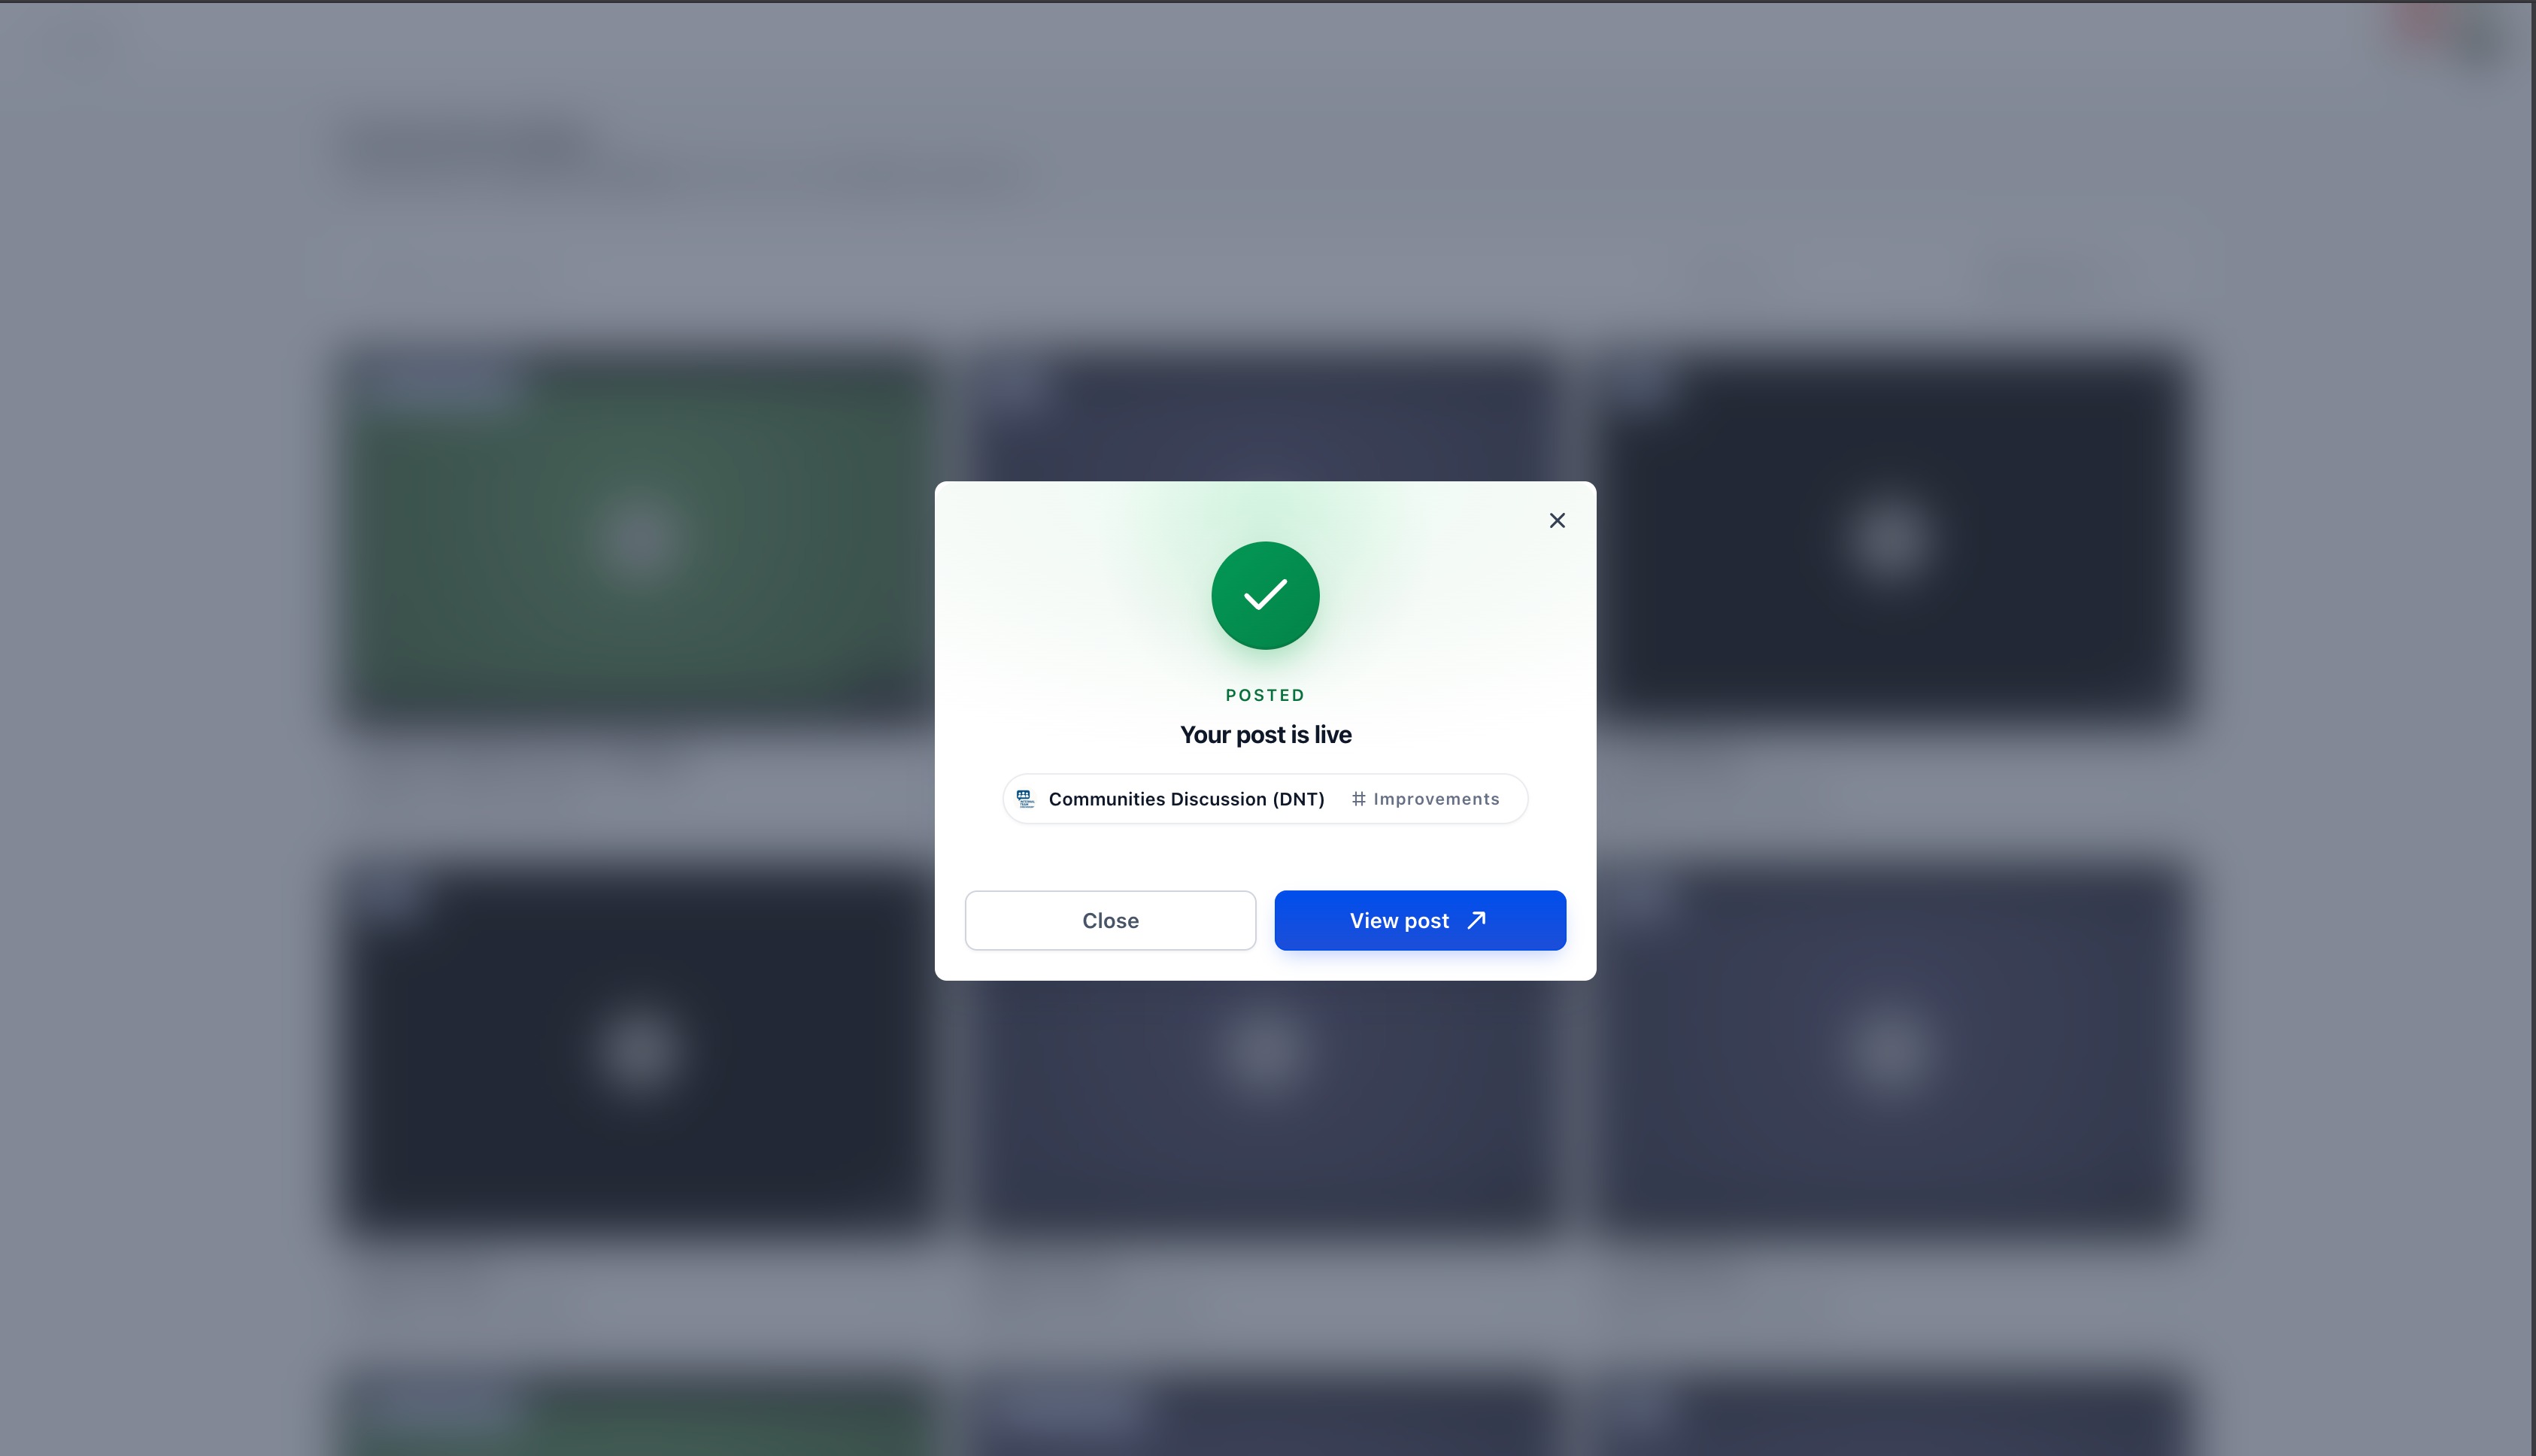
Publish the post. After publishing succeeds, use the confirmation options to close the workflow or open the Community post.
Frequently Asked Questions
Need Help?
If you cannot complete the sharing workflow, identify whether the issue occurs with the recording, Community selection, post composer, permissions, or publishing.
- Share as Post is missing: Confirm the meeting recording is available and open the completed recording again.
- Community is not listed: Confirm you have access to the intended Community and use the Community search to locate it.
- Recording is missing from the composer: Close the composer, reopen the recording, and restart Share as Post to confirm the correct recording was selected.
- Unable to publish: Verify that your Community role permits you to create posts in the selected destination.
- Wrong Community selected: Change the Community in the composer before publishing rather than restarting the entire workflow.
- Post is not visible after publishing: Use the success confirmation to open the published post and verify the destination.
- Issue continues: Collect the recording name, intended Community, your Community role, the step where the issue occurs, and screenshots of the recording and composer before contacting support.