

The platform allows you to connect your own third-party email sending service (SMTP) instead of using the default LeadConnector Email System. This is useful if you already have an established sending reputation, need higher volume limits, or prefer to manage your own email infrastructure.
This guide walks you through adding, configuring, and activating a custom SMTP service inside your sub-account.
Where to Find Email Services
Navigate to the Email Services settings using the steps below:
- Log in to your sub-account
- Click Settings in the left sidebar
- Select Email Services
- Go to the SMTP Service tab (or Advanced Settings depending on your interface version)
Your interface may show tabs labeled ‘SMTP Service’ or ‘Advanced Settings’ — both lead to the same SMTP configuration area.
Default vs. Custom Email Service
A side-by-side comparison to help you decide which option fits your business:
Supported SMTP Providers
When you click + Add Service, you can choose from the following providers:
Step-by-Step: Adding a Custom SMTP Service
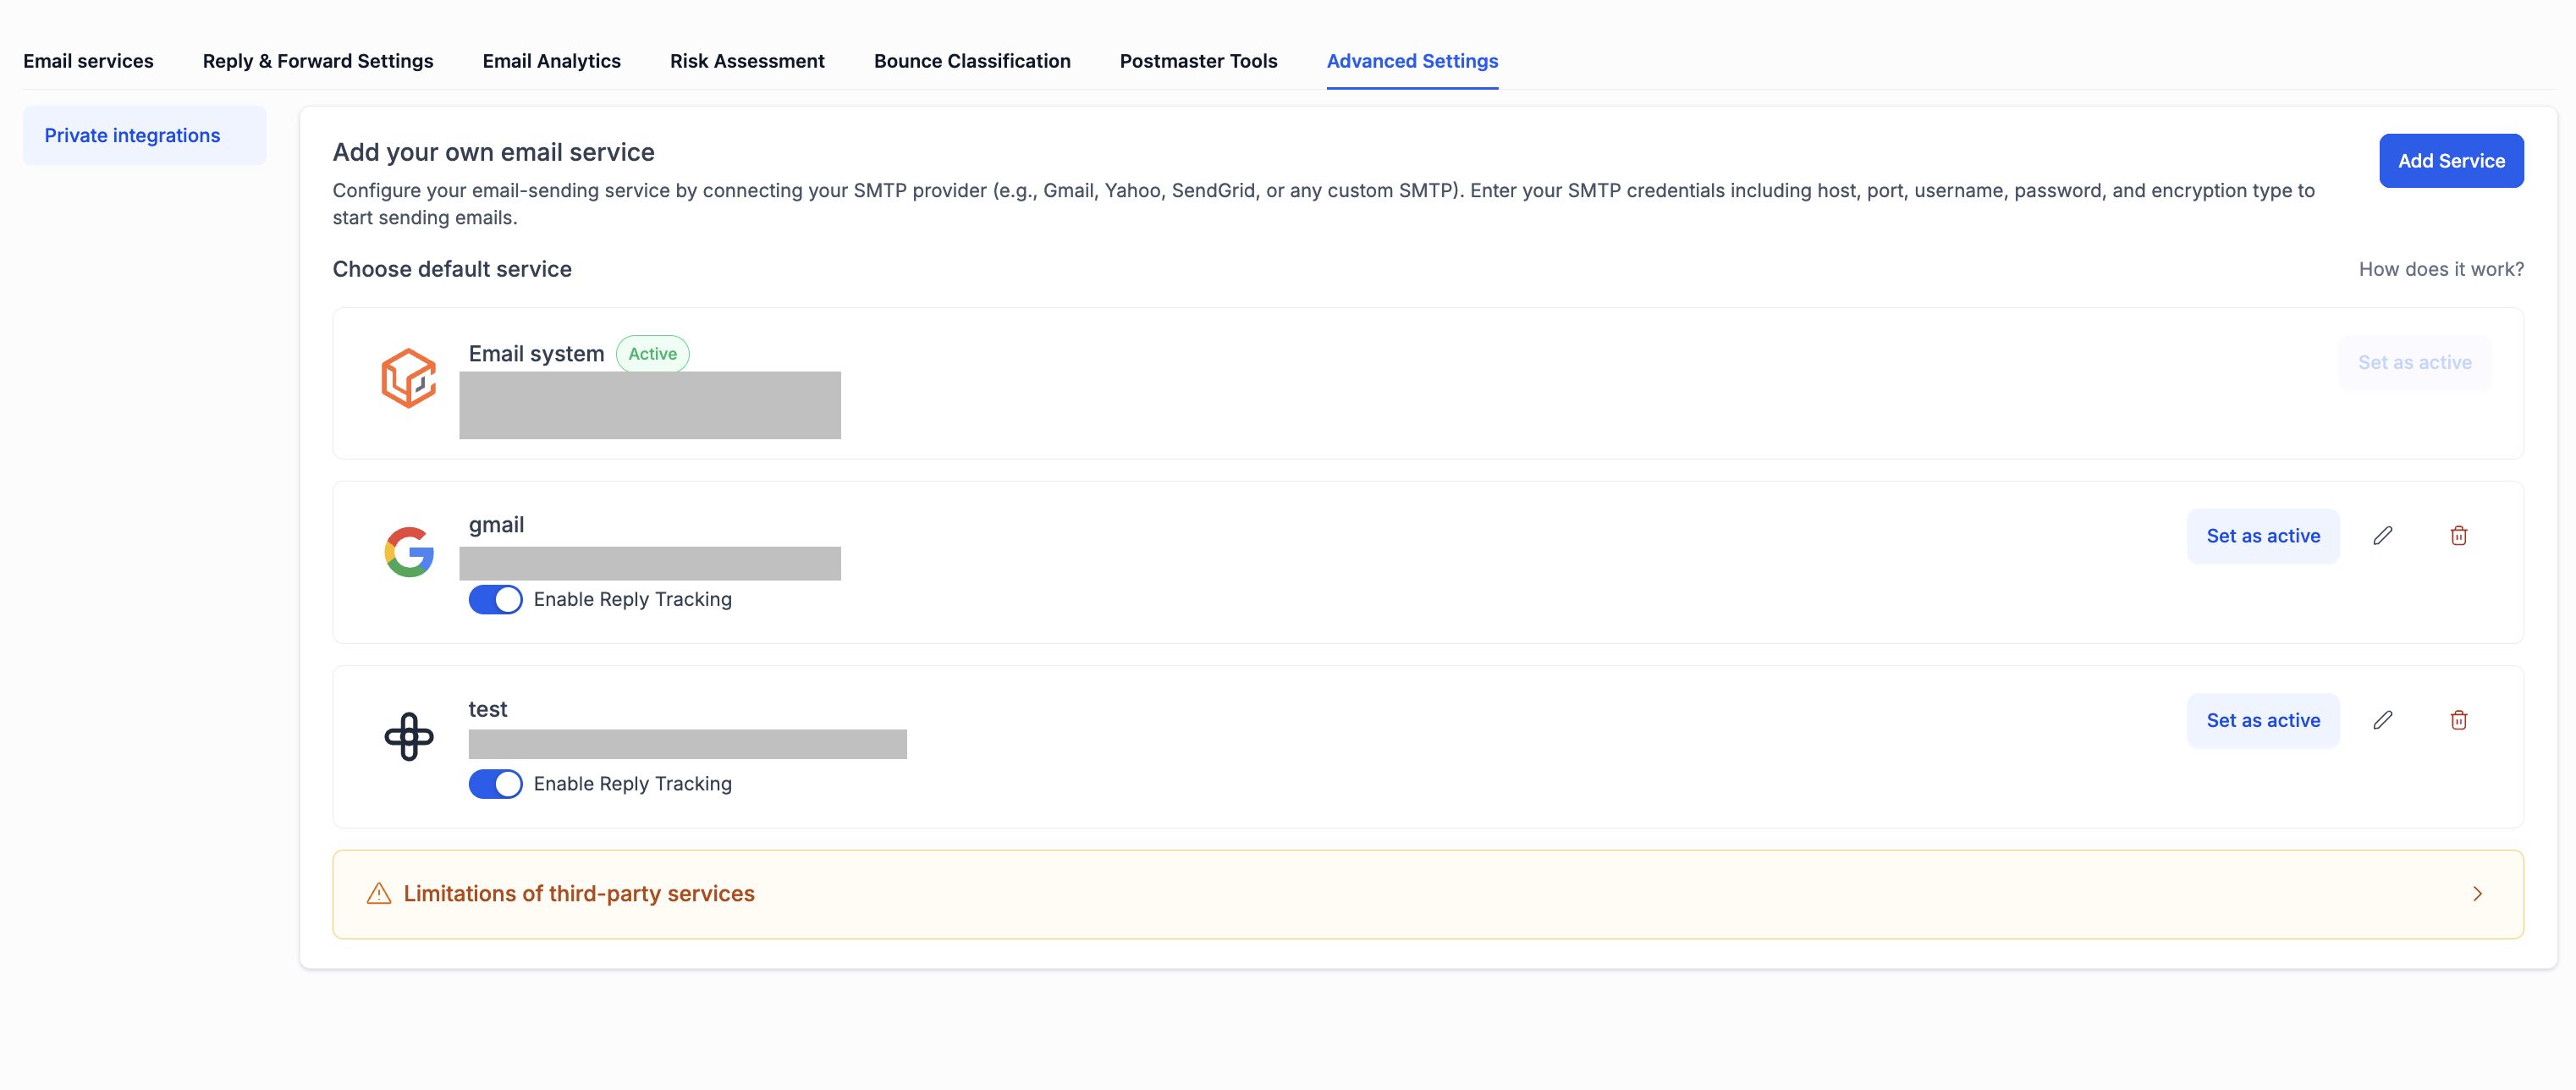
Go to Settings → Email Services → SMTP Service tab.
In the top-right corner of the page, click the + Add Service button. A popup will appear titled ‘Add your own email service’.
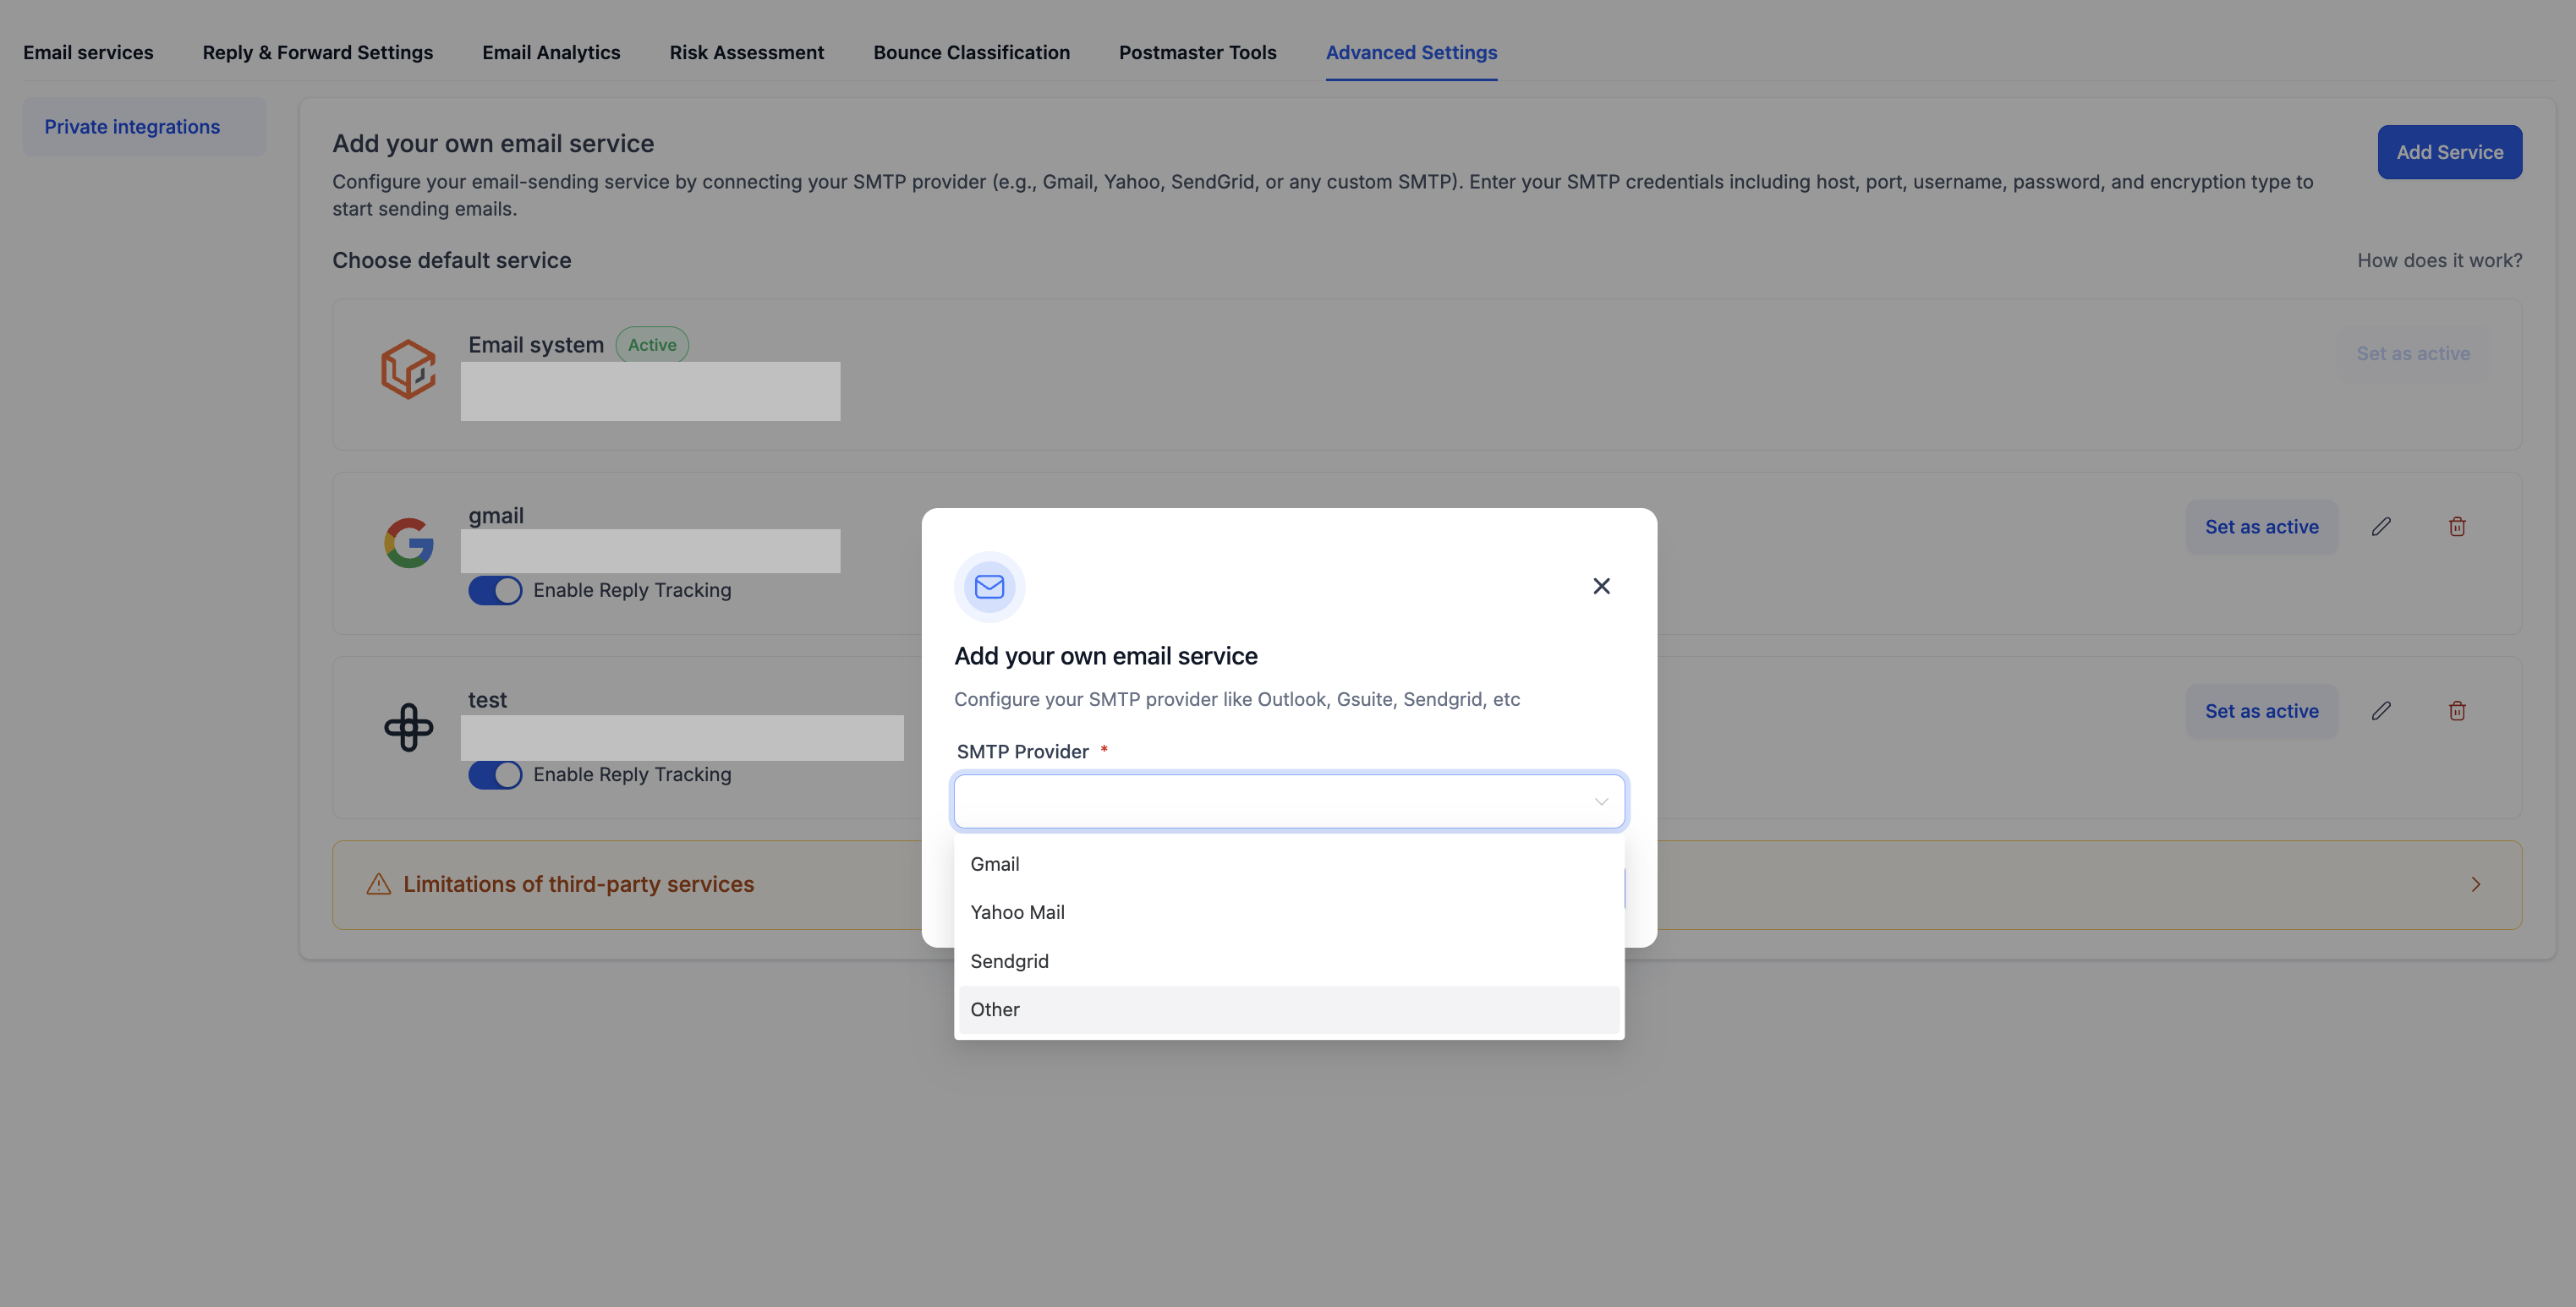
From the SMTP Provider dropdown, select your provider:
- Gmail
- Yahoo Mail
- SendGrid
- Other (for Mailgun, Amazon SES, Postmark, etc.)
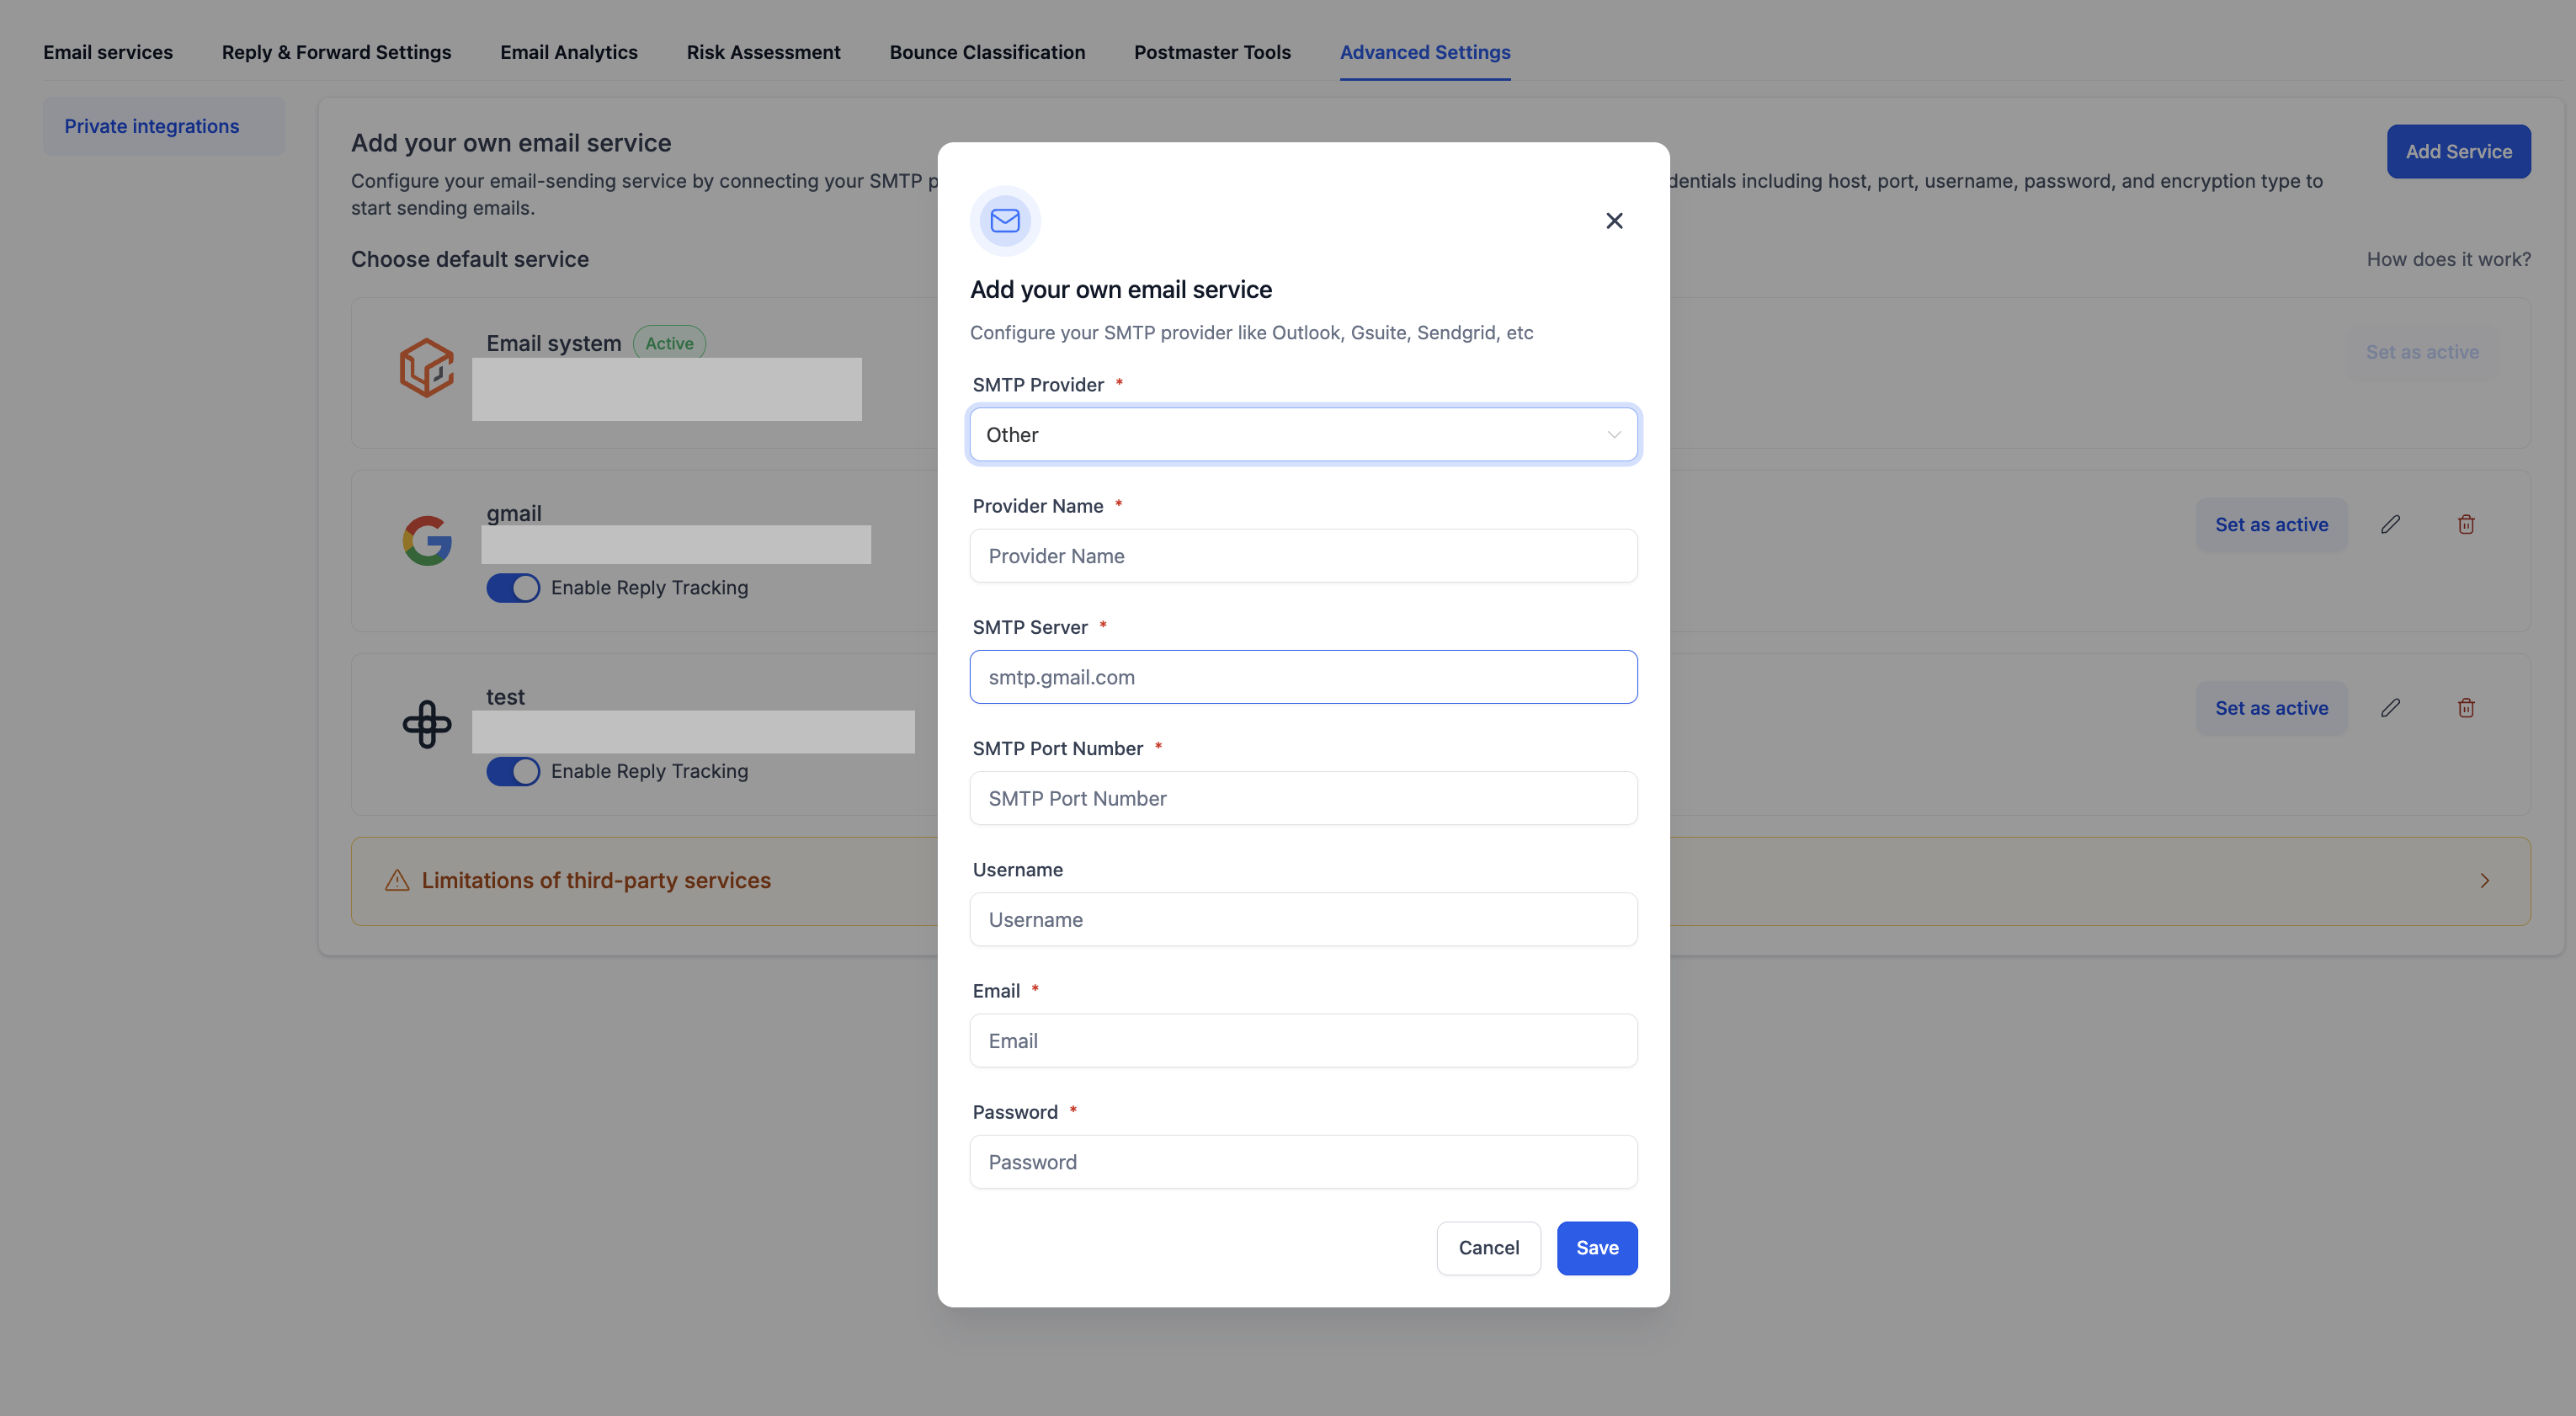
Fill in the required fields. These details come from your email provider’s dashboard:
Once saved, your new SMTP service will appear in the provider list. To start using it:
- Find your newly added service in the list
- Click Set as active
- Confirm the selection
You can have multiple SMTP services saved and switch between them at any time. Only one can be active at a time.
Common SMTP Settings Reference
Quick reference for popular providers — verify values in your provider’s dashboard before pasting.
| Provider | SMTP Host | Port | Notes |
|---|---|---|---|
| Gmail | smtp.gmail.com | 587 / 465 | Requires App Password if 2FA is on |
| SendGrid | smtp.sendgrid.net | 587 | Use ‘apikey’ as username |
| Mailgun | smtp.mailgun.org | 587 | Use your Mailgun SMTP credentials |
| Amazon SES | email-smtp.[region].amazonaws.com | 587 | Requires IAM SMTP credentials |
| Postmark | smtp.postmarkapp.com | 587 | Use server API token as credentials |
| Yahoo Mail | smtp.mail.yahoo.com | 587 | Requires app password |
| Zoho Mail | smtp.zoho.com | 587 | Use your Zoho account credentials |
Important: Limitations of Third-Party SMTP
When you use a custom SMTP service instead of LeadConnector, some platform features become unavailable. Please review these limitations before switching:
- Create dedicated sending domain from the app
- Google Postmaster tools integration
- Microsoft Postmaster tools integration
- Risk Assessment
- Bounce Classification
- Inbox Placement Testing
- Spam Score Checker
- Blacklist Monitor
- Managed Domains & IPs
If these features are important to your email strategy, consider staying on the LeadConnector Email System, which gives you full access to all built-in deliverability tools.
Enable Reply for SMTP
When viewing your active SMTP service, you will see an Enable reply checkbox. Enabling this allows inbound replies to emails sent through your SMTP to be received and tracked inside platform conversations.
If you need two-way email communication with your contacts, make sure Enable reply is checked for your active SMTP service.
Switching Back to LeadConnector
You can switch back to the default LeadConnector Email System at any time:
- Go to Settings → Email Services → SMTP Service
- Click on LeadConnector Email System
- Click Set as active (or select it as the default)
All your custom SMTP services will remain saved and can be reactivated later.